
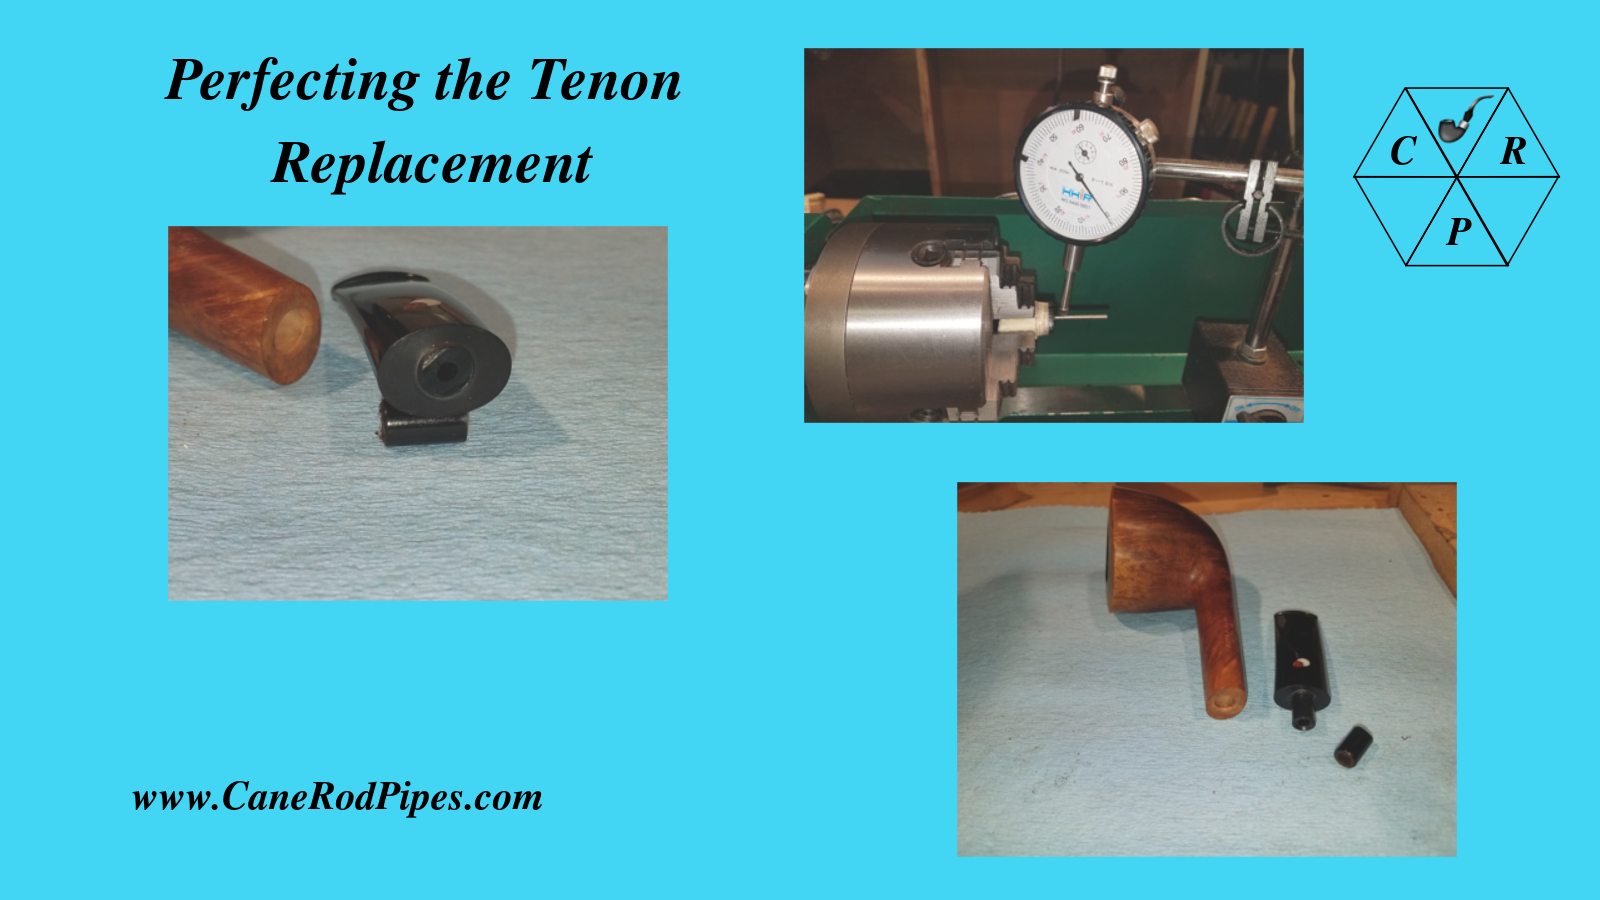
One of the most common repairs I’m asked to do involves a snapped tenon. Most of the time the pipe arrives with the tenon stuck in the mortise and the stem in otherwise perfect condition. It is always possible to cut a new stem for the pipe, but often there are markings on the stem that the customer would rather preserve. And, of course, fabricating a new stem is a lot of work and as a result is going to cost more that a tenon repair. Since I have had a lot of opportunities to fine tune the process of tenon replacement, I thought it might make for an interesting article.
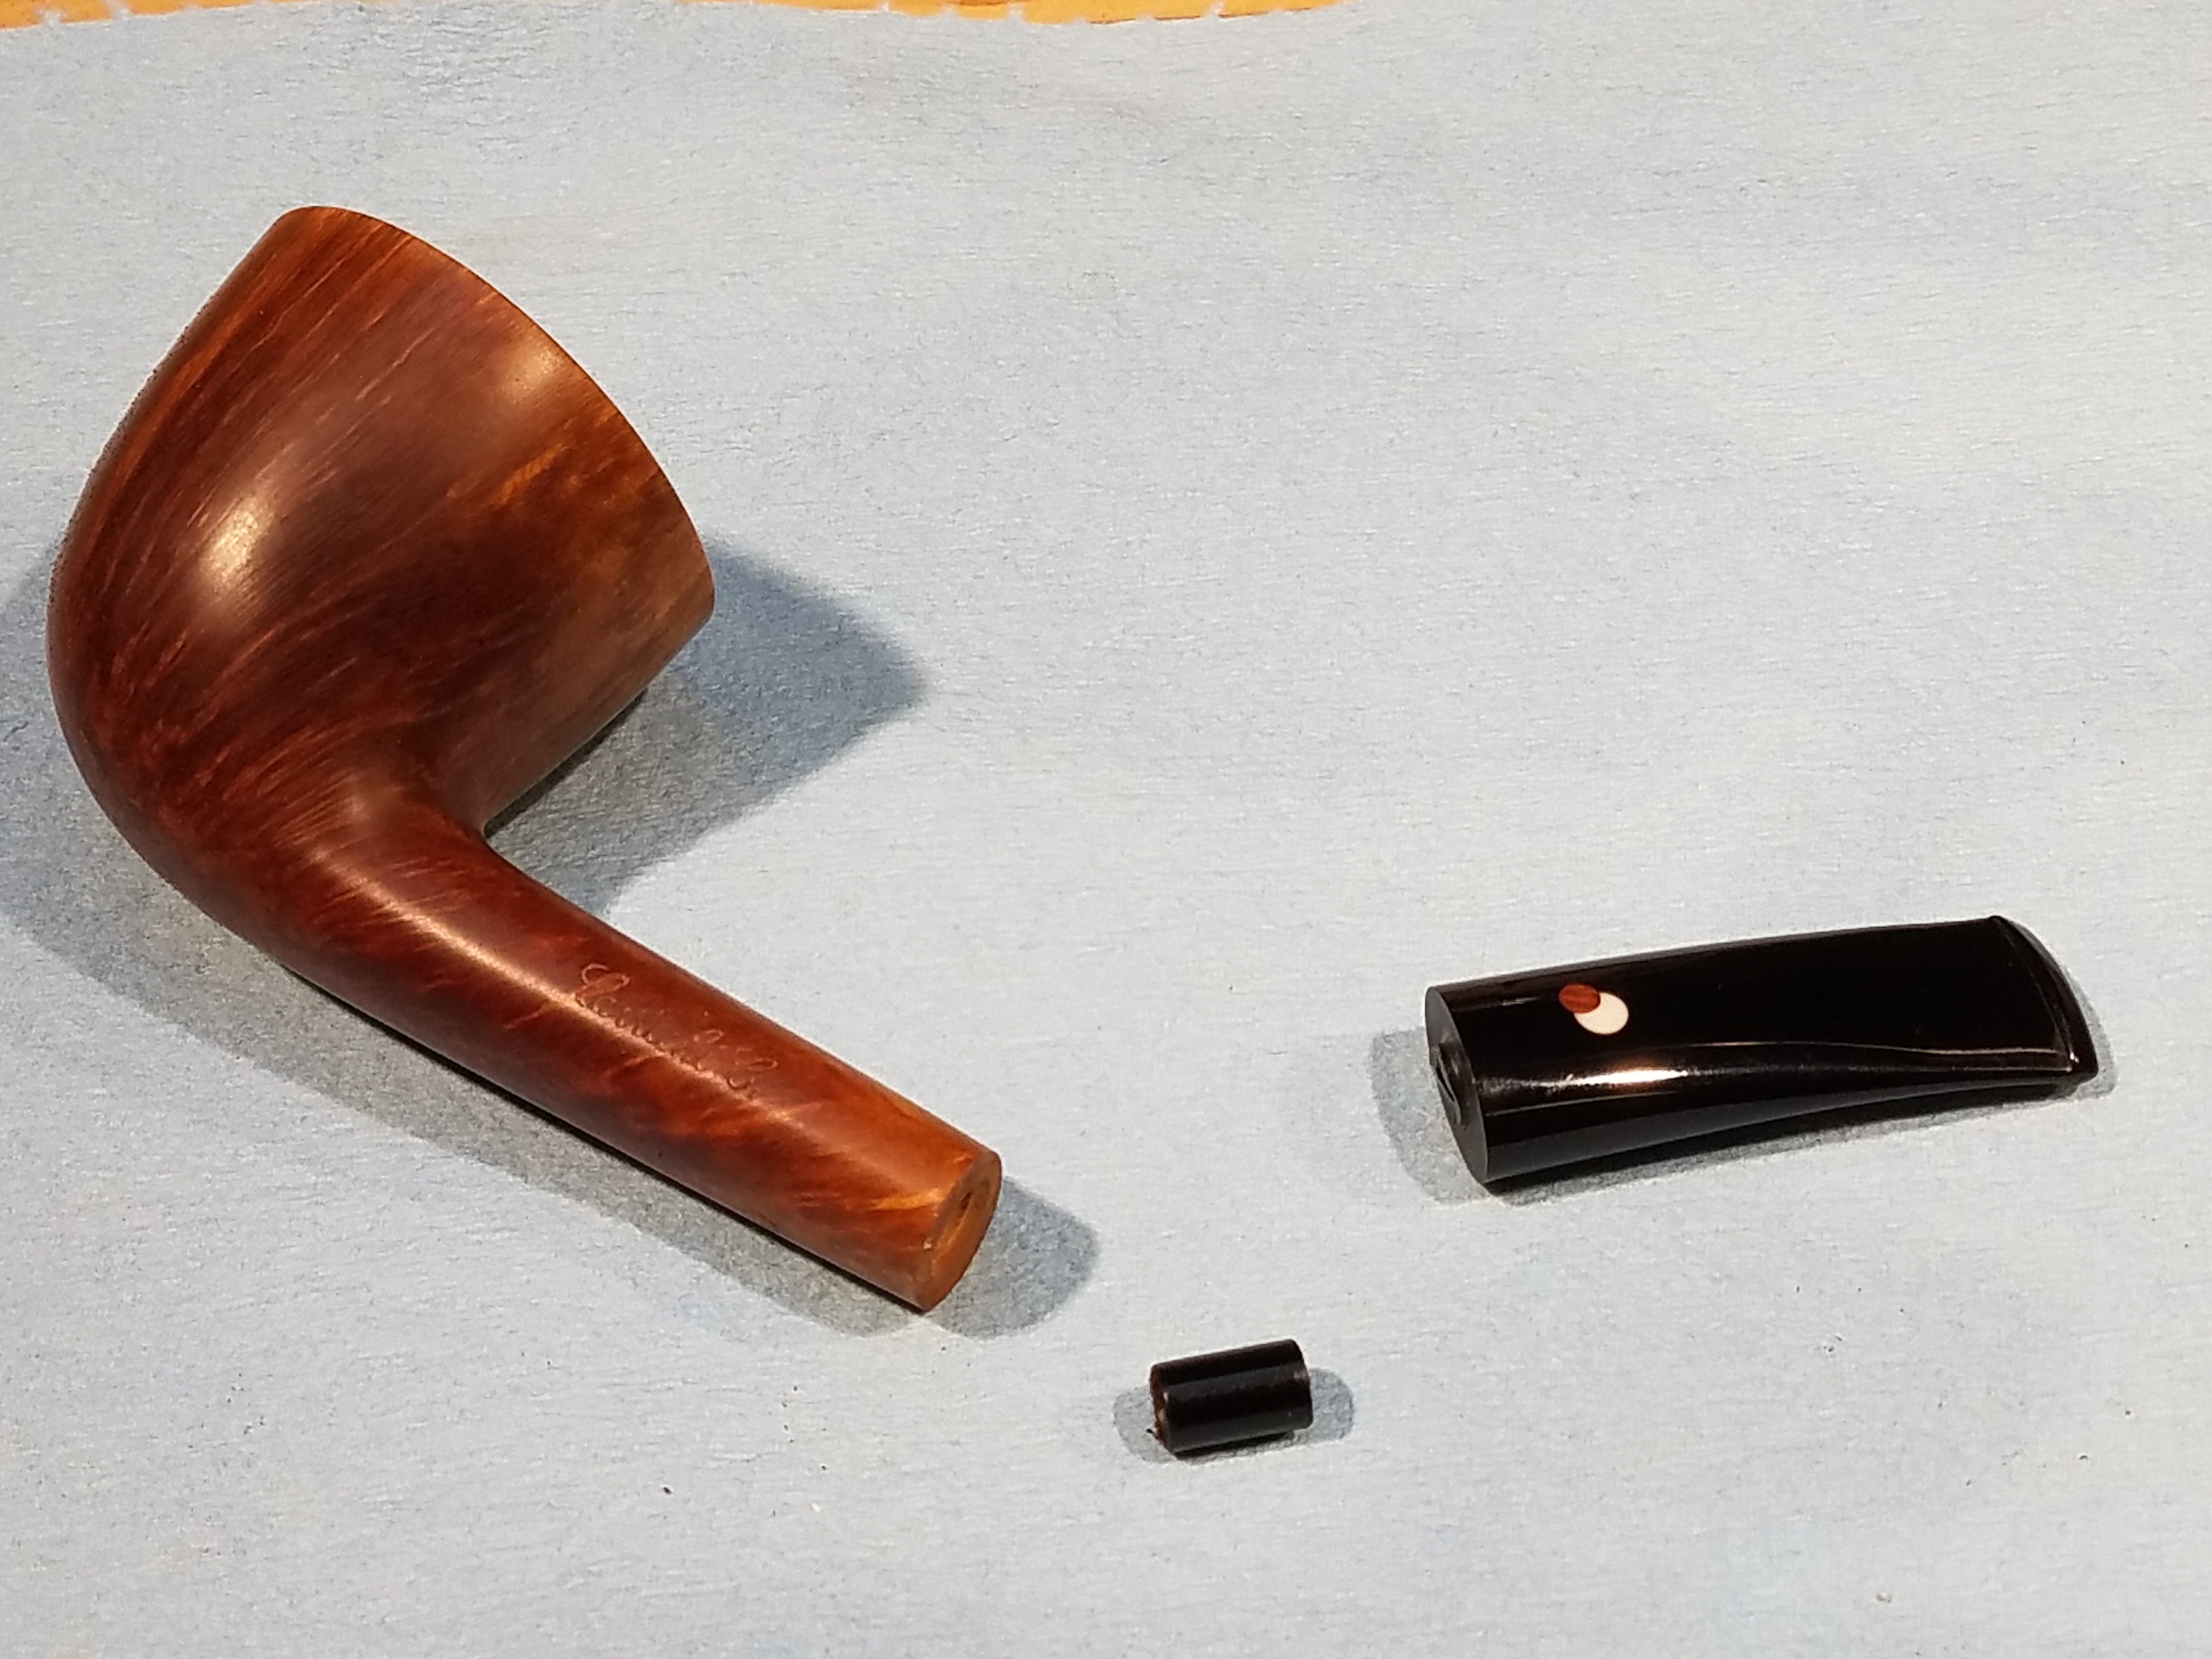
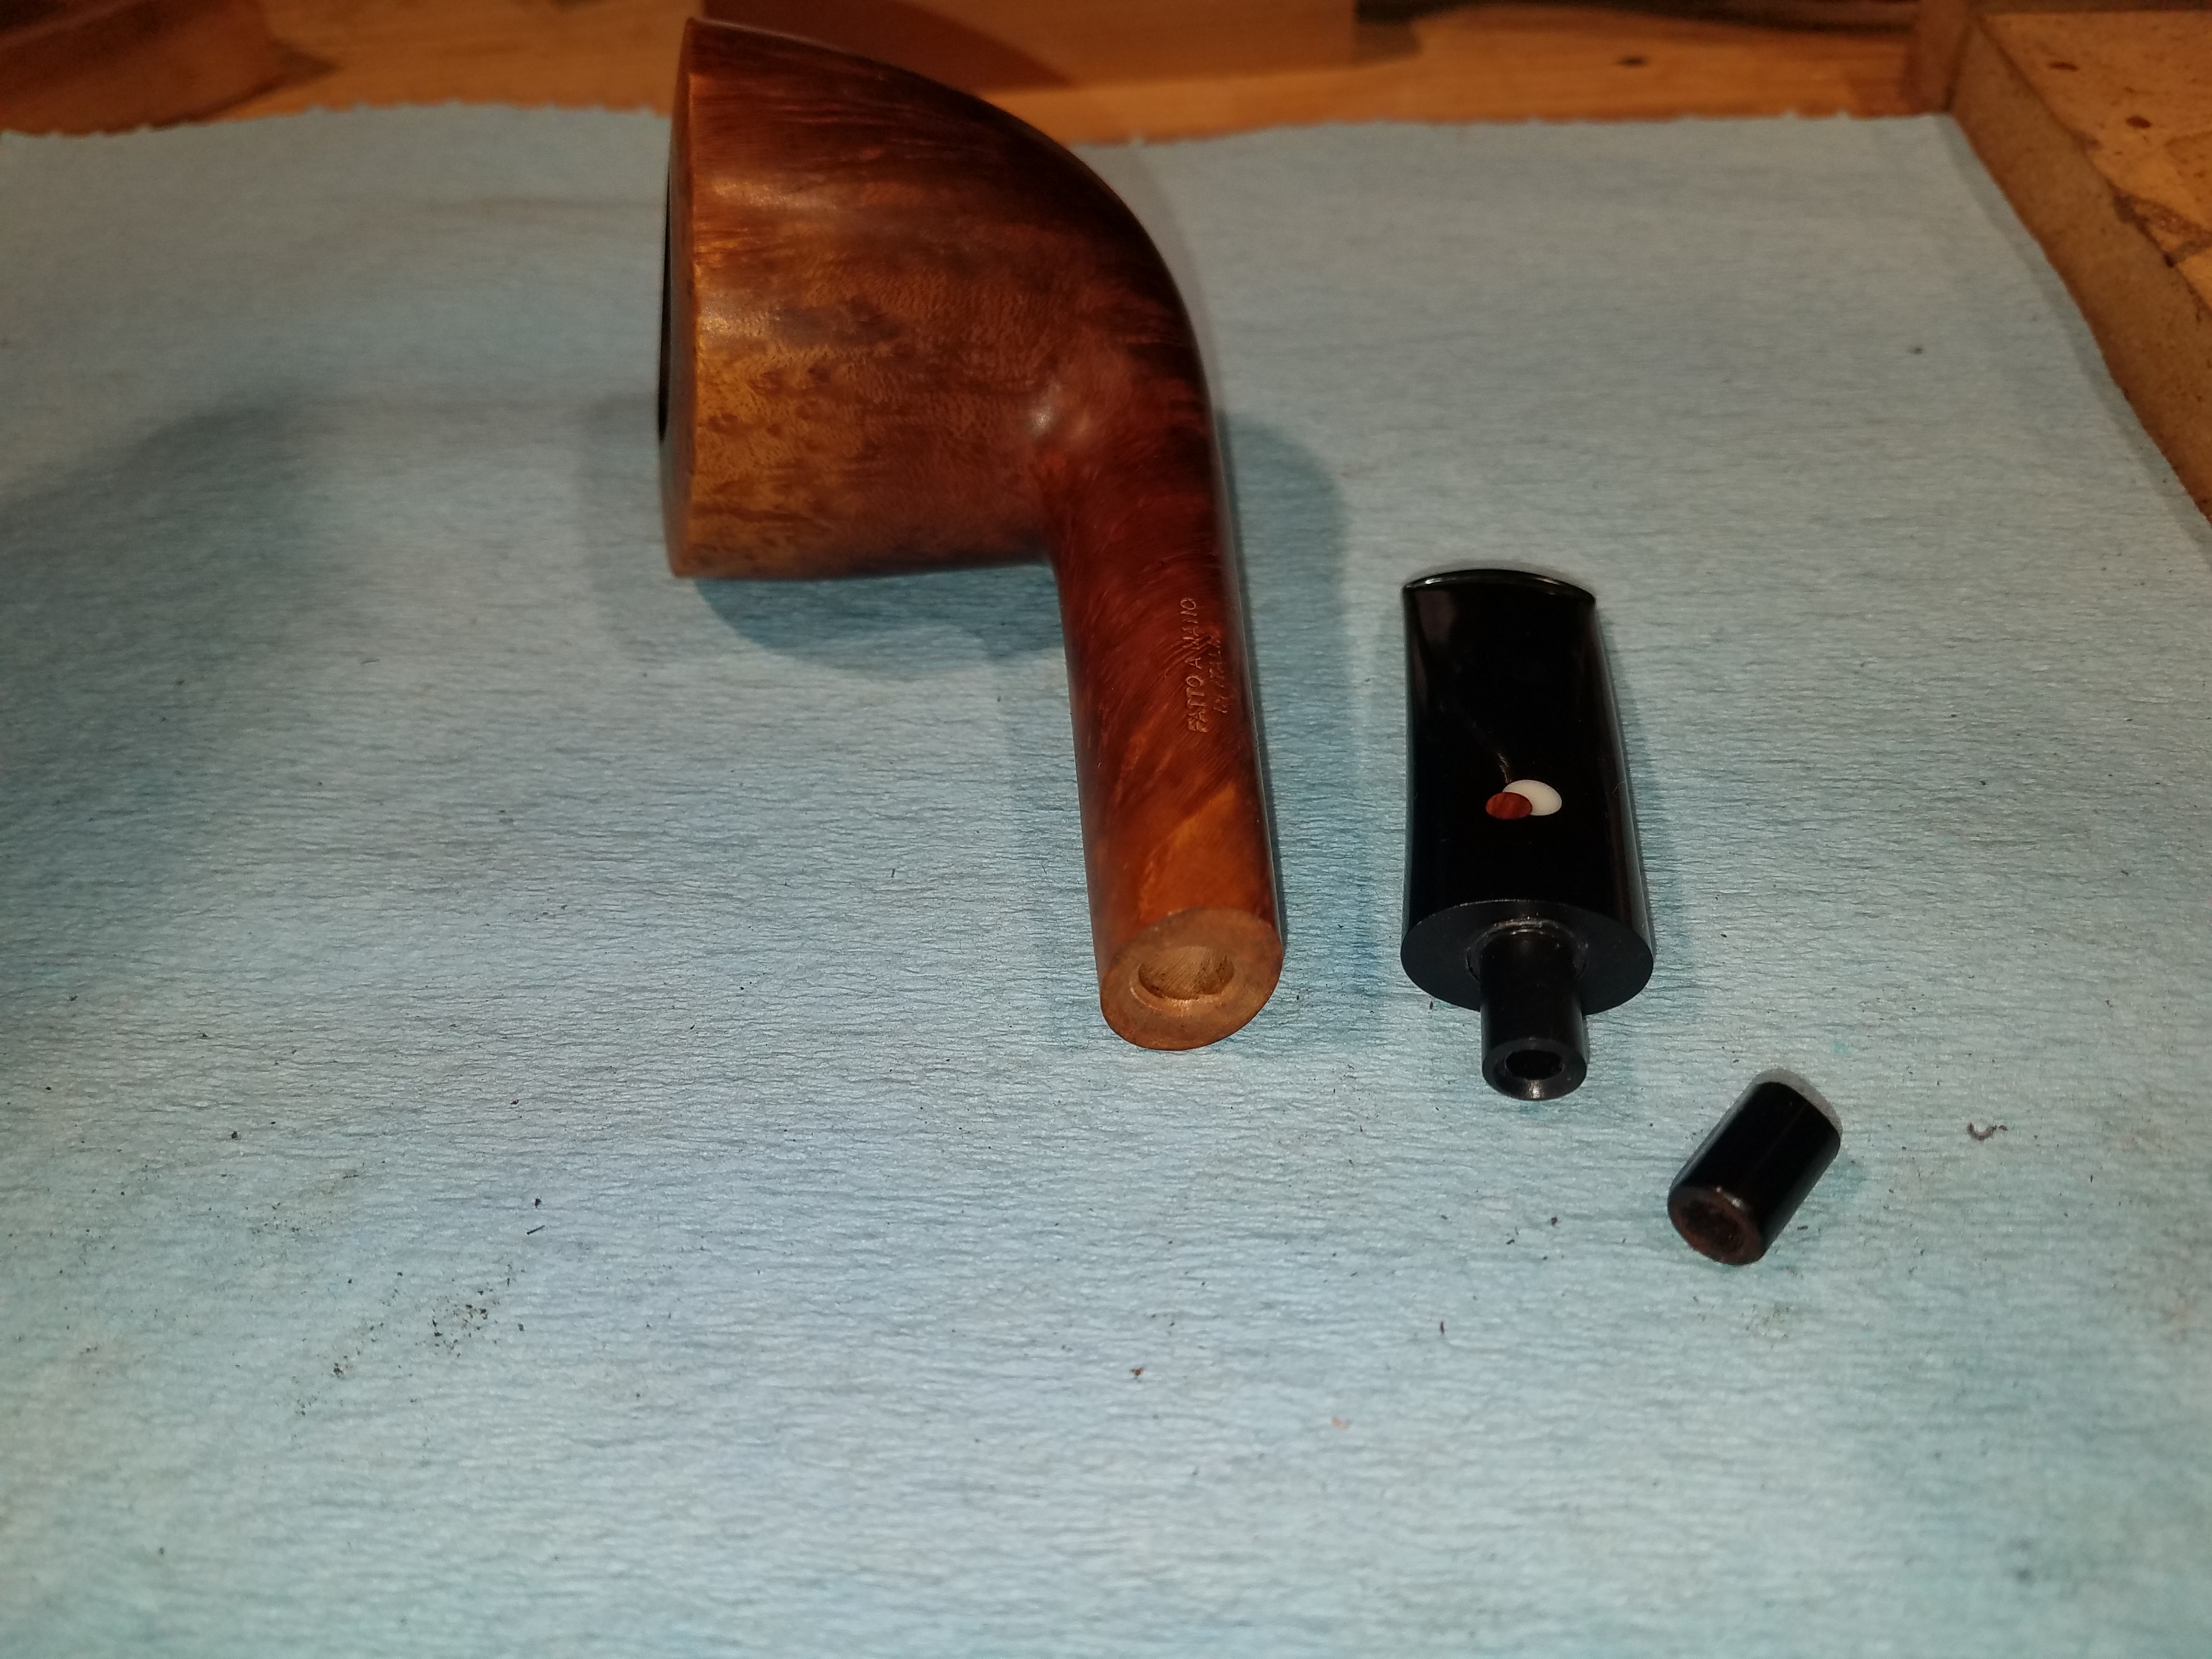
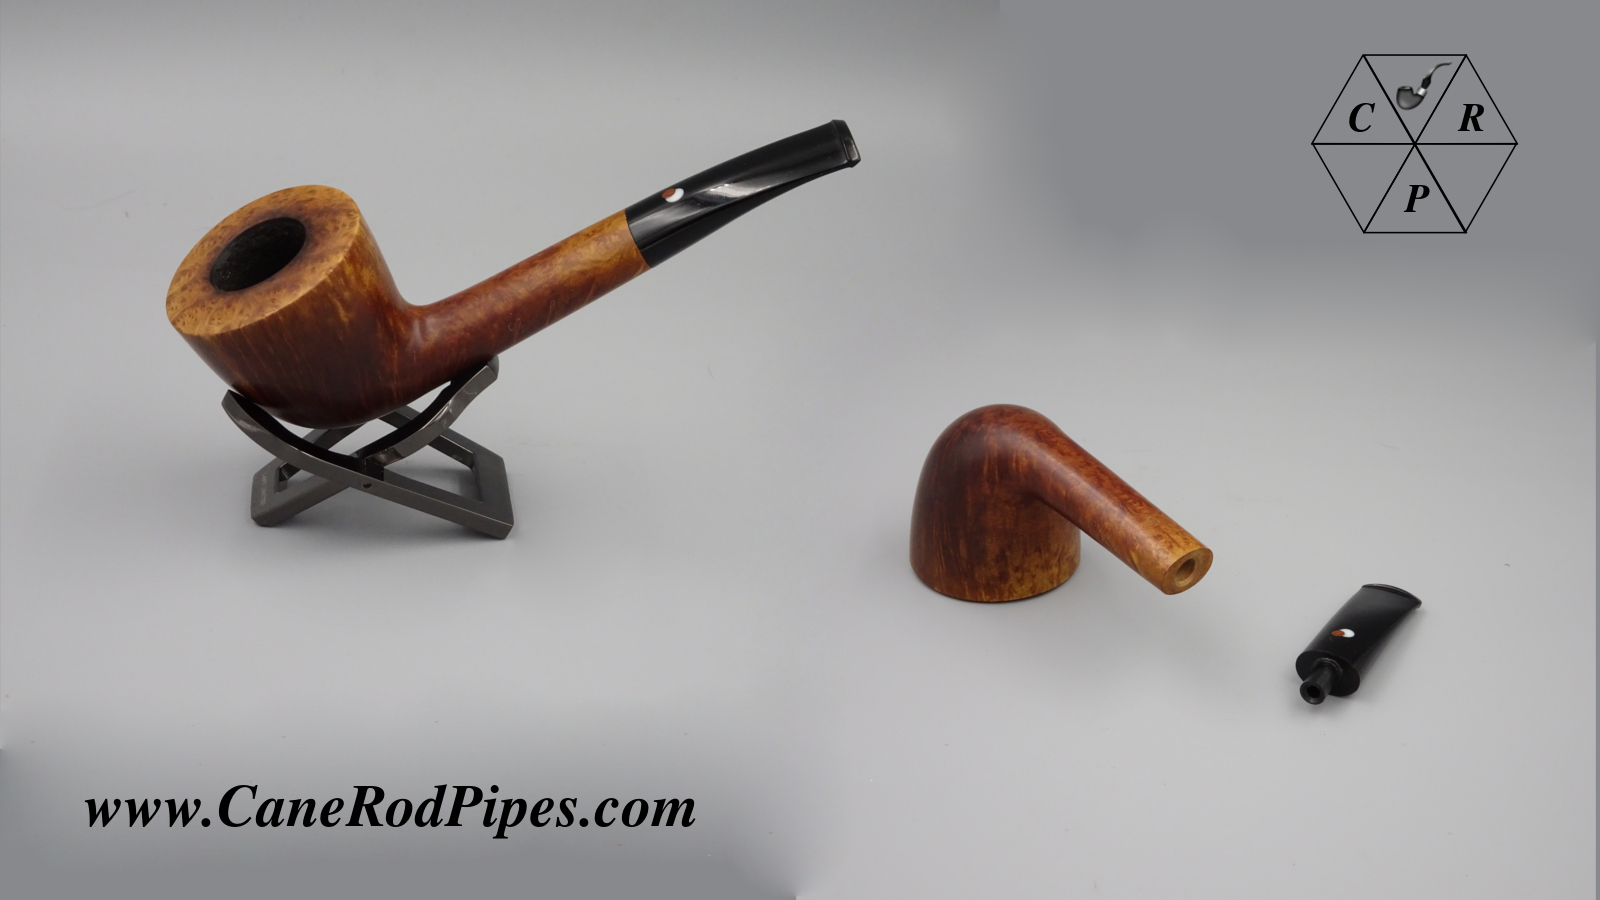
Our subject is this lovely Cavecchi that arrived with the tenon in the mortise. I took the pictures below after extracting the tenon. You can see the relatively clean break which is typical, and the otherwise beautiful stem with unique markings. It would be a shame to replace this with a plain black ebonite stem, so we will try to repair the original.

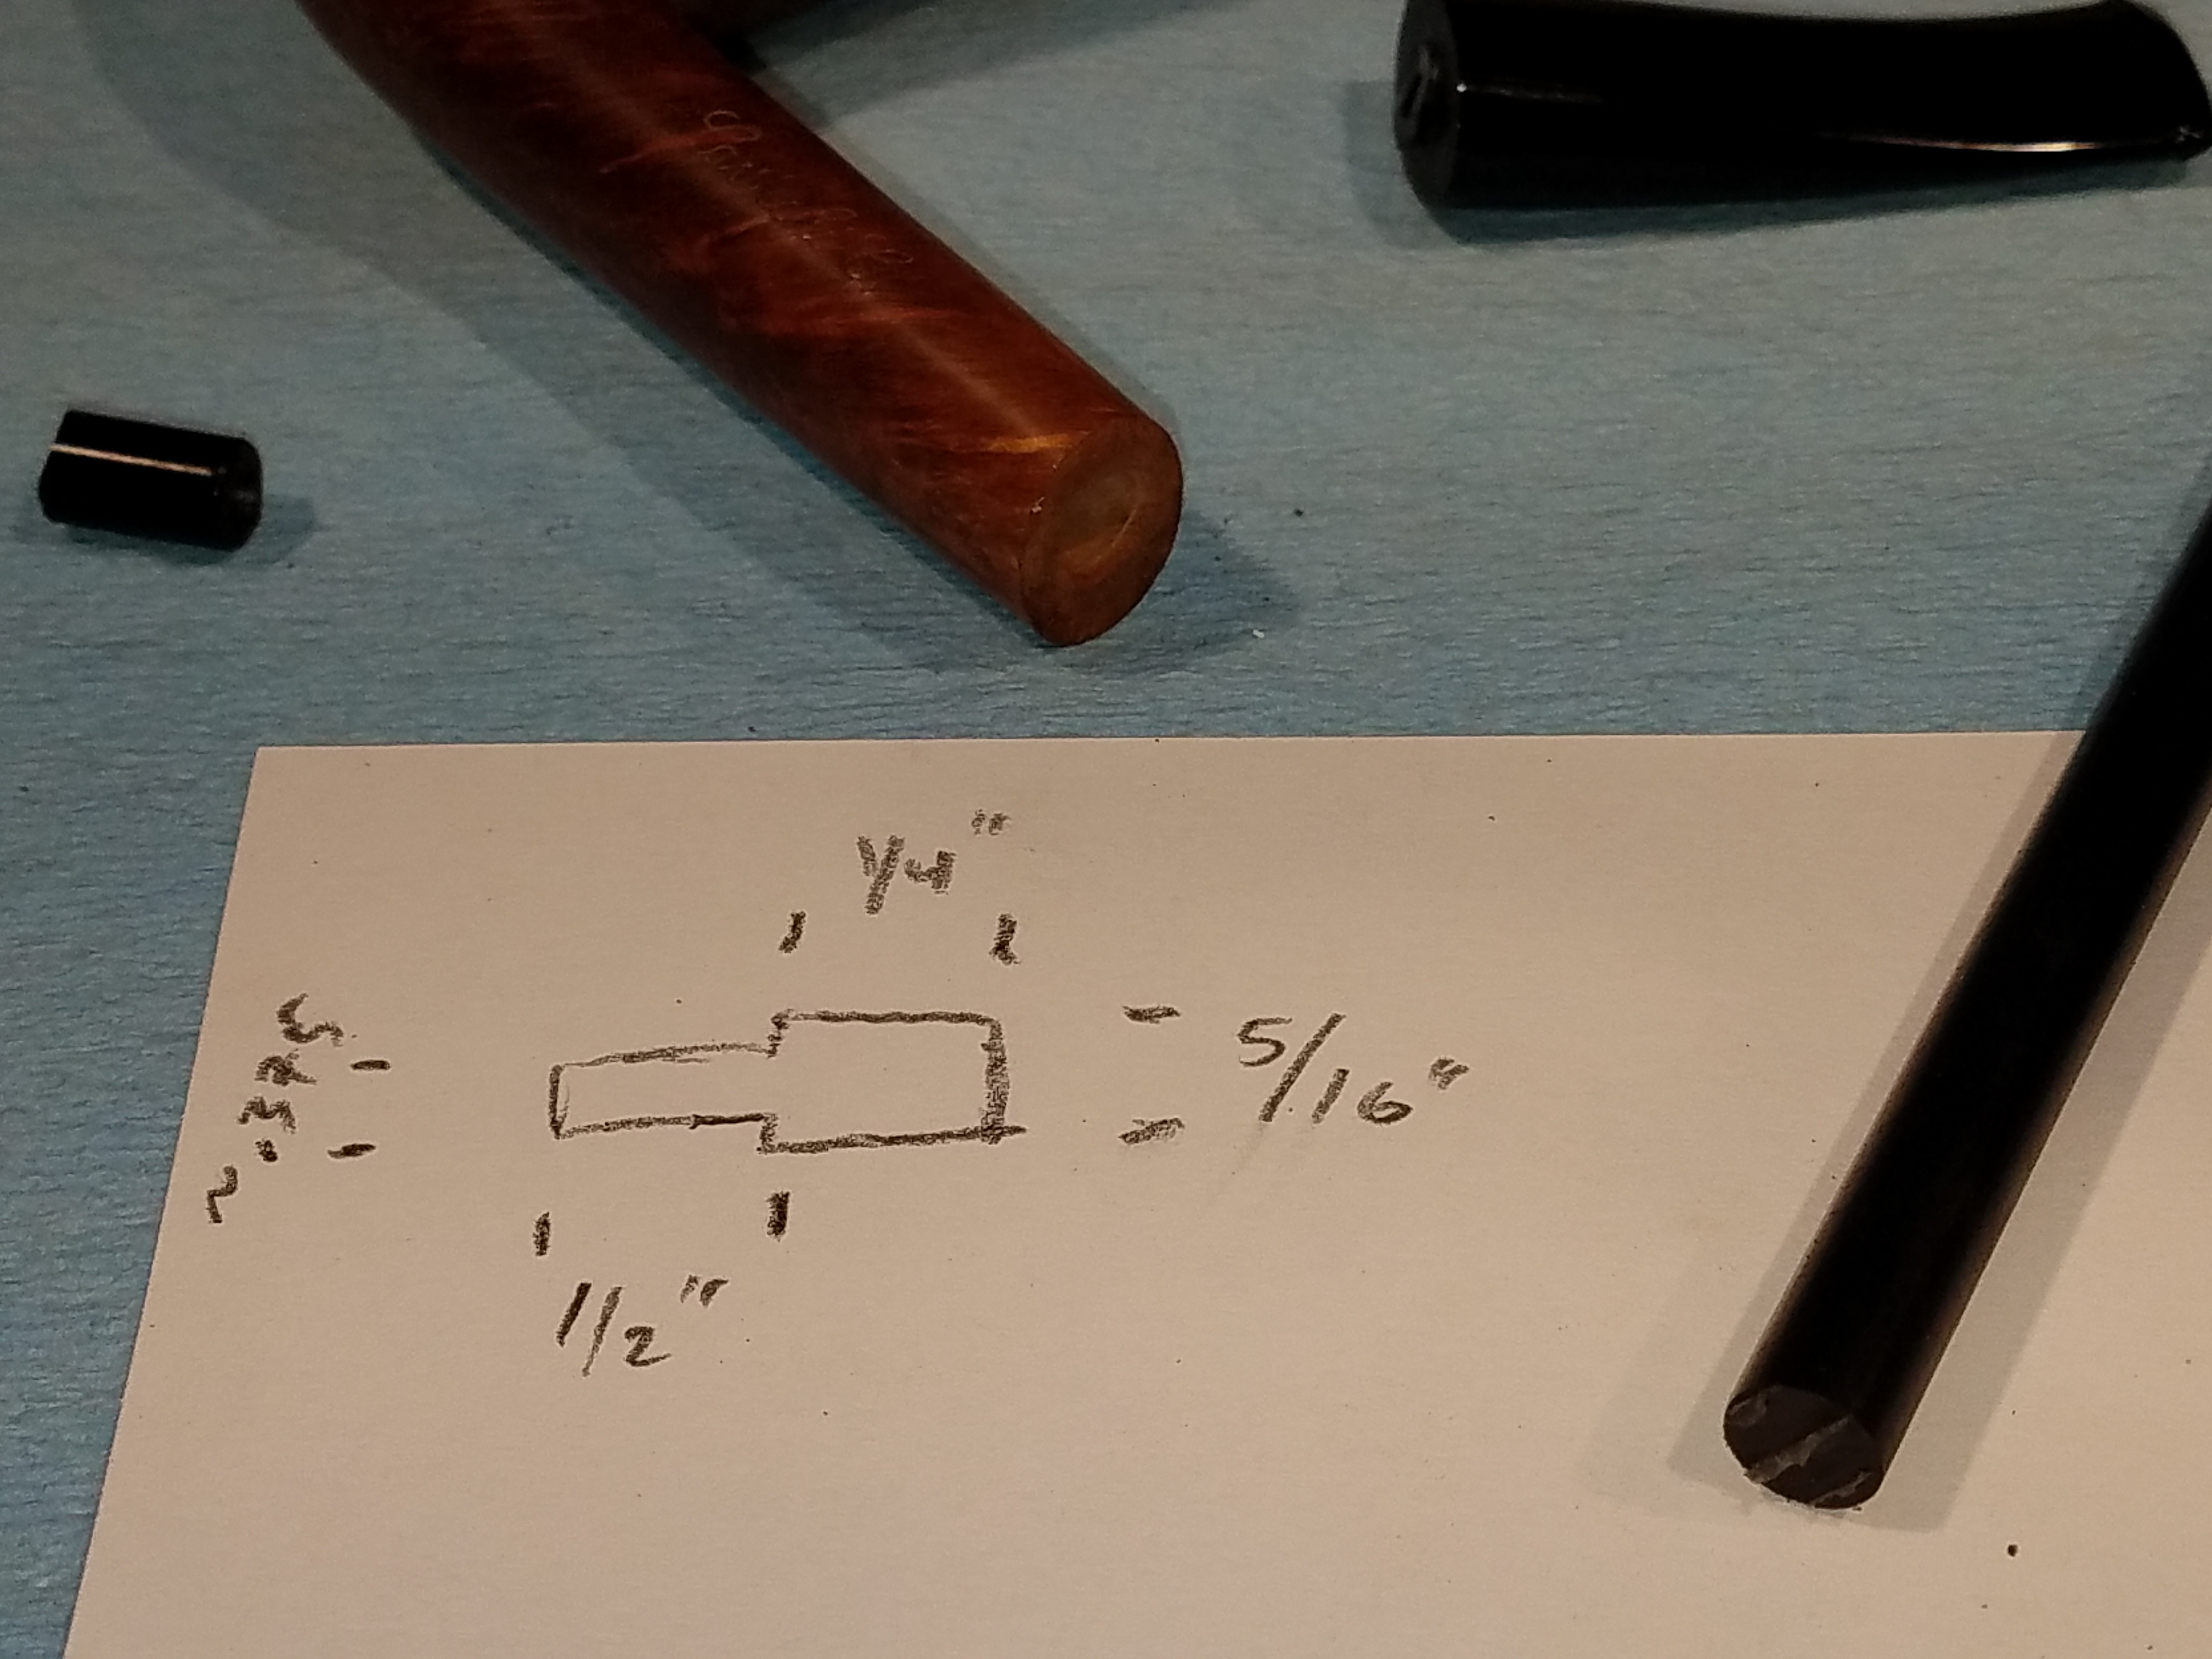
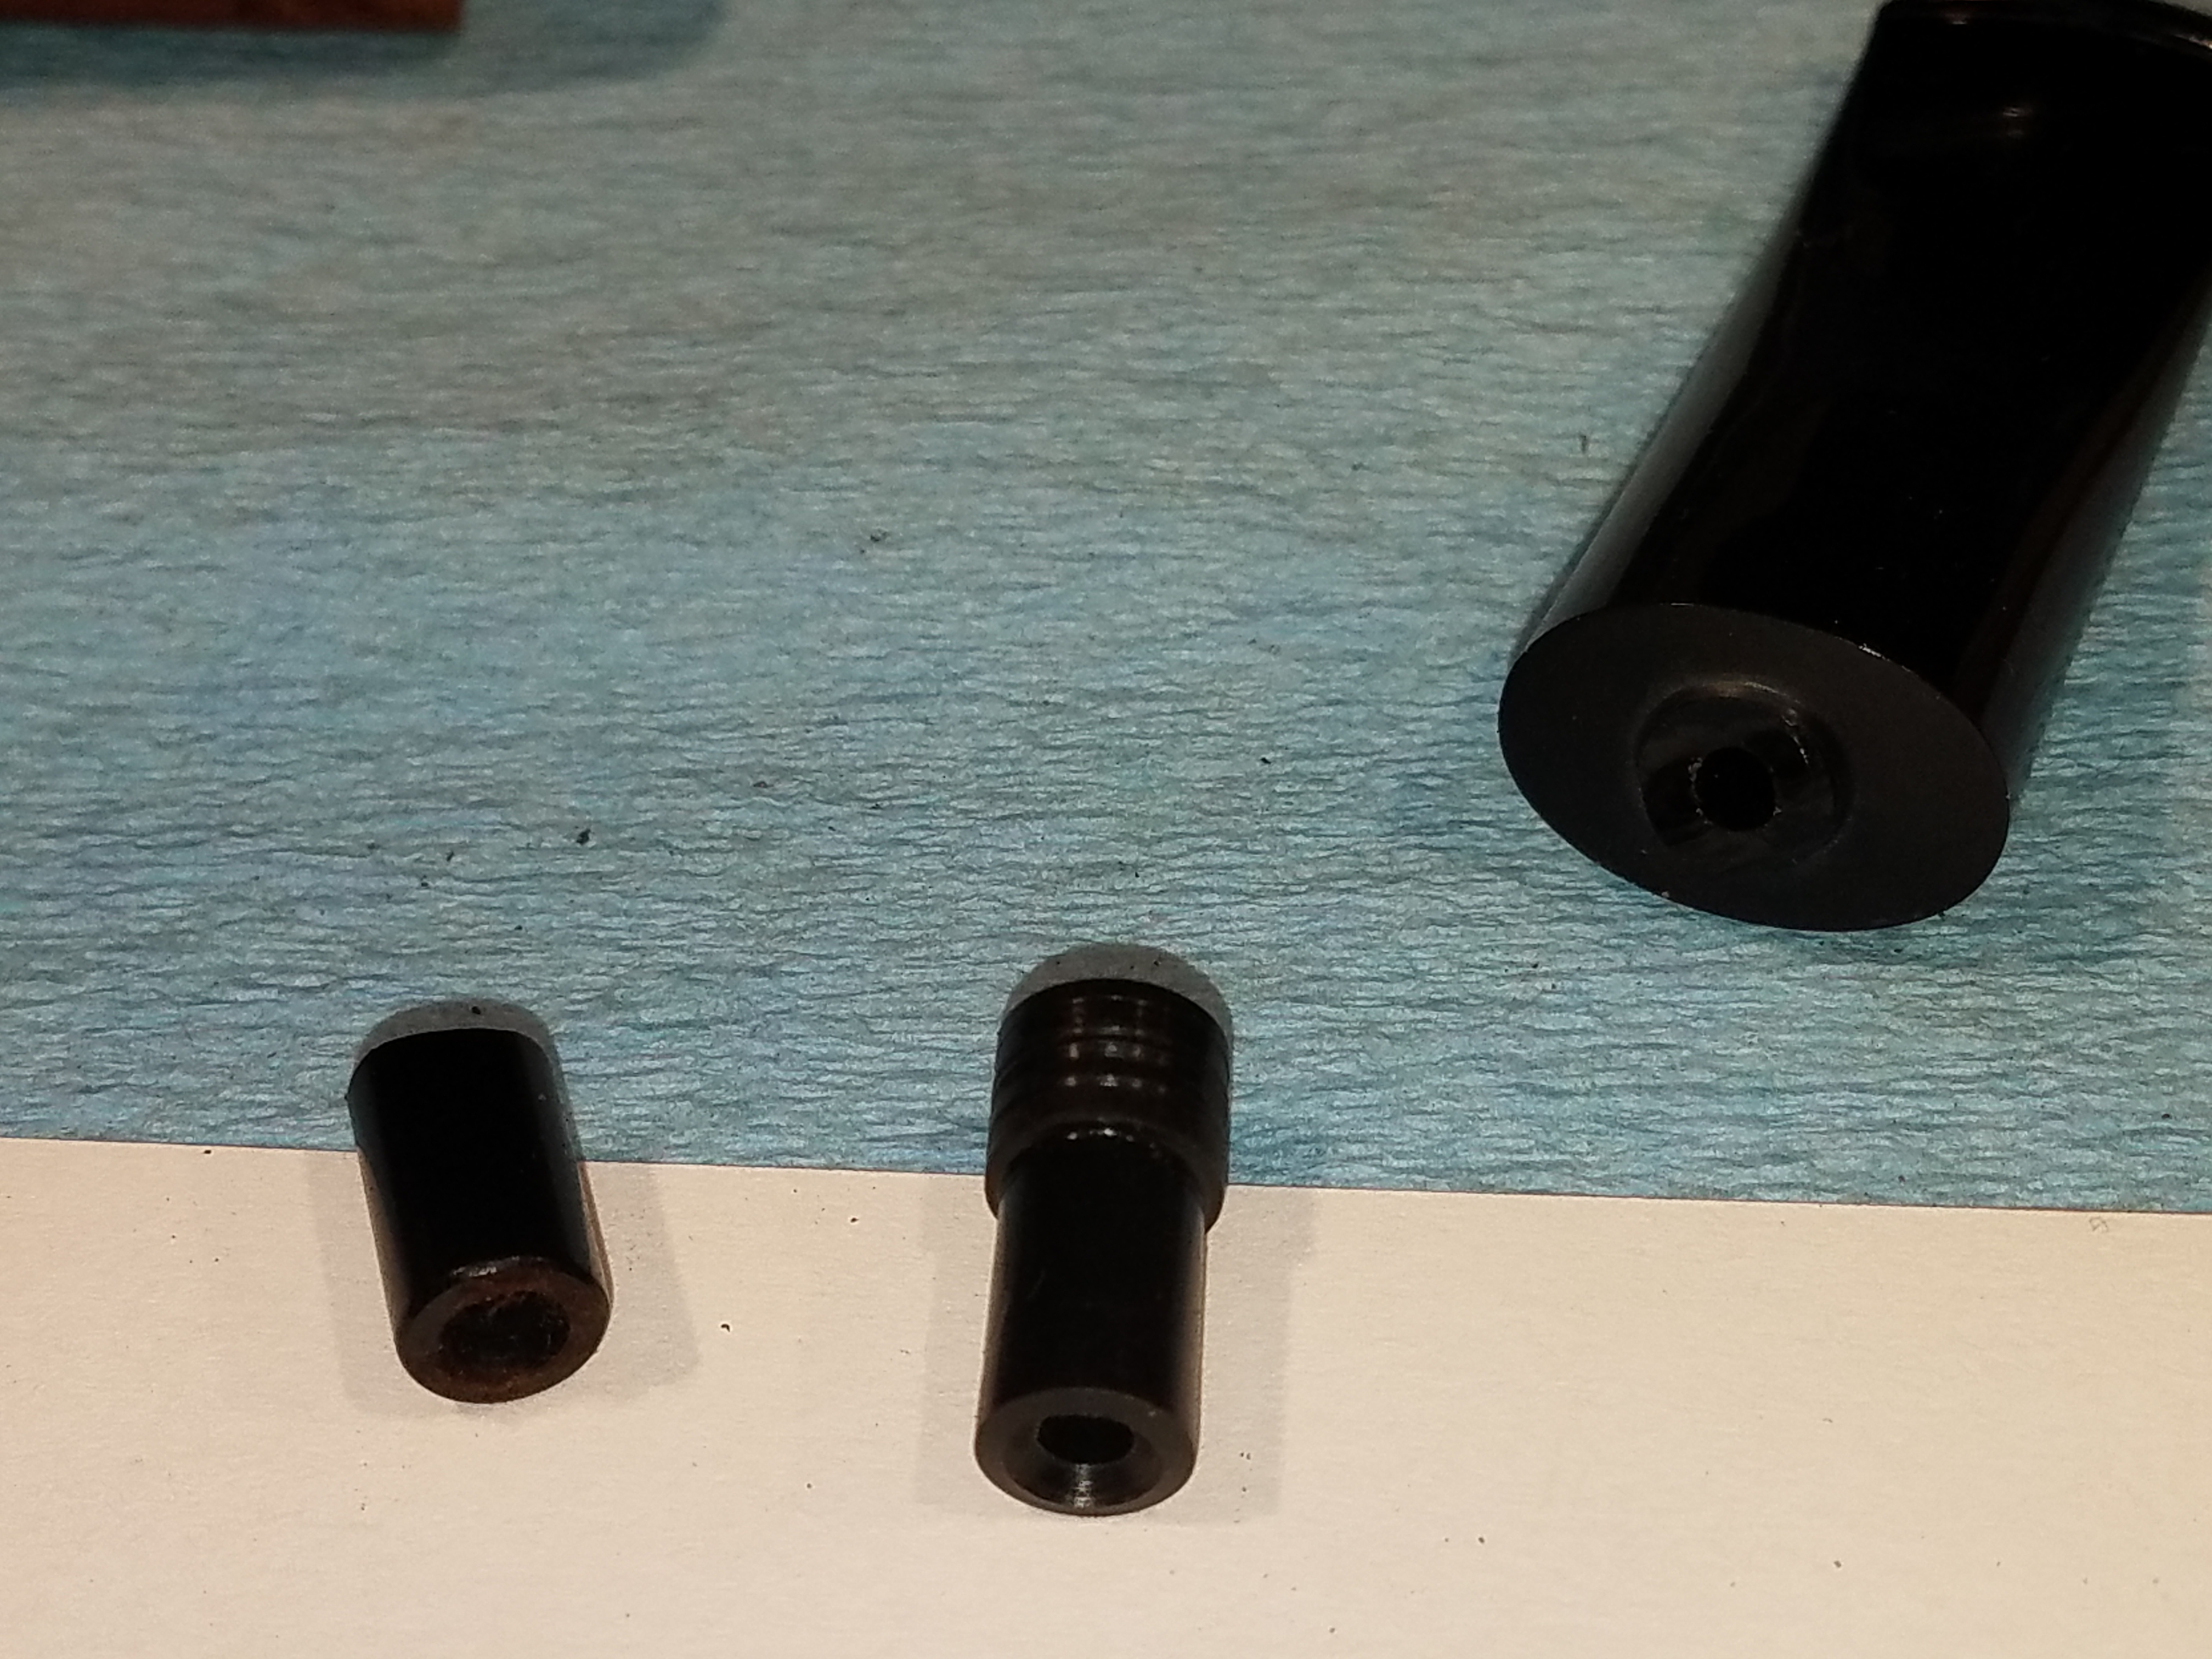
The plan is to fabricate a delrin tenon that will be set into the end of the stem. We will use a section of 5/16 in diameter delrin rod that can bee seen in the right of the image below. The rough sketch shows the basic shape of the piece we need to make. A ¼ inch section will be left at the original diameter for the part that will be inset into the stem. Modeled after the broken tenon, the remainder of the piece will be ½ inch long and turned to ~0.275 inch diameter to fit the pipes mortise (note the tenon diameter marking on the sketch is incorrect).
The delrin rod is chucked in the lathe and faced off. Delrin is a great material that is easy to machine and makes a great tenon. It is a slick material that slides easily against the briar mortise allowing for a tight fit. However it is also just a bit more flexible than ebonite (and a lot more flexible than acrylic) making it less likely to snap when lateral pressure is applied.
The one negative to using delrin also has to do with it’s slick low-friction surface. When we insert a new tenon, we are creating a new weak spot in the stem along the axis where we expect there to be a force applied every time the stem is removed from the shank. In other words, it is quite easy to pull the new tenon out of the stem if we don’t take measures to prevent this from happening. The first of these measures it to cut a series of grooves into the part of the new tenon that will be set into the stem to give the epoxy something to grab. You can see these grooves in the picture below. Once the tenon is sized to the dimensions described above and grooved, I drill a 1/8 inch hole through the entire length of the part and chamfer the end before parting it off the rod.
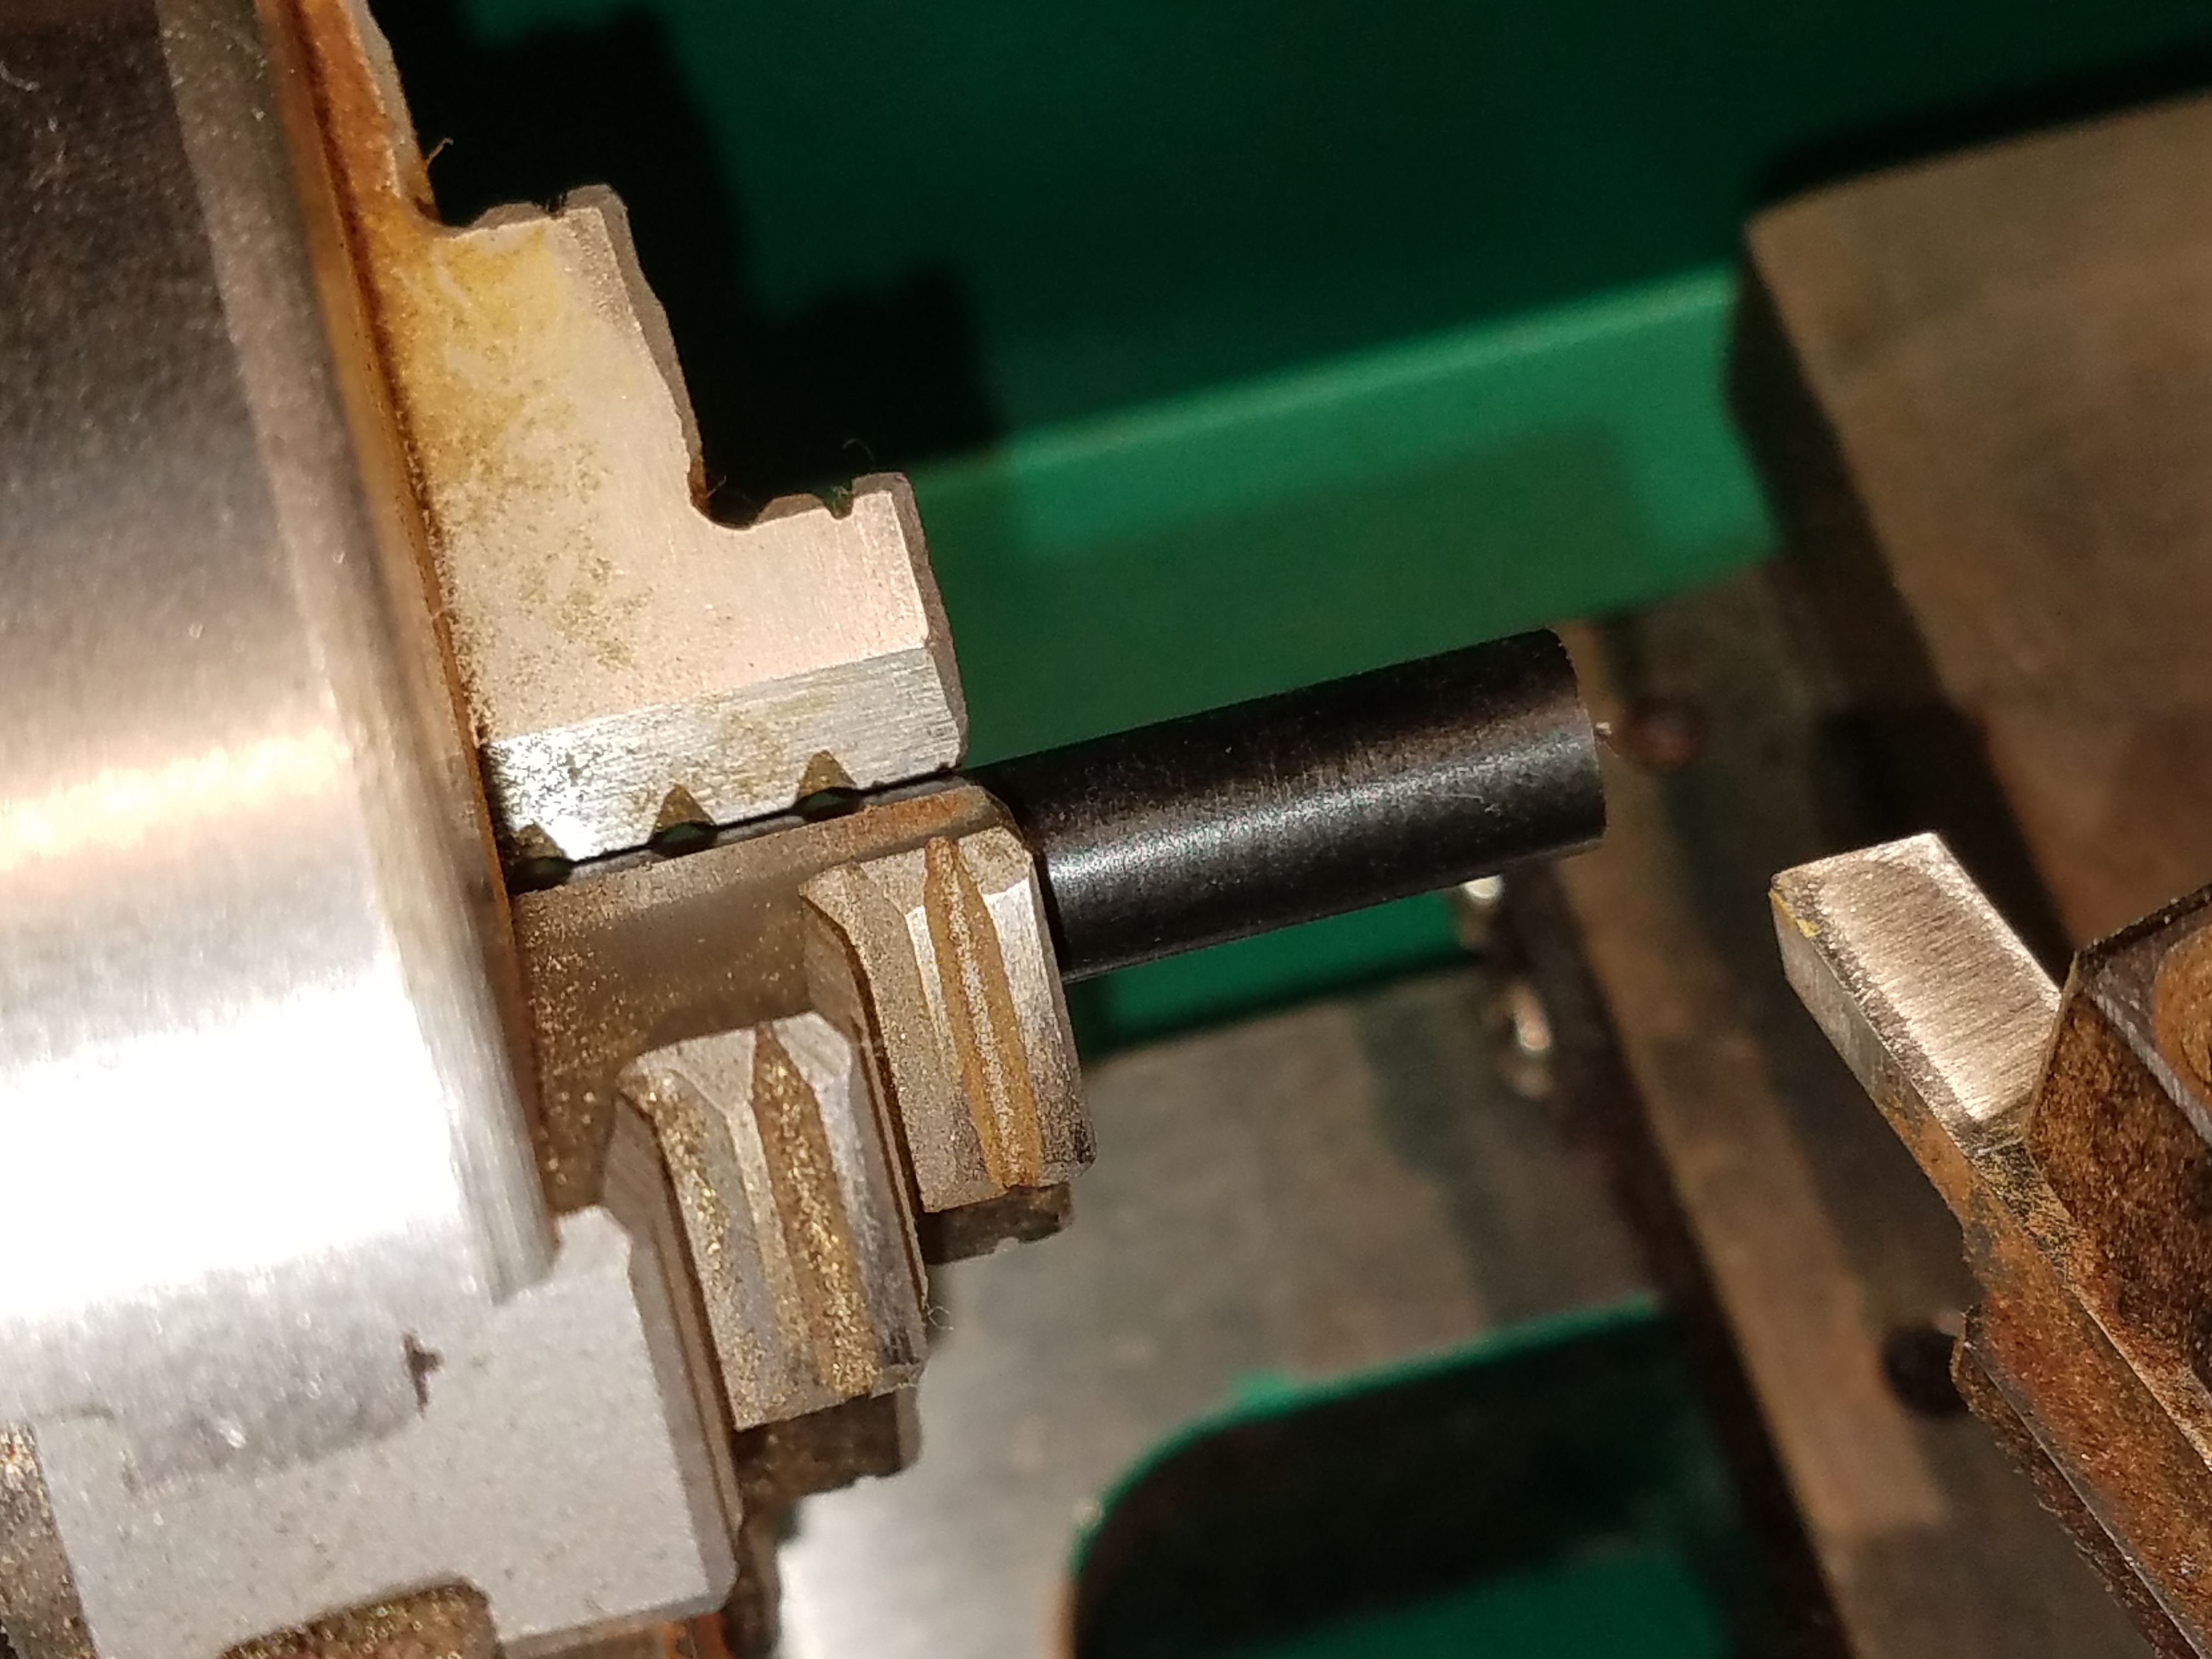
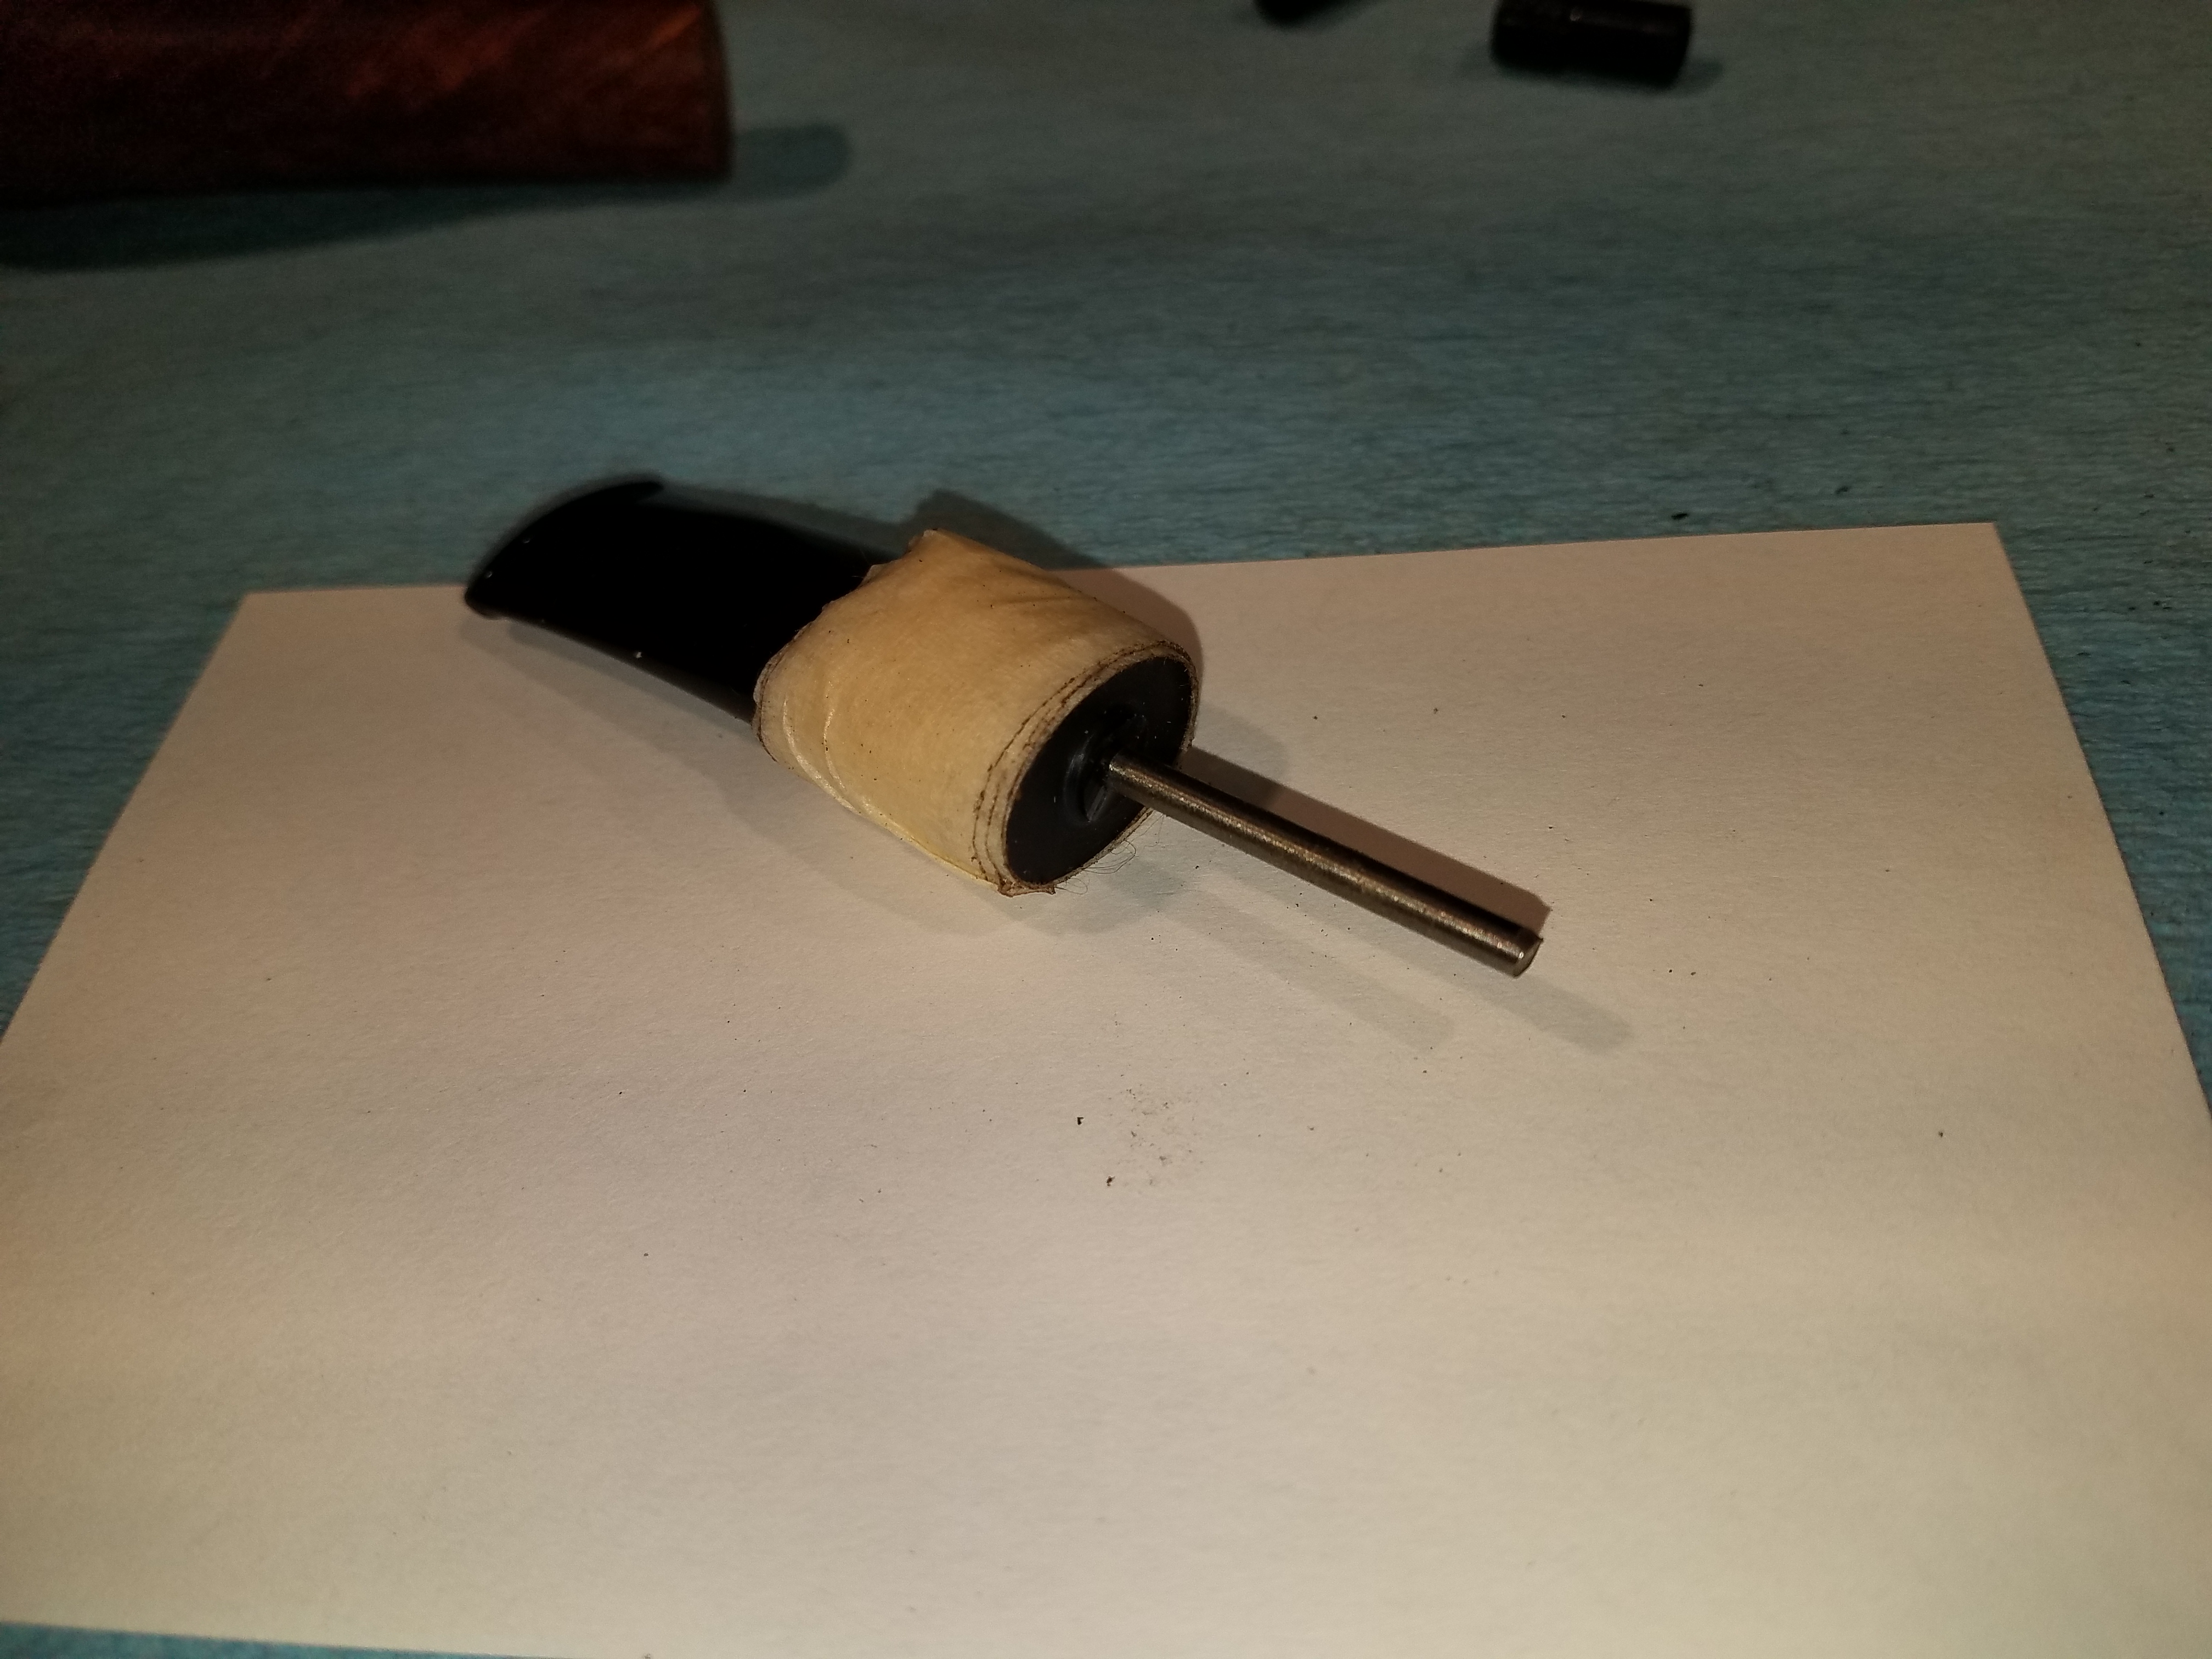
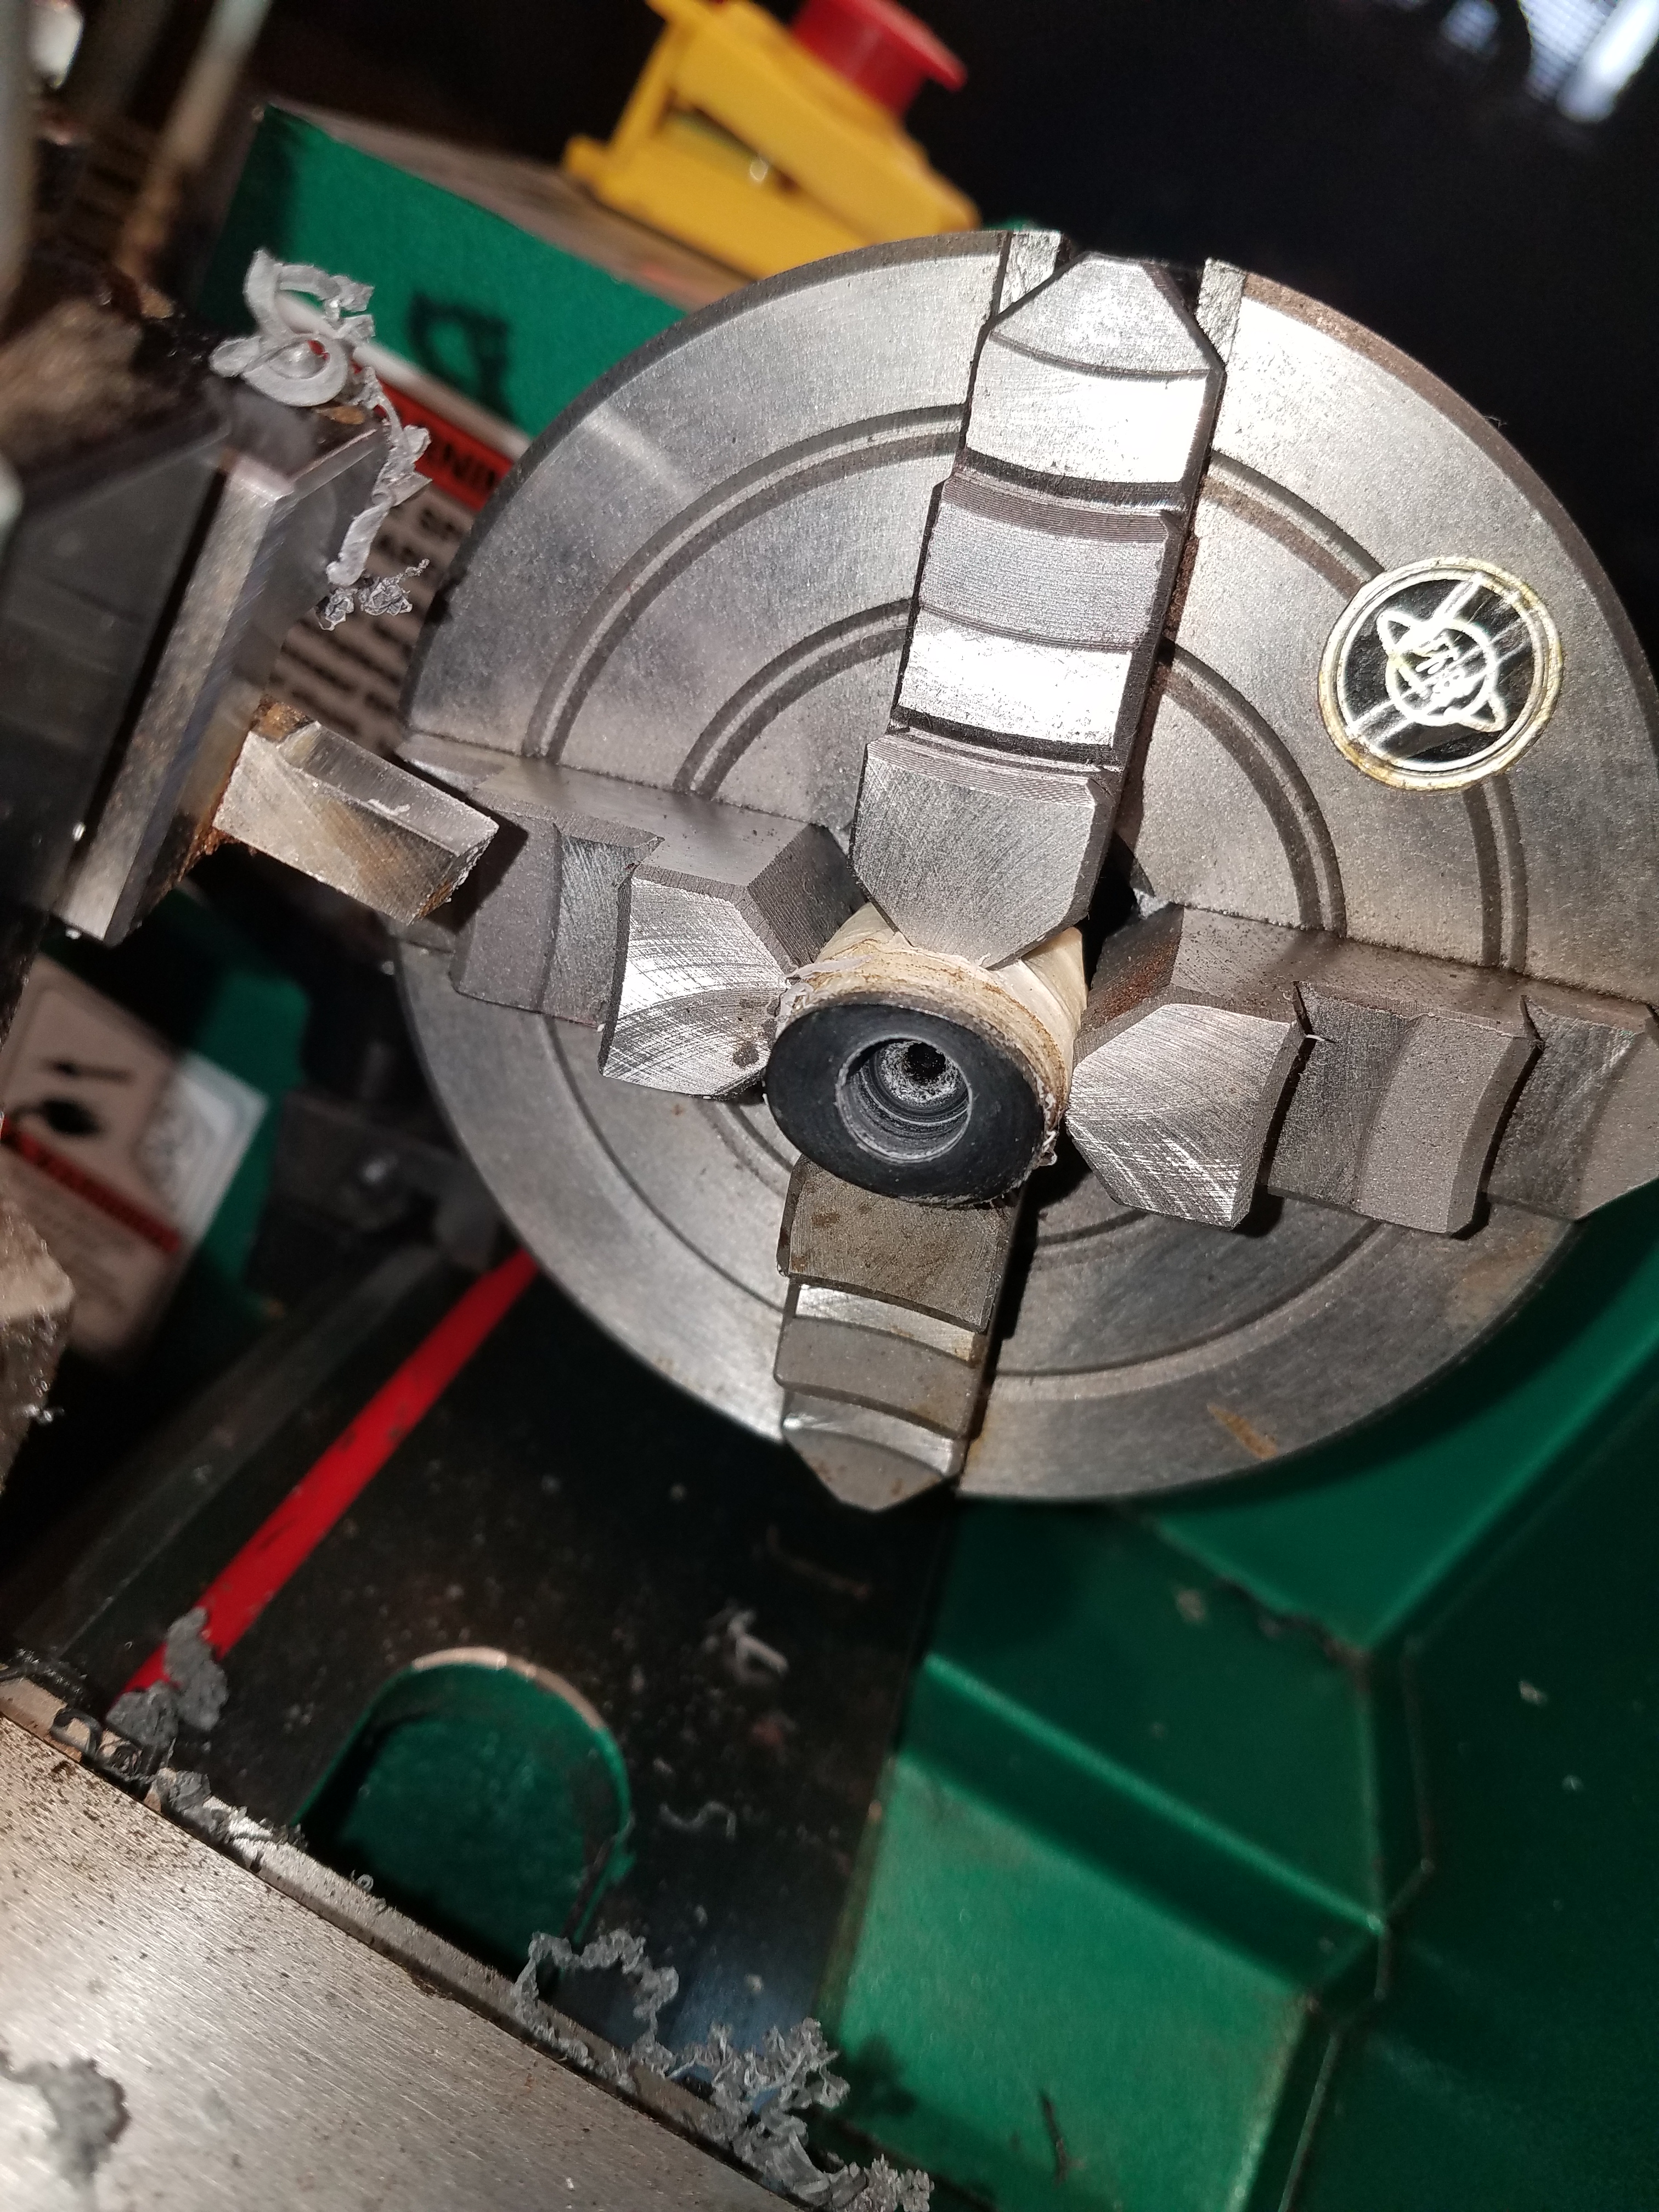
With the new tenon complete, we set it aside and turn our attention to the stem. To prepare the stem for the lathe, I put a heavy layer of masking tape around the region that will be clamped in the chuck. We are going to use a 4 jaw chuck and manually aligning the stem, so we do not have to worry about the thickness of the tape. I also choose a piece of drill rod that snugly fits into the airway. This is an extremely important step and choosing a rod that fits tightly and is perfectly straight will determine the success of the repair.
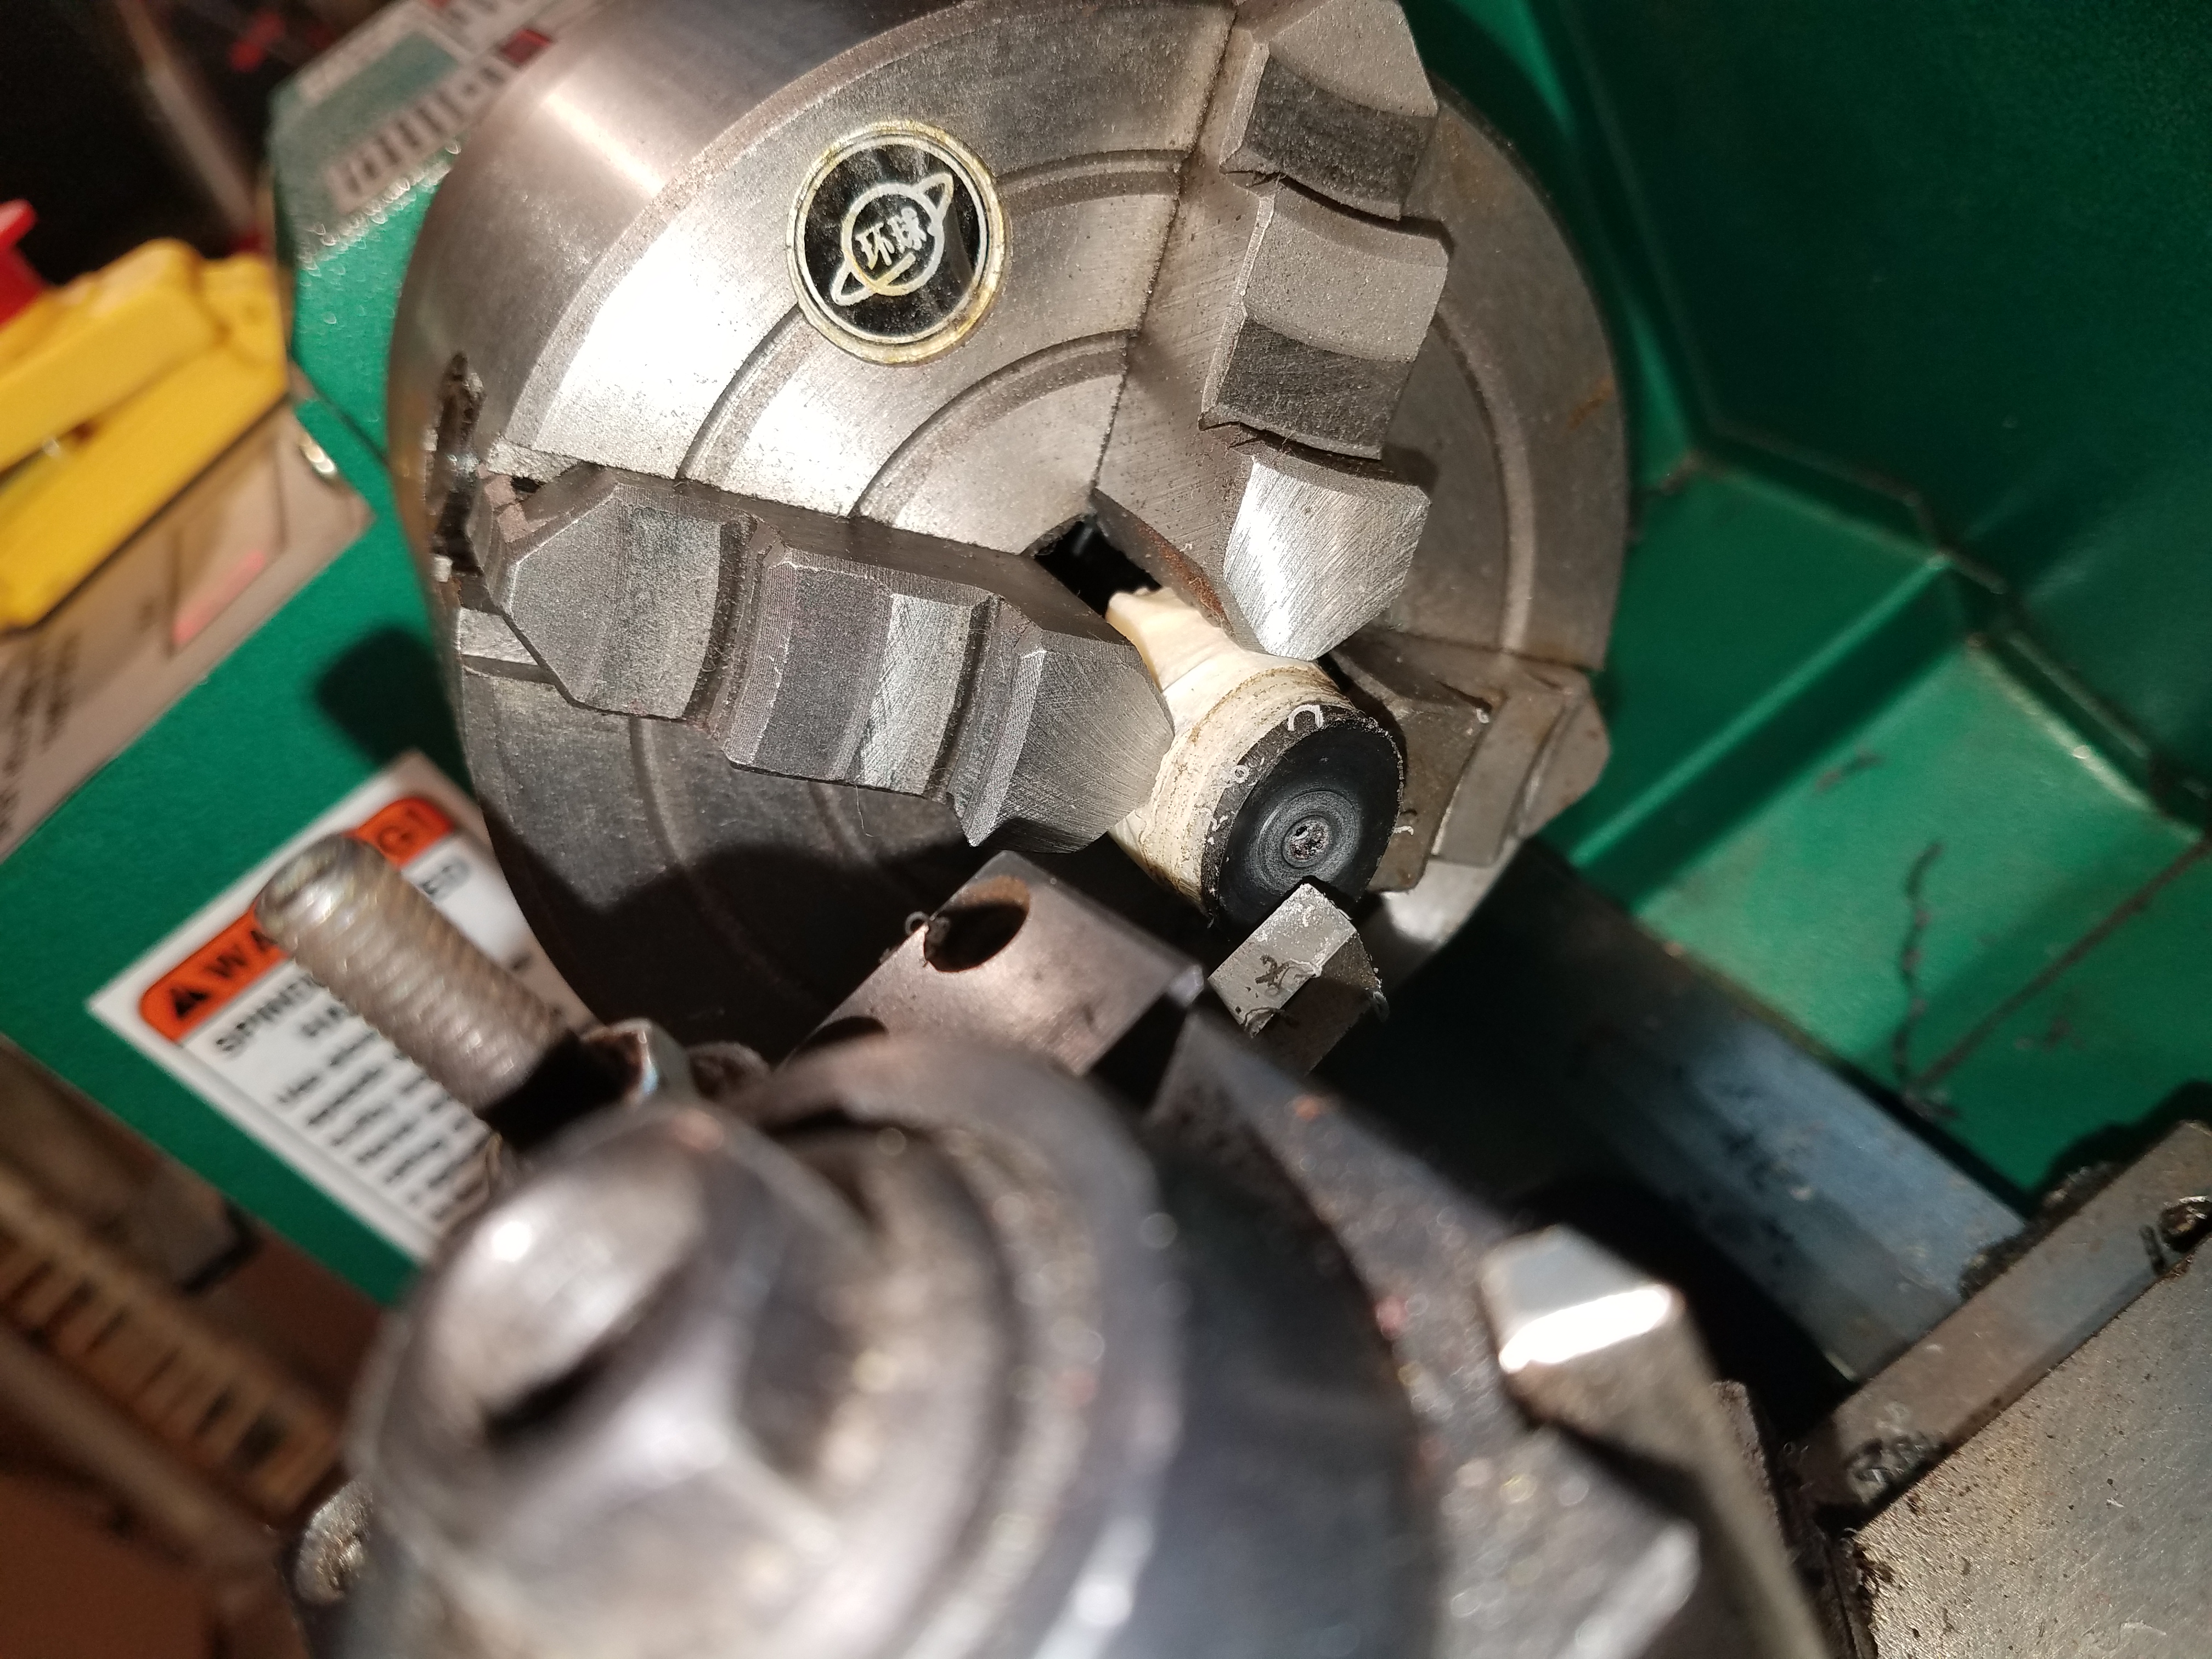
The stem is then put in the 4 jaw chuck and centered using a dial indicator. Since each of the 4 jaws can move independently, it is possible to get the drill rod perfectly centered. This means that when the lathe turns it will turn the stem perfectly around the center of the airway and any drilling that we do will be exactly concentric to the airway. I’m not showing it here, but I also indicate off the face of the stem to make sure that the tenon will be perpendicular to the stem face. If done correctly, this will guarantee that the stem fits flush and gap free with the shank.

Once the stem is secured and centered, I use a facing tool to remove the remaining bits of the old tenon. I am careful not to touch the face of the stem in order to not disrupt the fit of the face to the shank.
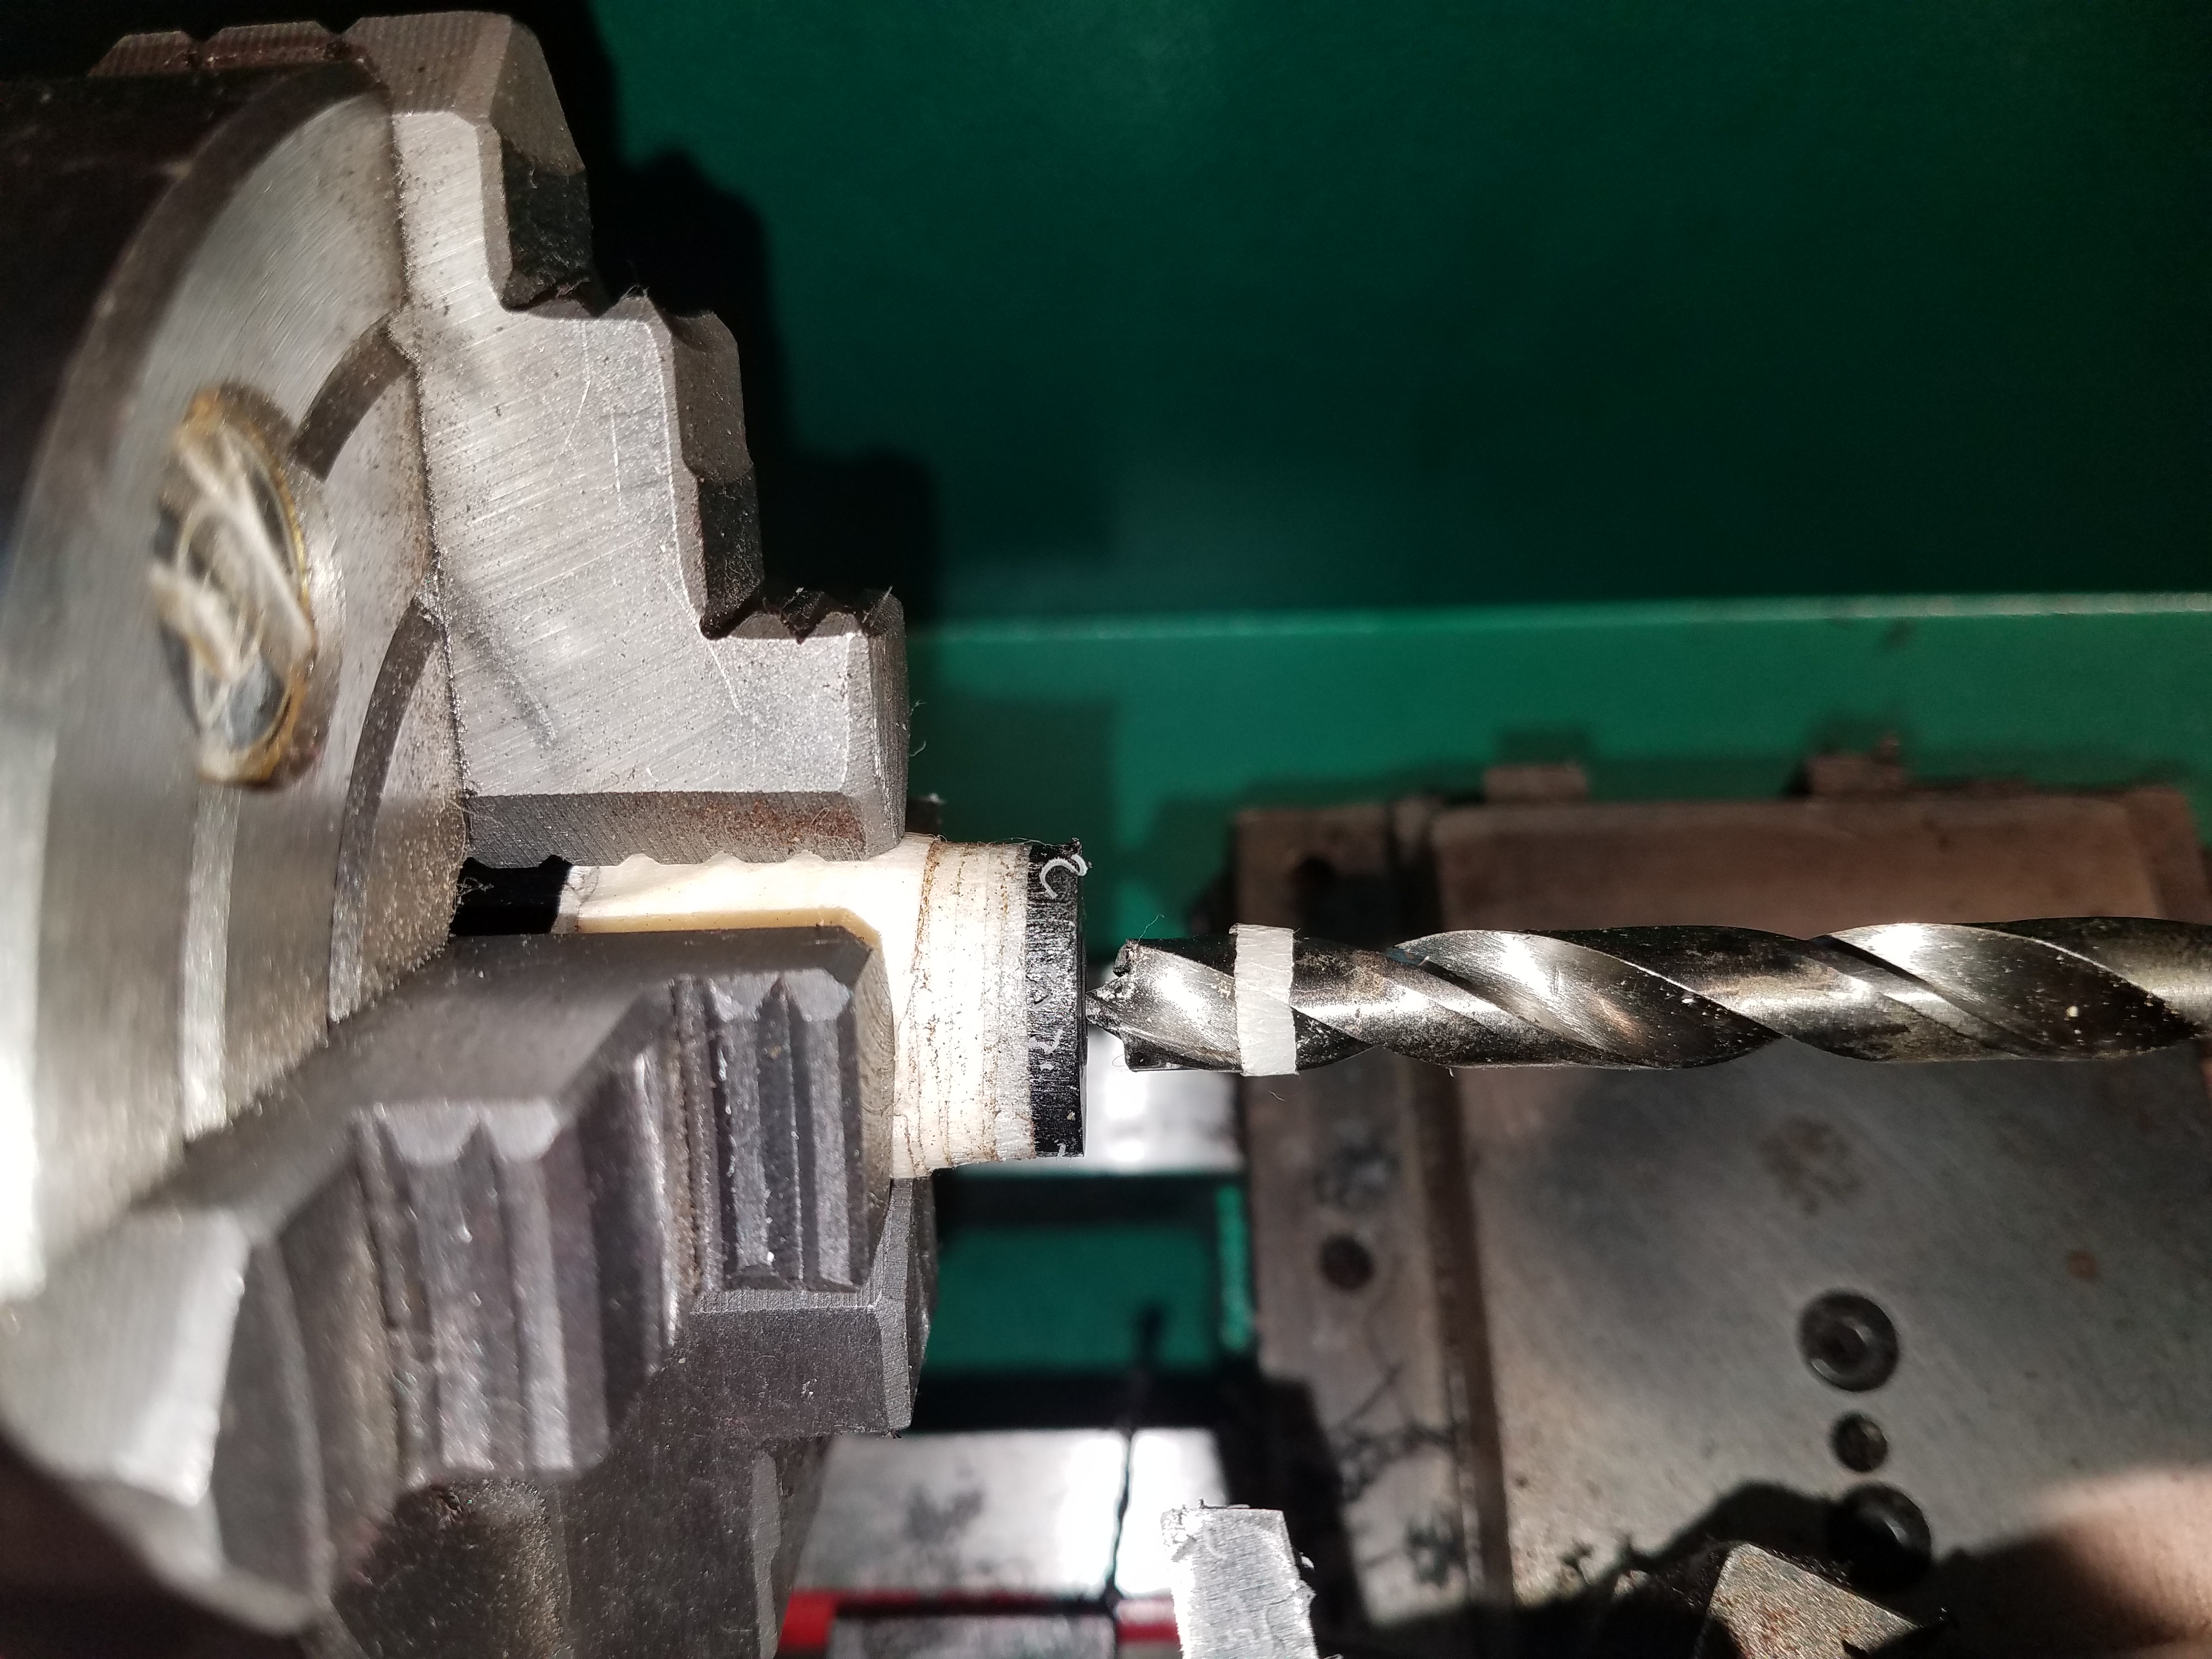
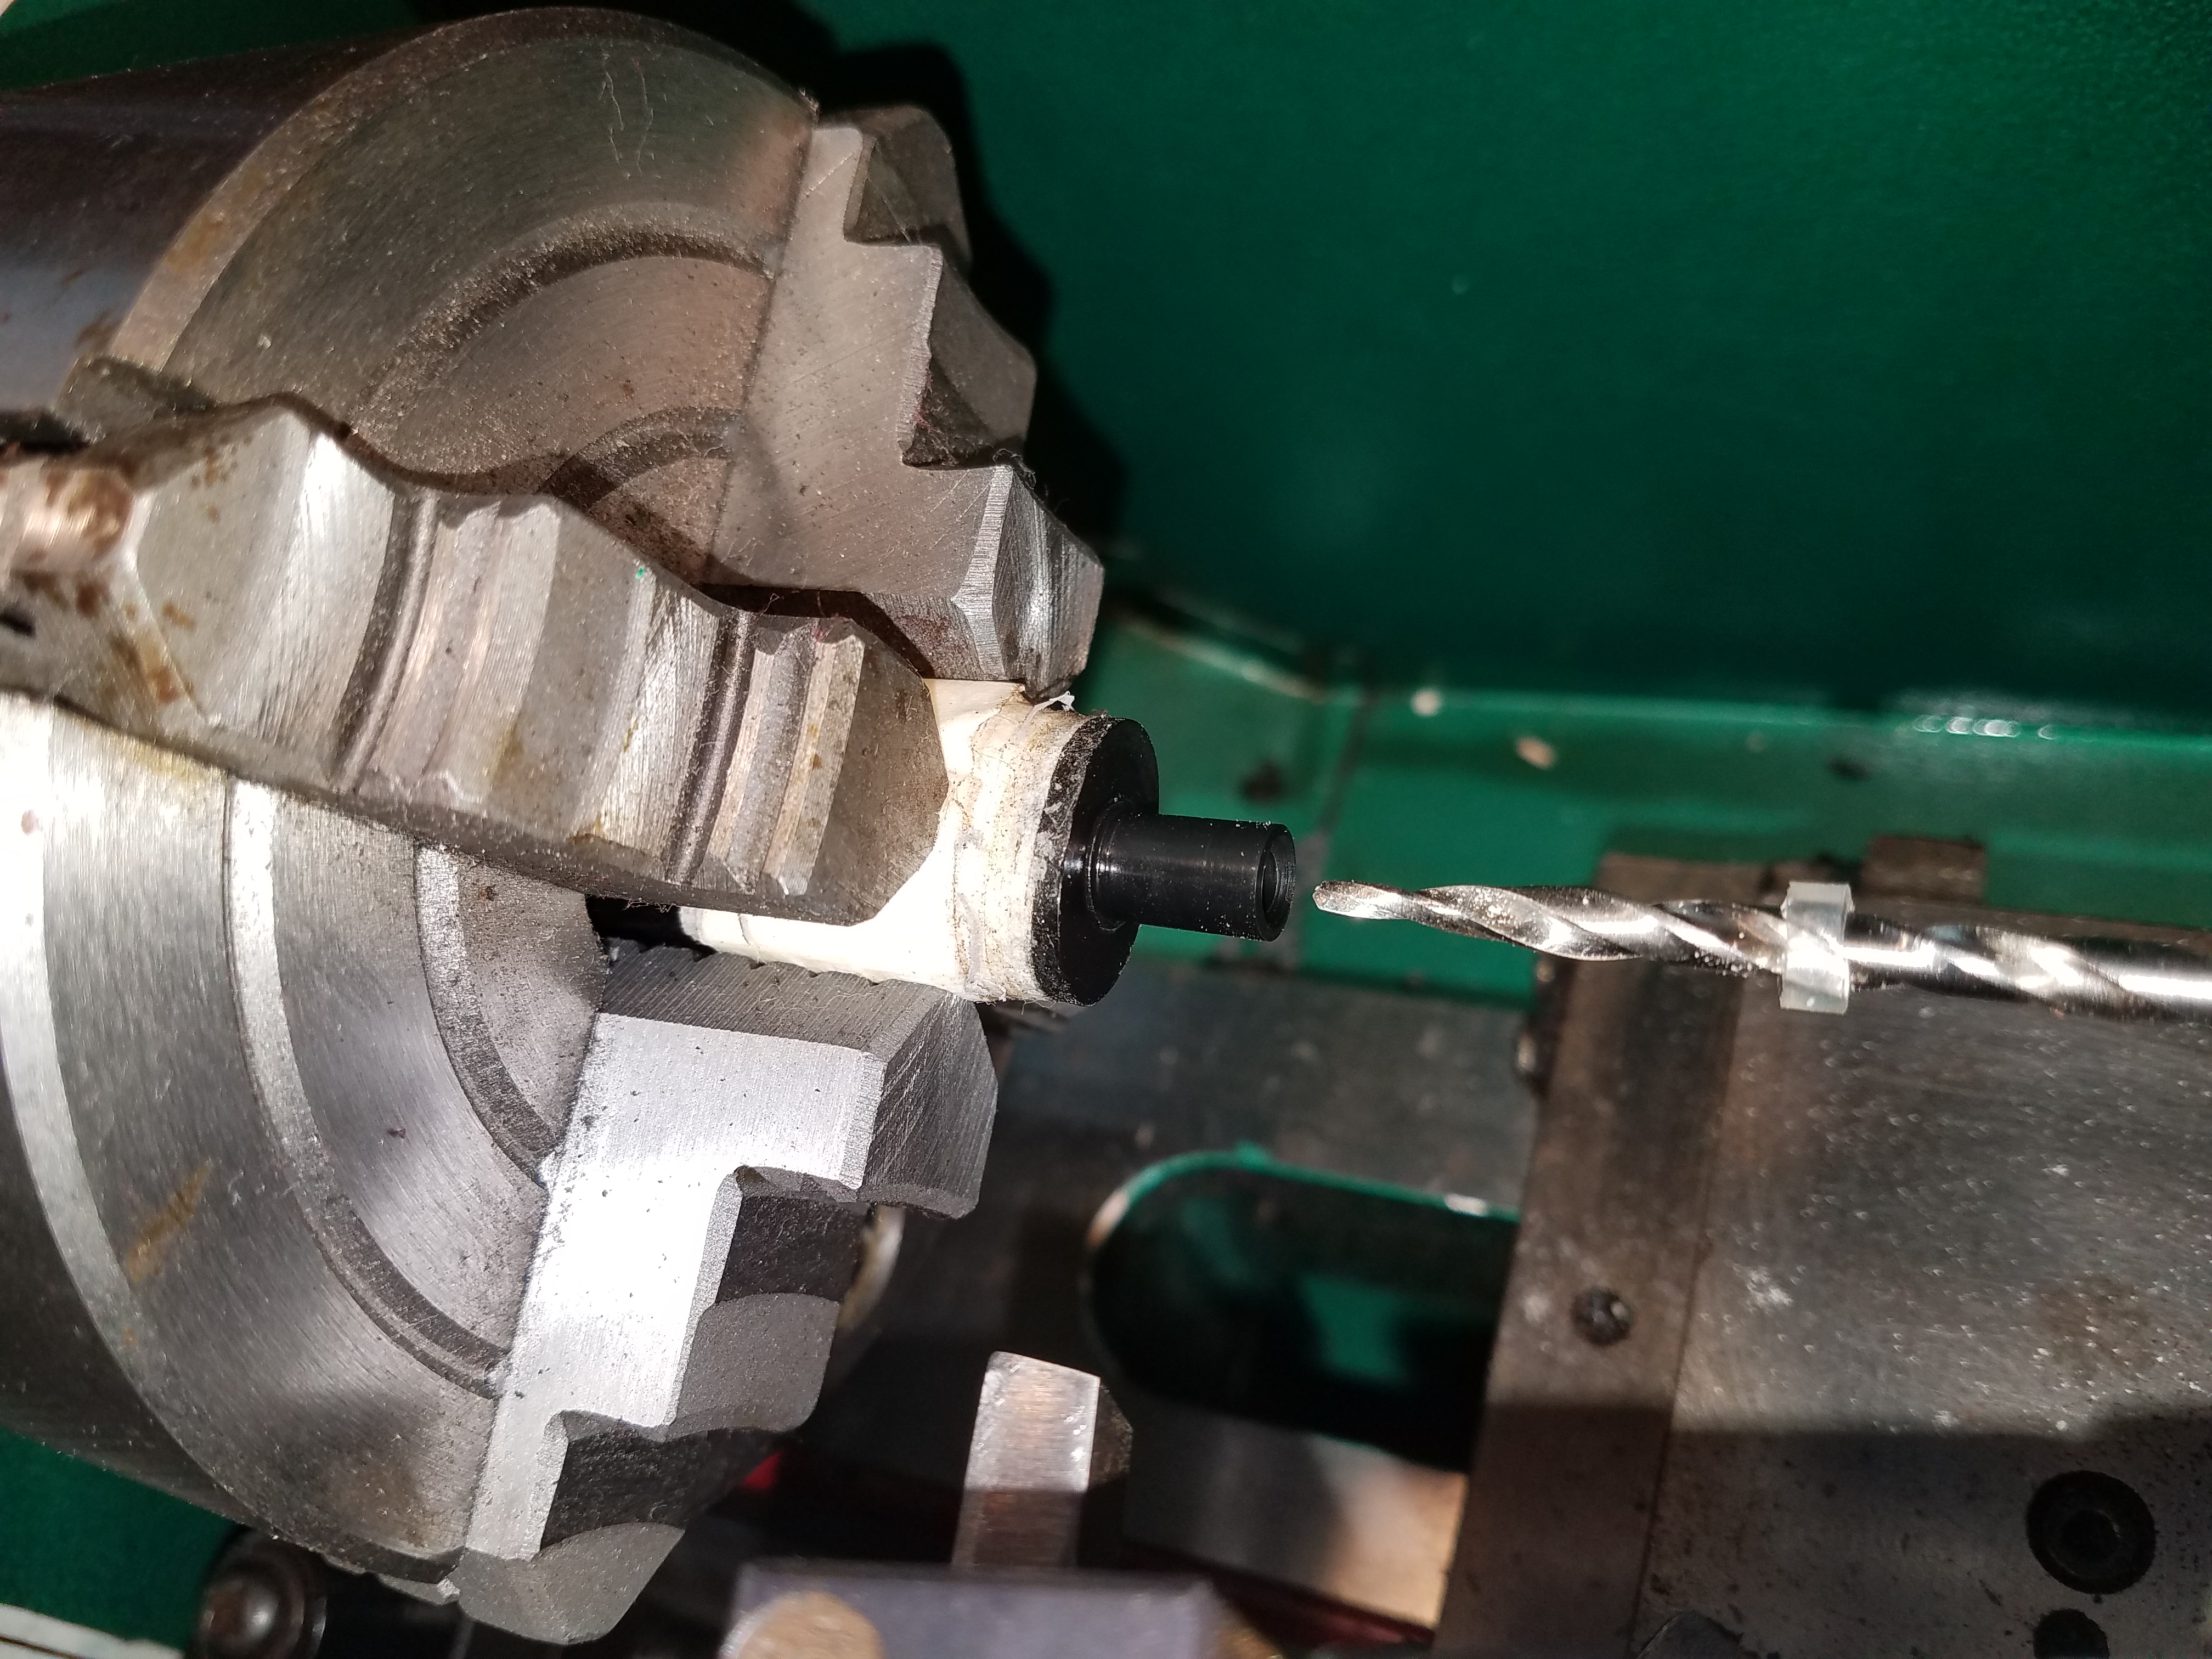
Finally, we drill a hole in the stem to receive the new tenon insert. Here I am drilling a hole ¼ inch deep. I’m using a drill bit that is just slightly less than 5/16 inch by about 10 thousandths of an inch. This allows for a tight press fit of the new tenon into the stem which helps strengthen that weak link between the stem and tenon insert. This press fit is critical for a long lasting repair and it is the reason why we had to be so accurate in aligning the stem. There will be no “play” in the joint that could be used to slightly shift the tenon insert and allow for alignment after a poorly centered hole is drilled. Precision is the price we pay for a long lasting repair.
The final hole is shown below. I used a saw blade to scratch some grooves into the sides of the hole which can be seen if you look closely at the wall of the bore. Again, this is to provide some texture for the epoxy to grab onto and improves the strength of the tenon.
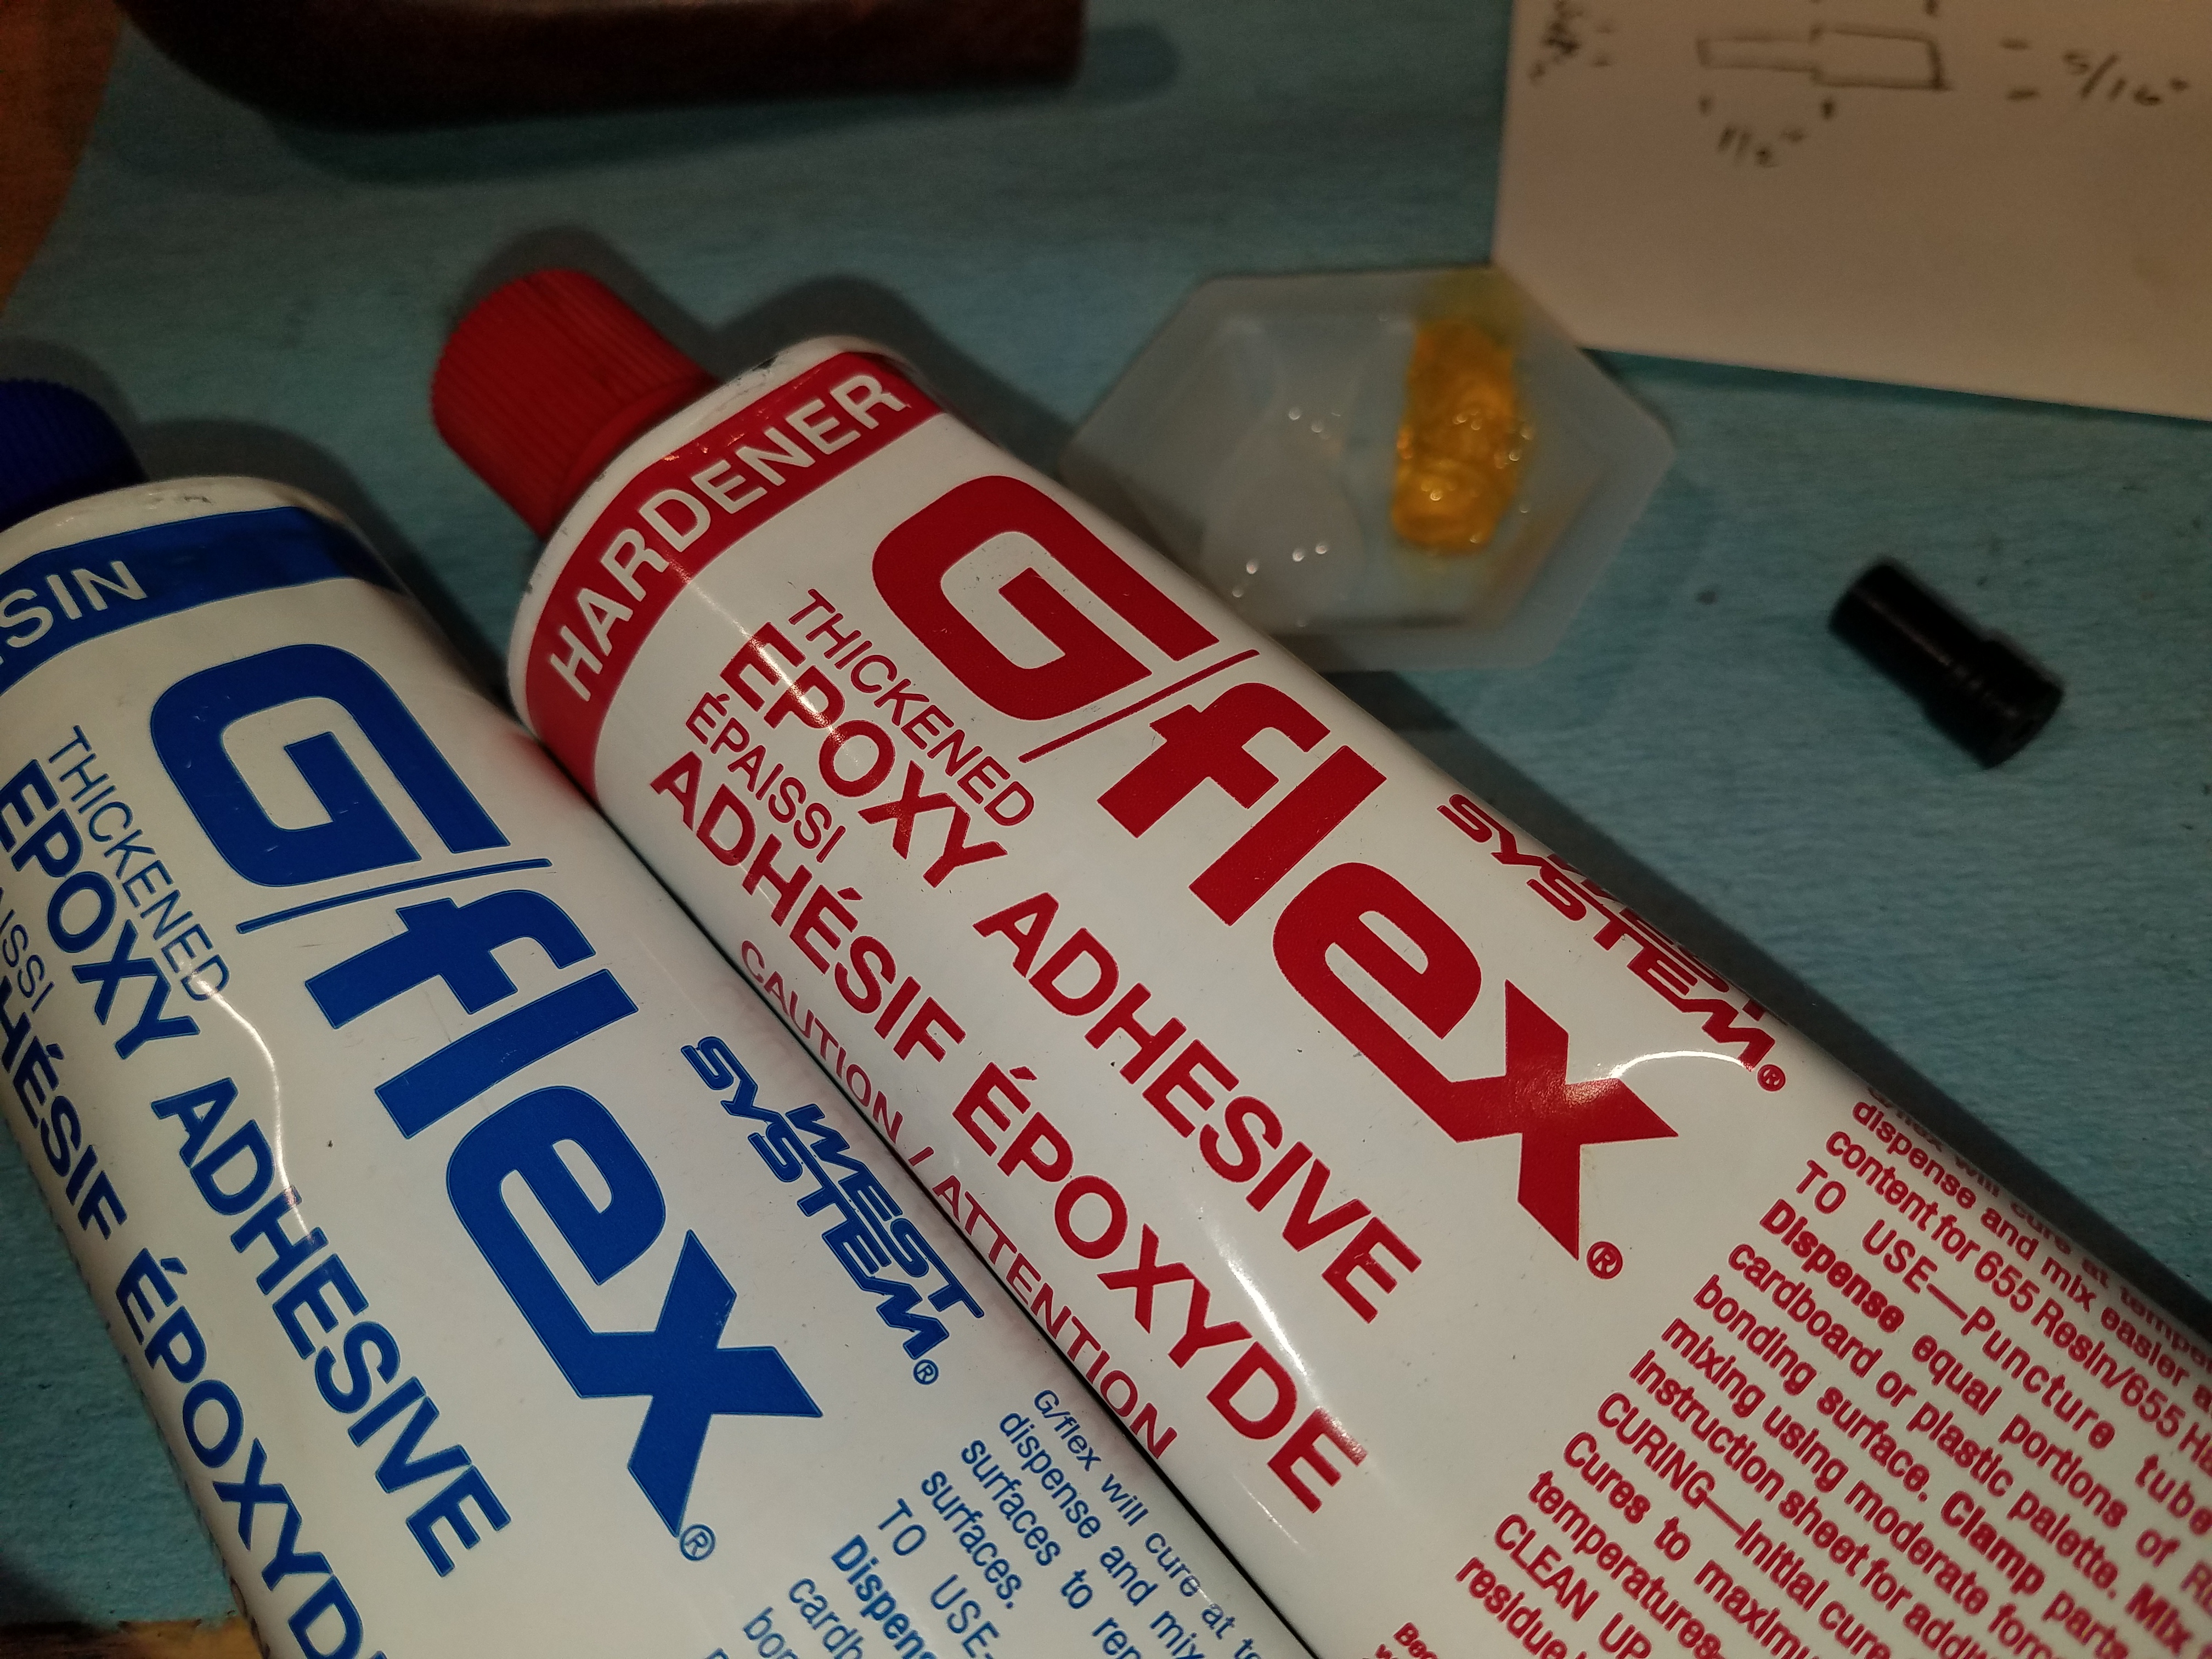
I next mix up the epoxy. I’m using the West System G/flex epoxy that is discussed in a previous article. This epoxy is more expensive than hardware store 5 minute stuff, and it requires a lot more time to cure, but it provides the most reliable bond I have been able to attain and I would not choose anything else for this use.
Epoxy is placed in both the stem hole and all around the tenon insert. The insert is then pressed into the stem using a center point in the lathe headstock to keep everything on center. Before taking the picture below, I used a paper towel soaked in denatured alcohol to remove the epoxy that had squeezed out from the joint.
The epoxy requires 24 hours to reach full working strength, but it is temperature sensitive, and the shop is a bit cool at this time of year. I therefore allow 48 hours before I do anything else. If I needed the lathe I might have done the steps below after 24 hours, but I would not try and fit the stem to the pipe for at least 48 hours.
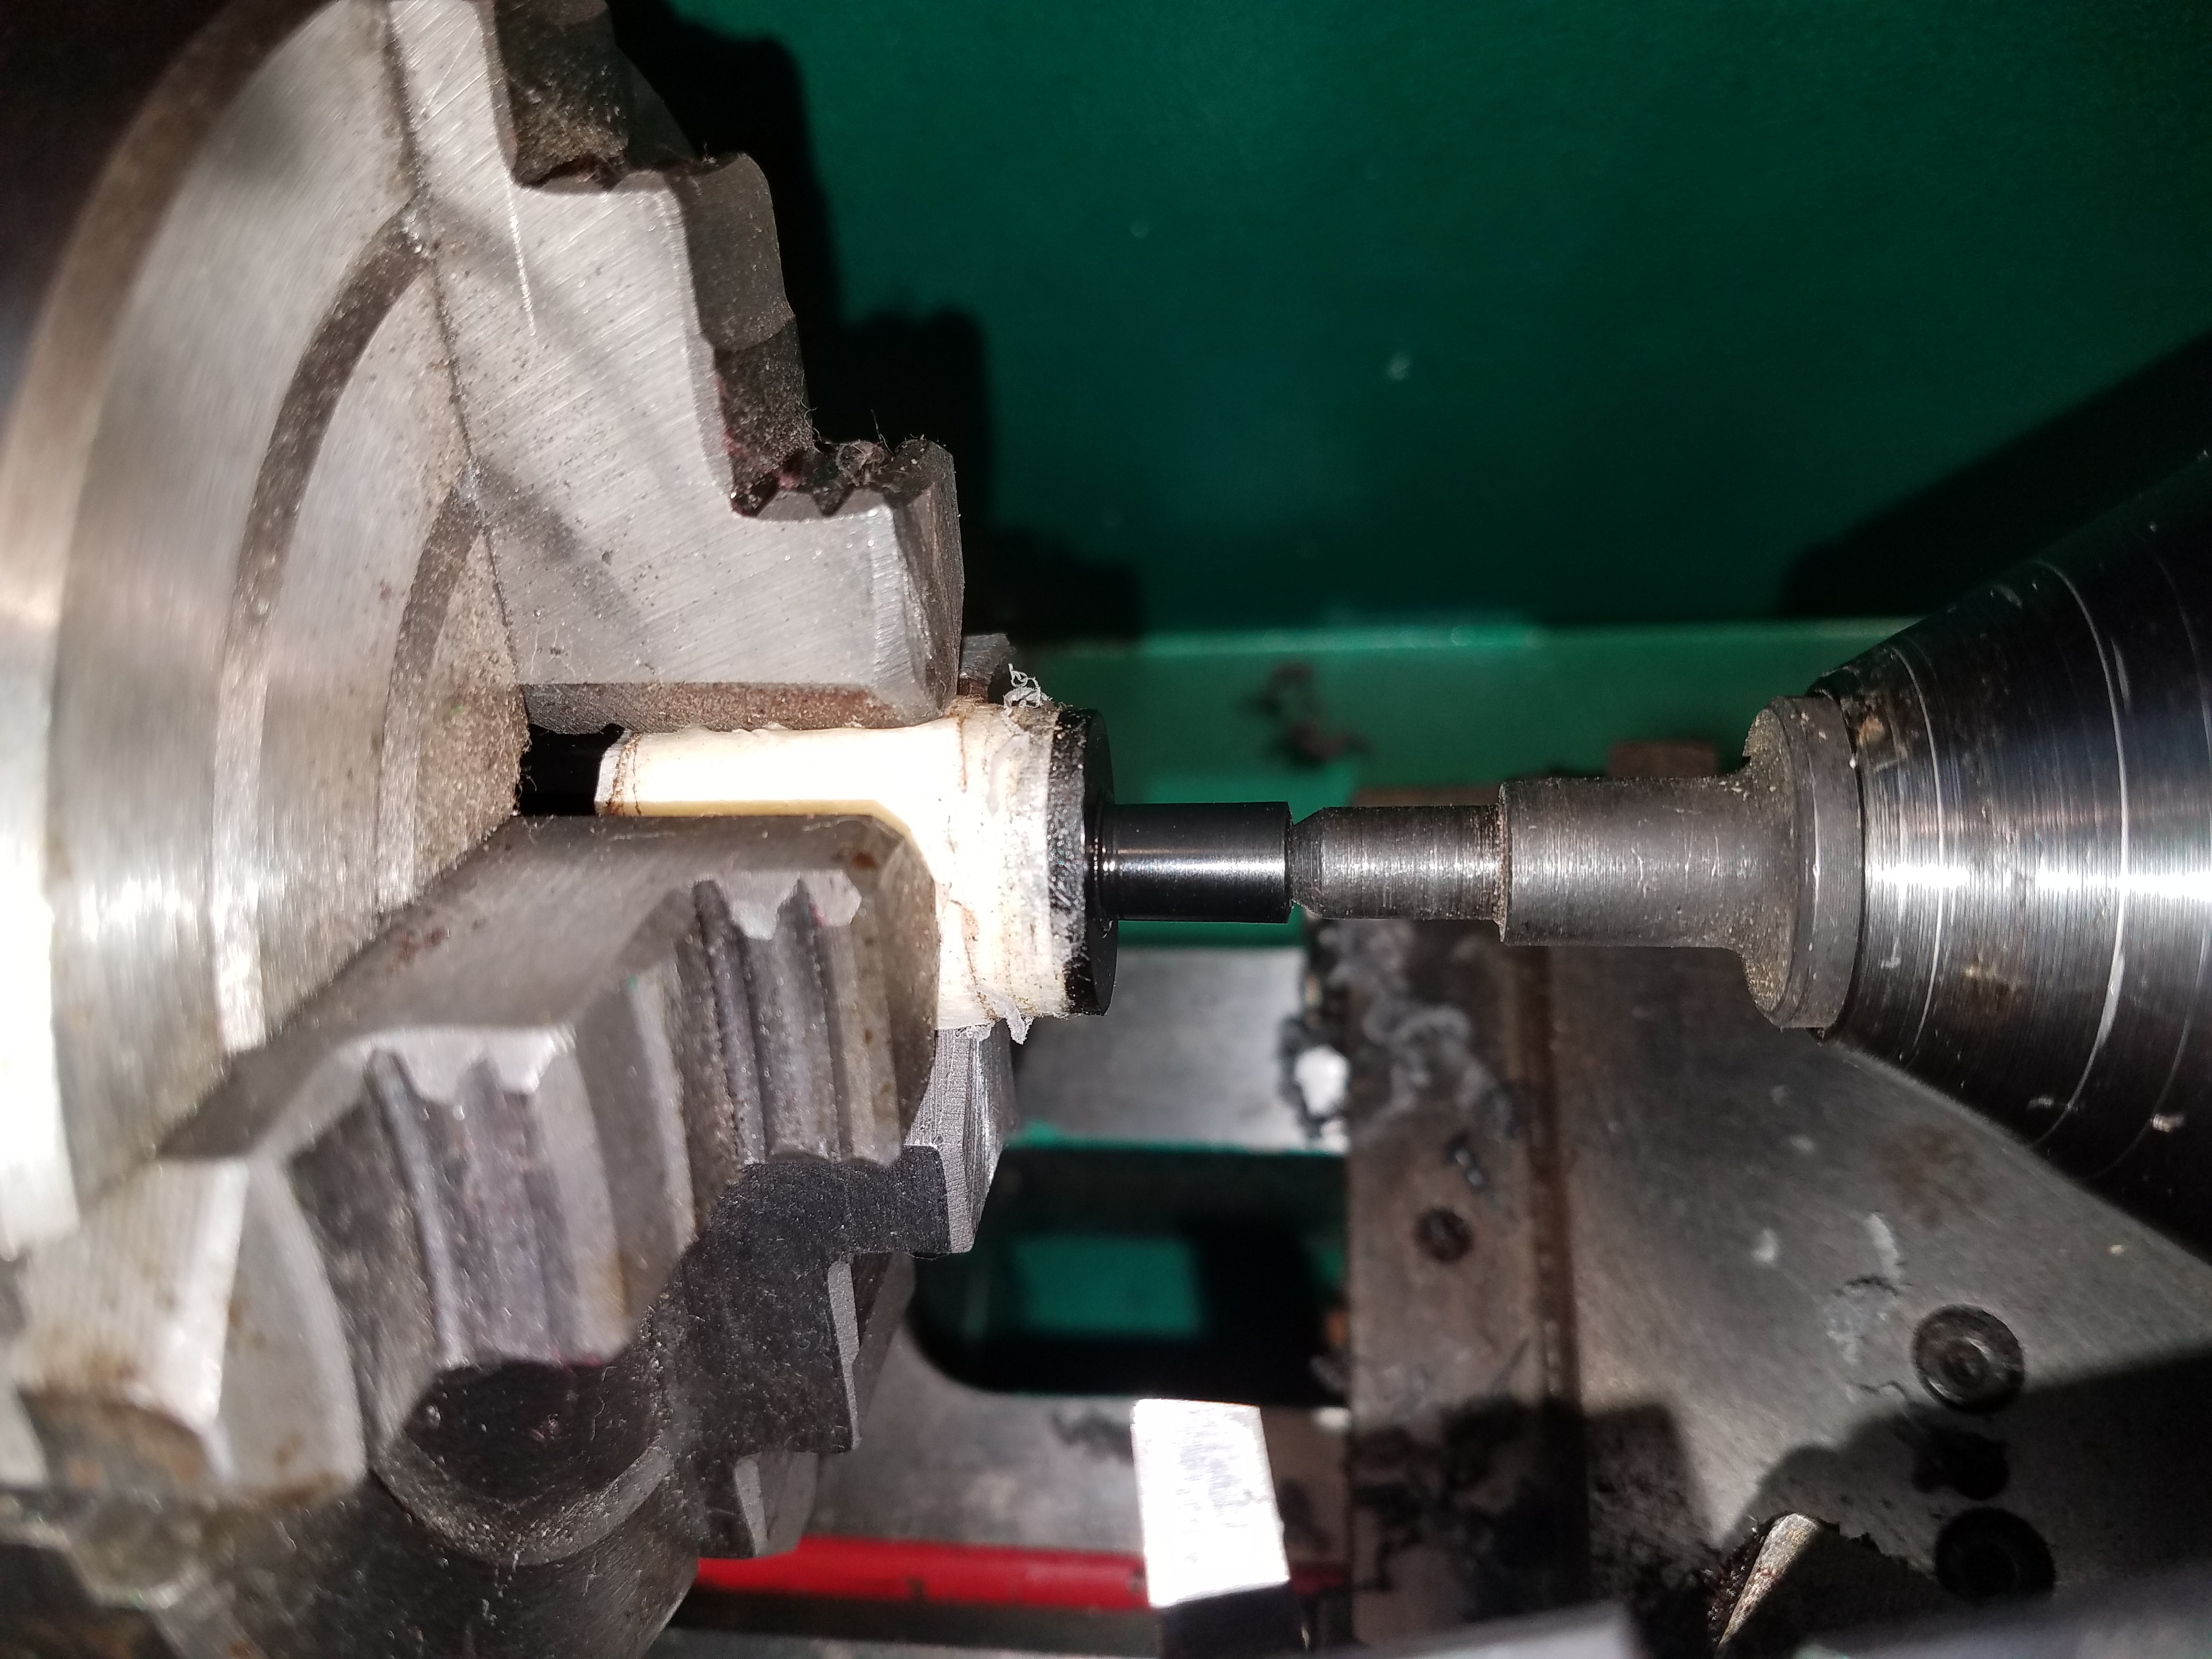
After 48 hours of curing time, I take the last step of drilling the tenon/stem assembly using a tapered drill bit. I’ve measured the bit to drill 1 inch from the end of the tenon. The tenon is ½ inch, and the stem insert is ¼ inch. So by drilling a tapered hole 1 inch into the stem we will form a smooth taper that will eliminate any steps in the airway that could occur where the 1/8 inch hole in the tenon meets the stem airway that is likely a different diameter. This step is also necessary because the epoxy will almost certainly have pushed into the airway and will need to be cleared.
After the final drilling I remove the stem from the chuck and clean off the tape and sticky residue using denatured alcohol. I also do a quick polish of the airway to smooth it out and remove any bits of delrin or epoxy that might have been left by the drill bit. The new tenon looks like it should, essentially undetectable.
And at last we can test fit the stem. Success!
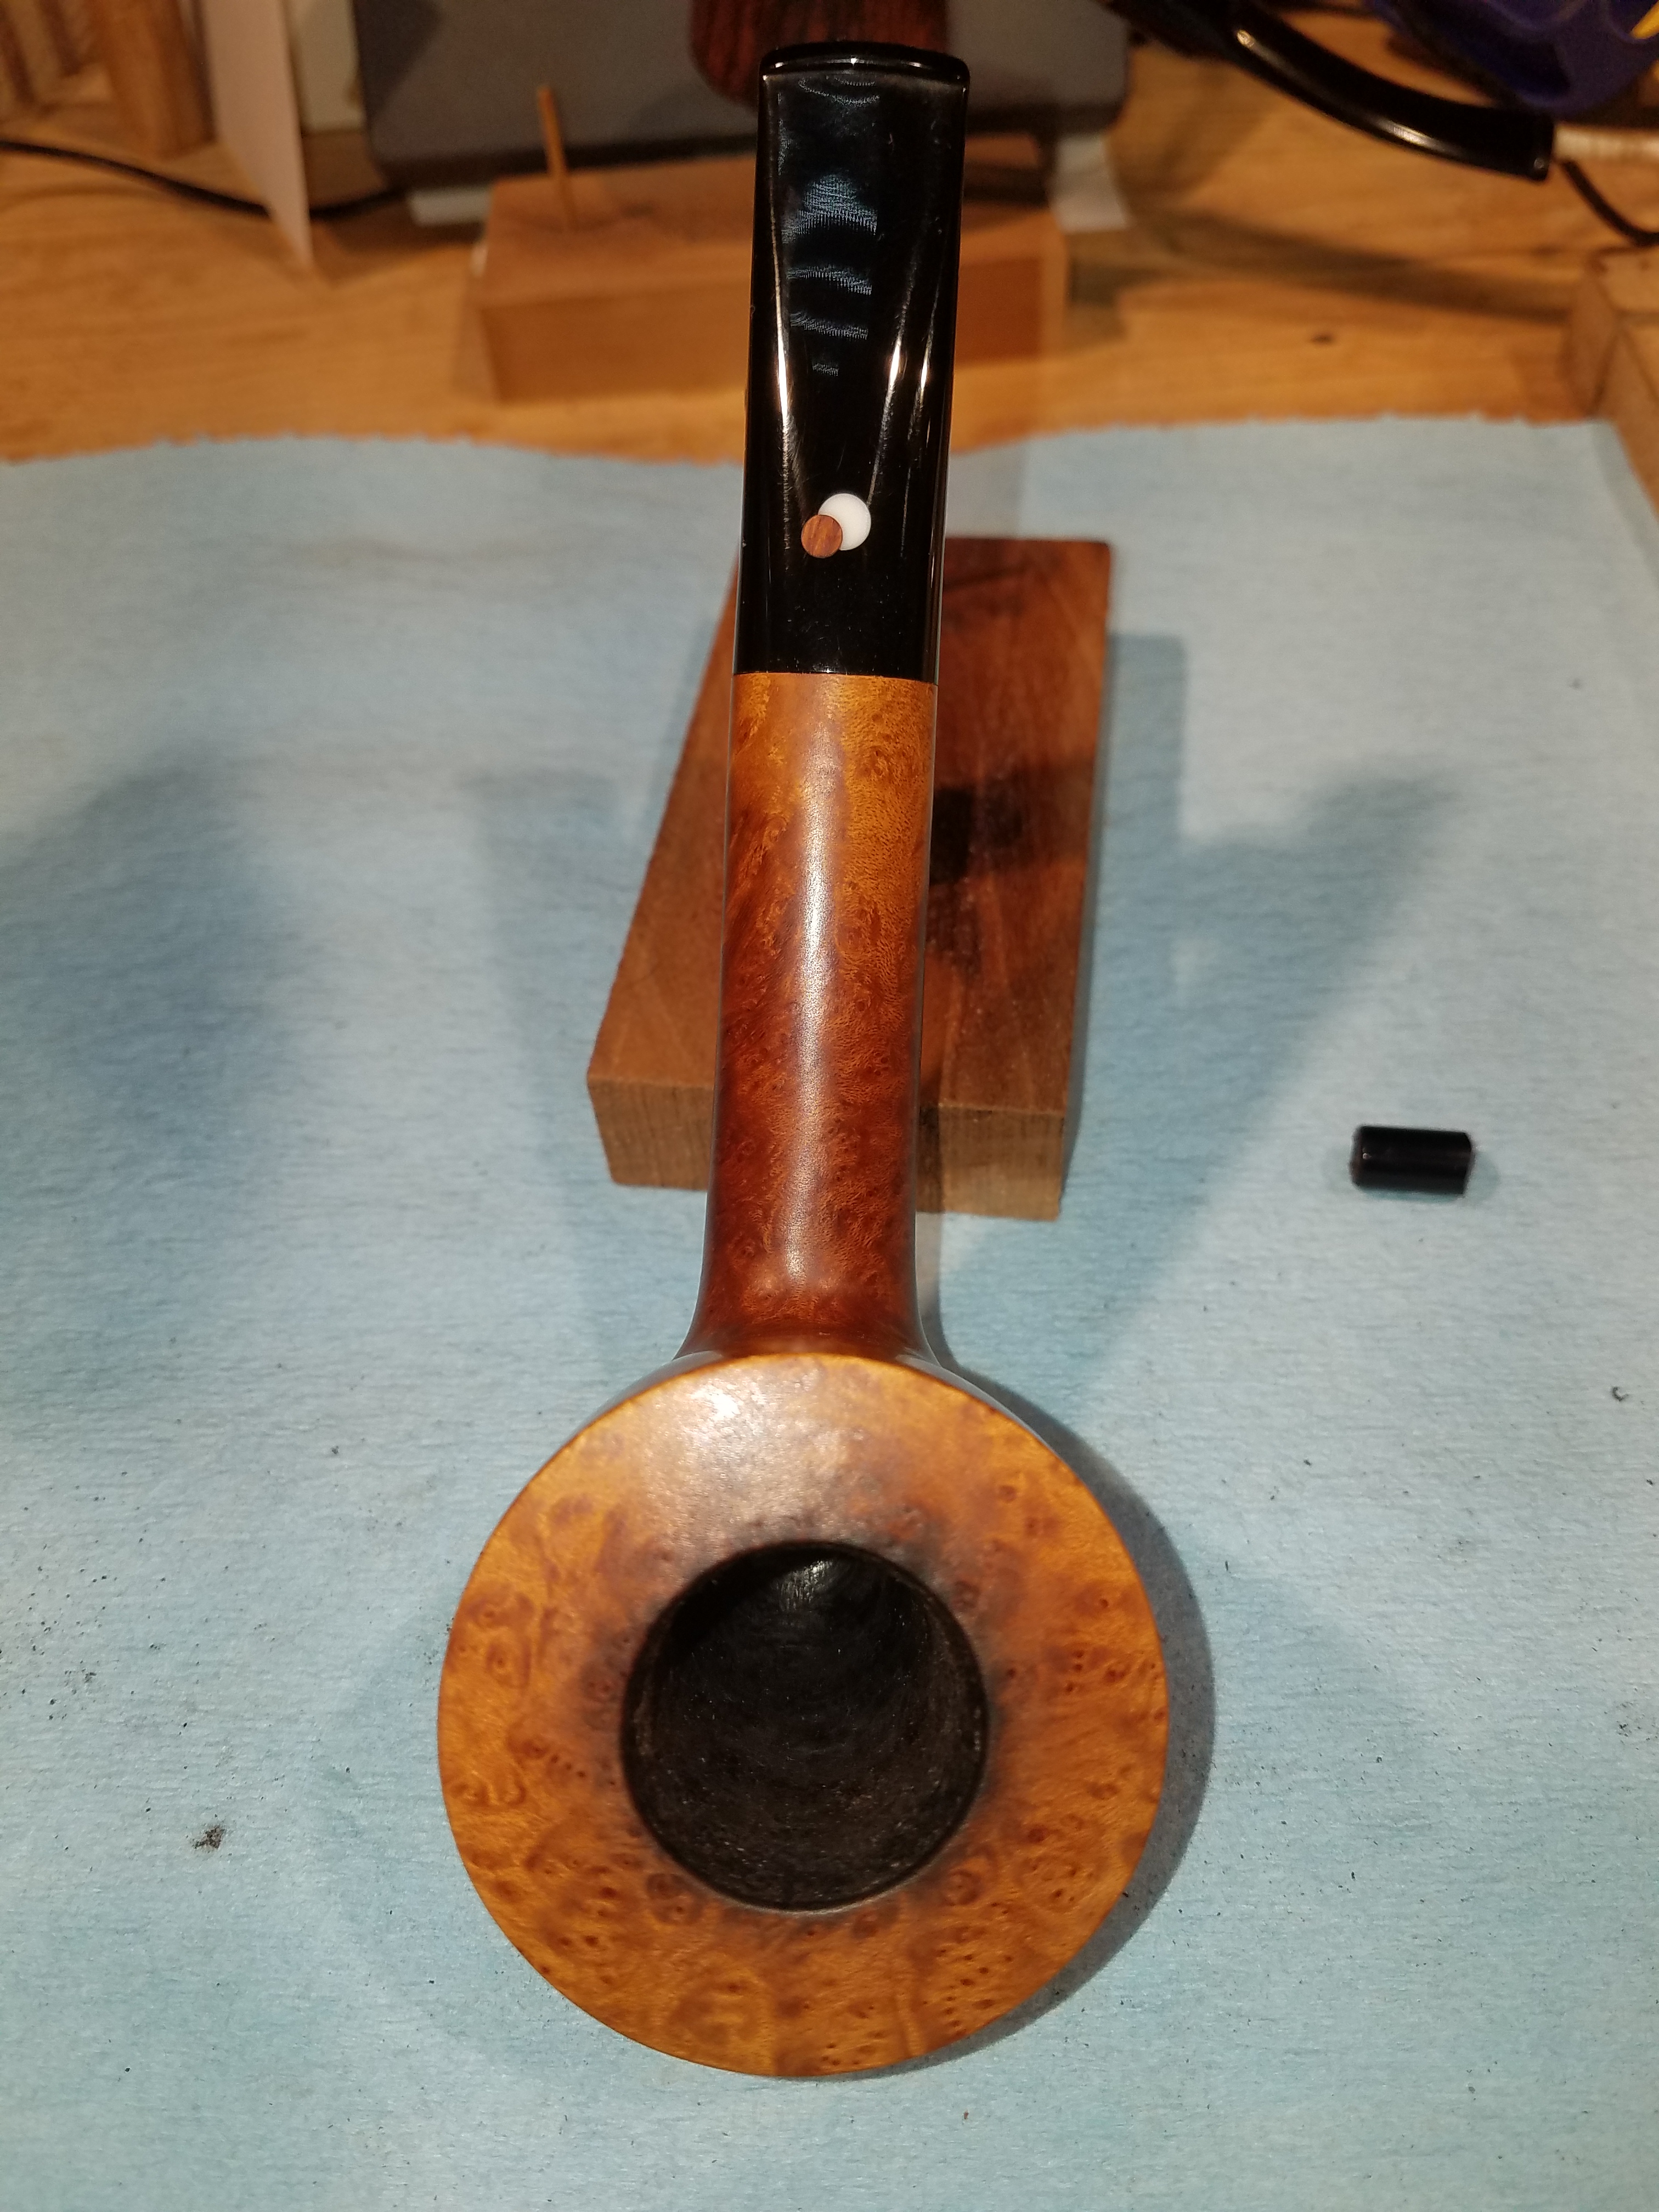
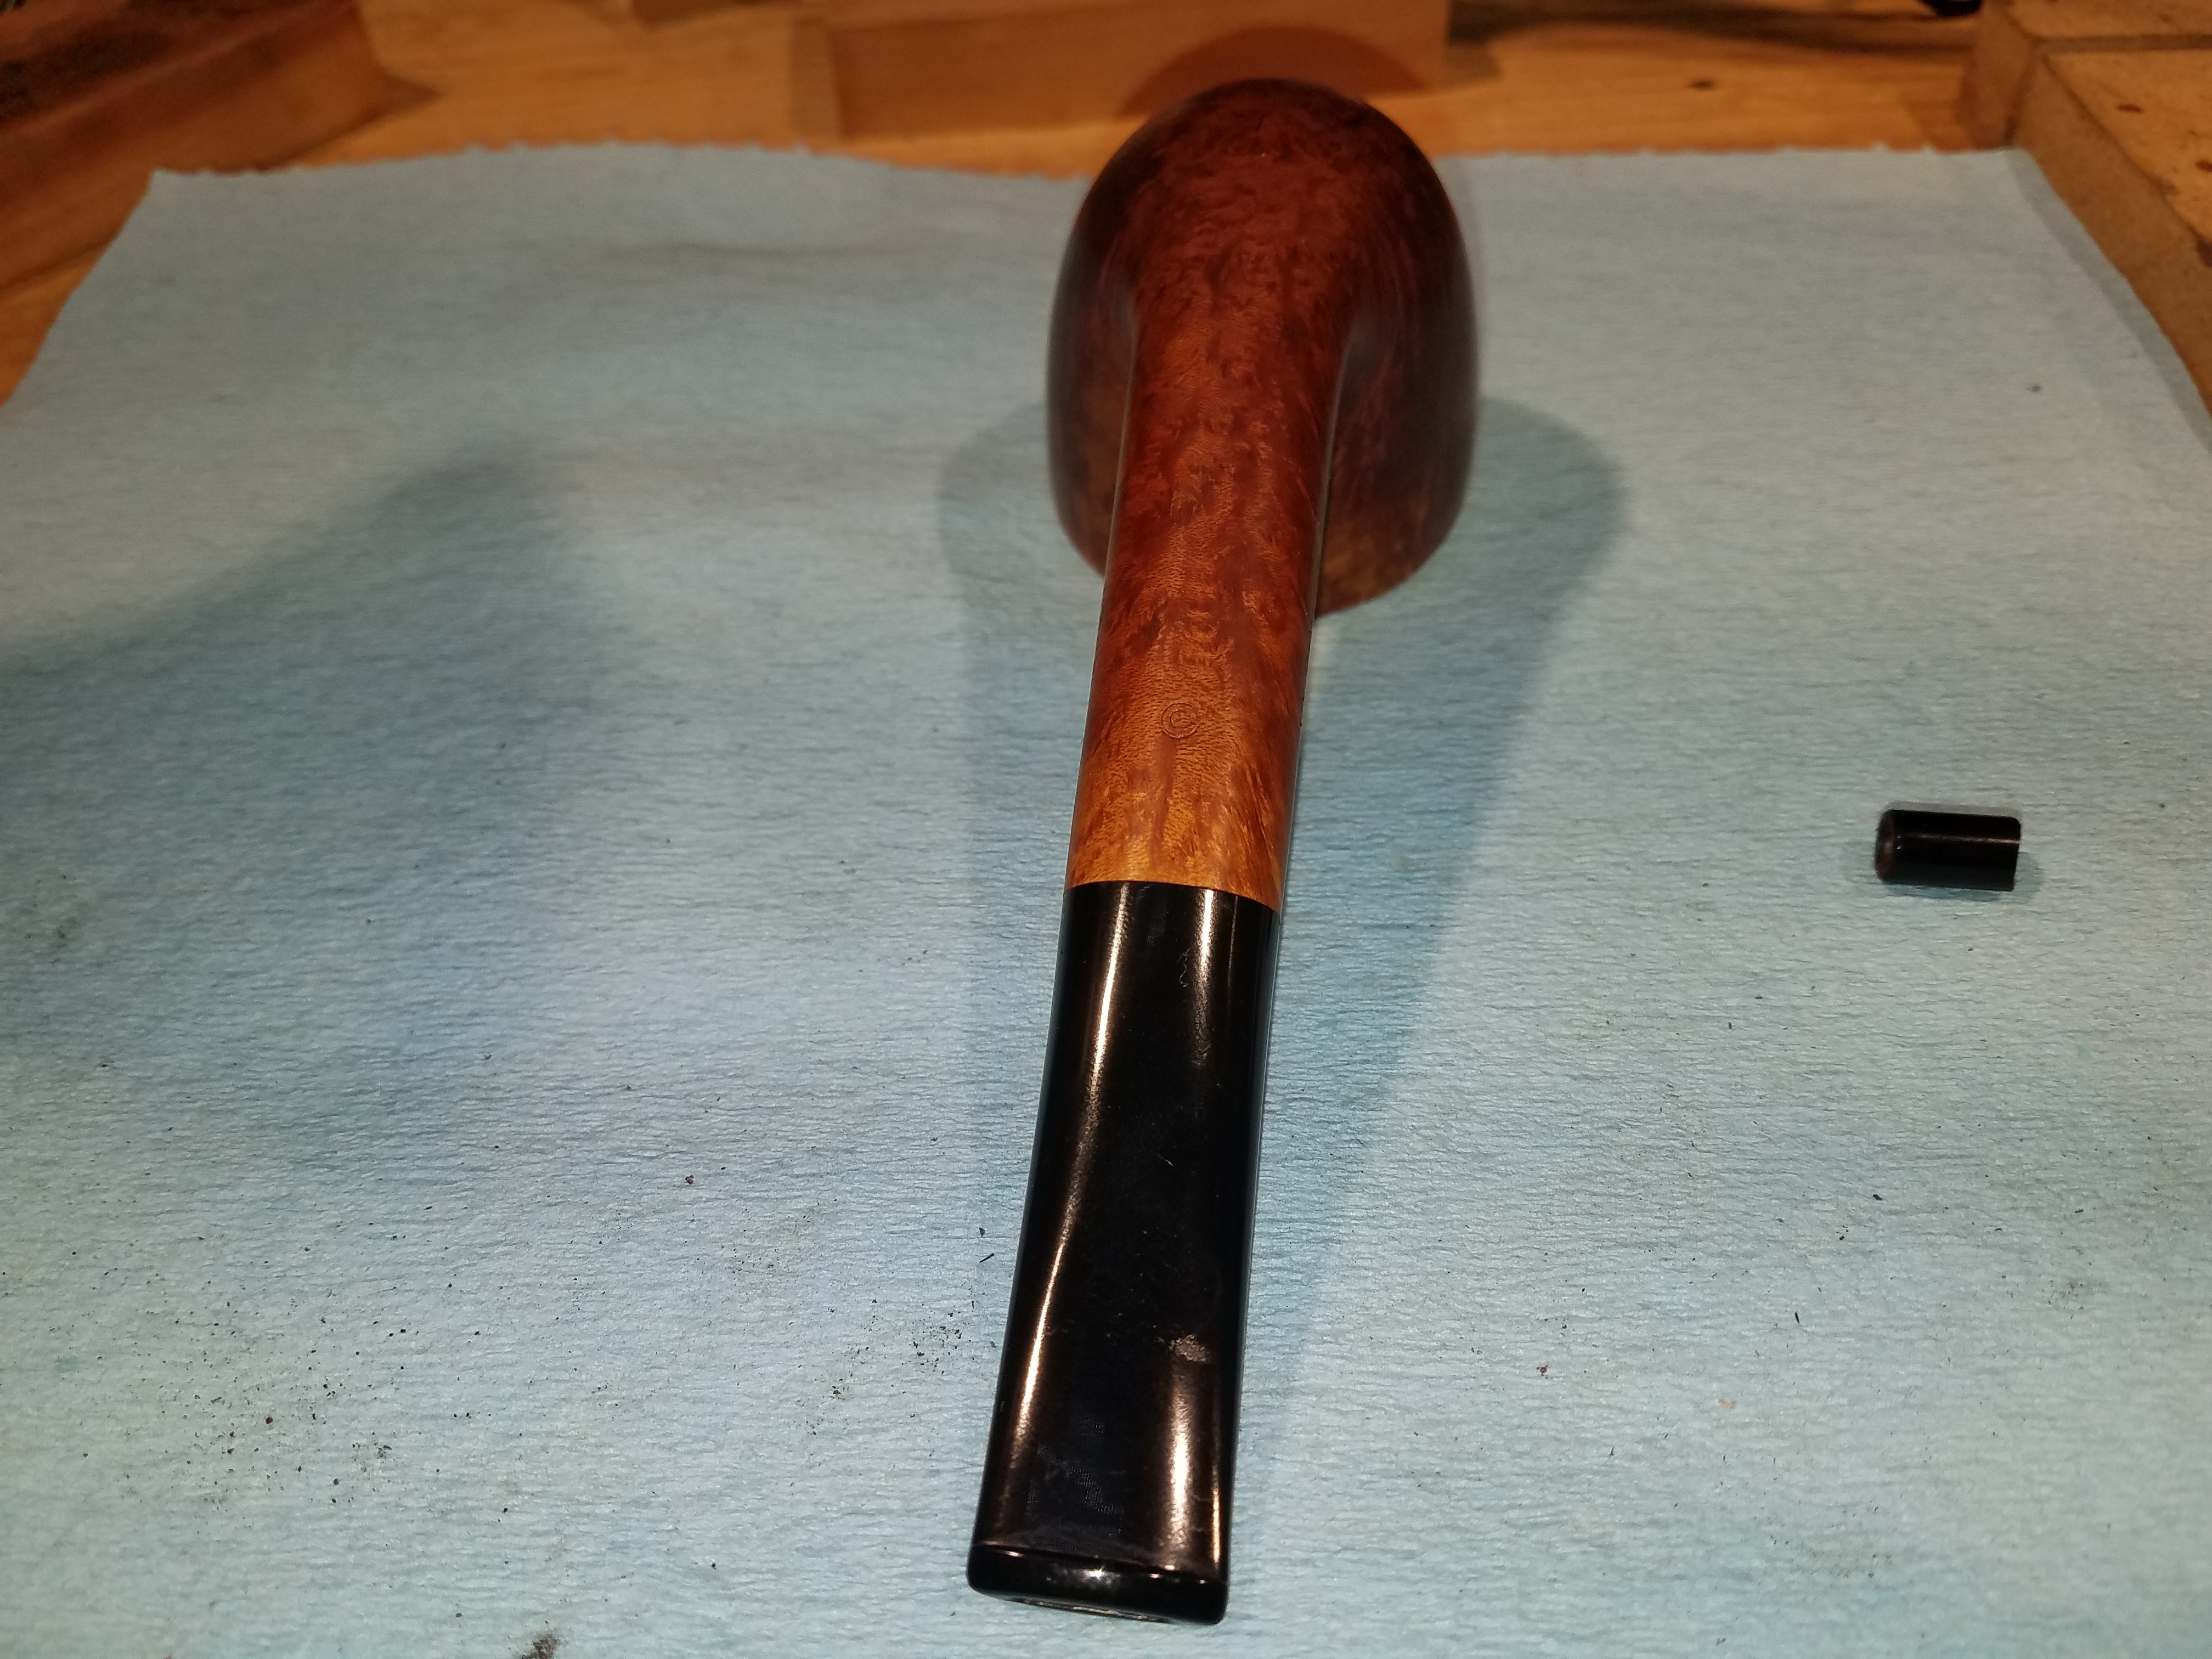
The fit is good, and the tenon slides securely in the mortise. The Cavecchi will be back in service with it’s original stem and with hopefully no noticeable difference in performance.
It is important to note that this method is not foolproof and can not be used on all stems. The best stems for tenon replacement are straight and either round or square in cross section. Bent stems can be straightened for repair, but the button end of the stem must be able to fit through the chuck and the lathe headstock, so not all stems can be chucked. And an odd shape can be built up with tape for the chuck, but it will sometimes slip which can lead to stem damage. So I always warn the owner that this method may wind up destroying the stem. But if the alternative is to replace the stem anyway, it is always worth trying.
Hi Mike, Excellent technique and description thereof…..with an ideal result. I’m sure that the customer was thrilled.
I’m guessing that the test-fit of a newly repaired stem is quite a “hold your breath” moment!! Best, Jerry
From: CaneRodPipes Blog To: jerryseidler@att.net Sent: Monday, March 26, 2018 7:22 AM Subject: [New post] Perfecting the Tenon Replacement #yiv7954760511 a:hover {color:red;}#yiv7954760511 a {text-decoration:none;color:#0088cc;}#yiv7954760511 a.yiv7954760511primaryactionlink:link, #yiv7954760511 a.yiv7954760511primaryactionlink:visited {background-color:#2585B2;color:#fff;}#yiv7954760511 a.yiv7954760511primaryactionlink:hover, #yiv7954760511 a.yiv7954760511primaryactionlink:active {background-color:#11729E;color:#fff;}#yiv7954760511 WordPress.com | CaneRodPiper posted: “One of the most common repairs I’m asked to do involves a snapped tenon. Most of the time the pipe arrives with the tenon stuck in the mortise and the stem in otherwise perfect condition. It is always possible to cut a new stem for the pipe, but often t” | |
Yes, you never know if it will line up. But when it does, it’s a very good feeling.
I have s Savinelli Tundra 620 and the tenon split when I dropped it on the floor. Can you fix it for me or recommend someone?
Either Tim West at J.H. Lowe or Jim Finn at PremiumPolishedPipes will be able to help. You can find both of them through Google. Good luck with the repair!