
I’m not sure that this post will be everyone’s cup of tea, but coffee is better anyway so…
The Pseudo-Problem
It was rattling around in back of my mind for months. An impending problem would certainly arise. I could see it, the aftermath, the damage. But the problem itself refused to yield. Well, that is not quite fair. It yielded perfectly to the pedestrian rubber band, or the oh so common drinking straw. But I knew I could do better, and the clock went on ticking.
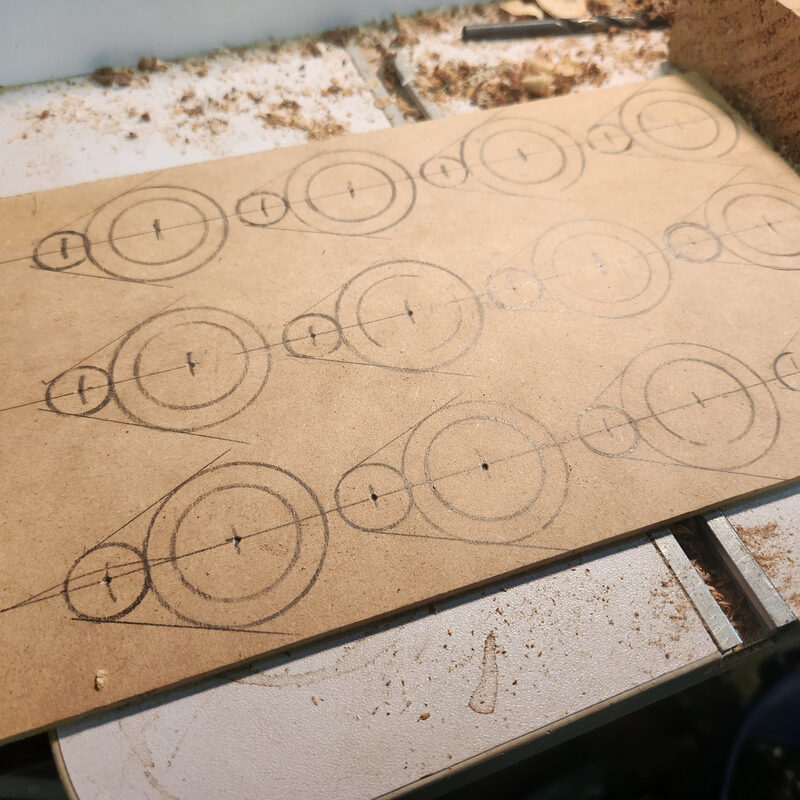
The first flash came to me about three weeks ago. I remember now thinking, “well…maybe…” But then something shiny caught my eye and I forgot all about it. But tidying the shop this past Saturday I glanced at a clipboard that held a sheet of scribbled paper and I saw the sketch below. Echos from a past I cannot recall. A note from past me to present moment me that I could not decipher. What the heck was that supposed to be. I took measurements…what was I thinking. Really, I would love to know what I was thinking.
And then it hit me. The problem I was facing…well, the potential future problem I might be facing had a solution. It was right here, and either I came up with a solution and forgot, or I intended this for an entirely different problem. I grabbed a pencil and compass and began playing with the sketched design. It did not take long before I could generate an outline that would be reproducible, and just might be functional. The drawing only required 2 compass measurement and a straight center line.
Building a solution
Now I am not one to launch directly in to building the perfect. When I do that, it takes me months if not years to complete. I have learned that a prototype made as quickly as possible will allow for quick trouble shooting and adjustments followed by a much less stressful production of the final item. Not that this was a very complicated build, but you know what they say about old habits. So a mock up was made from the finest cardboard box.
It worked! Well, it worked about as well as a hacked up piece of cardboard could. But inspired by this, I transferred the pattern to some 1/8” thick hardboard and produced a very nice final prototype that actually worked better than I had hoped. It turns out that message in a bottle sent across time from past me was a bit of golden inspiration.
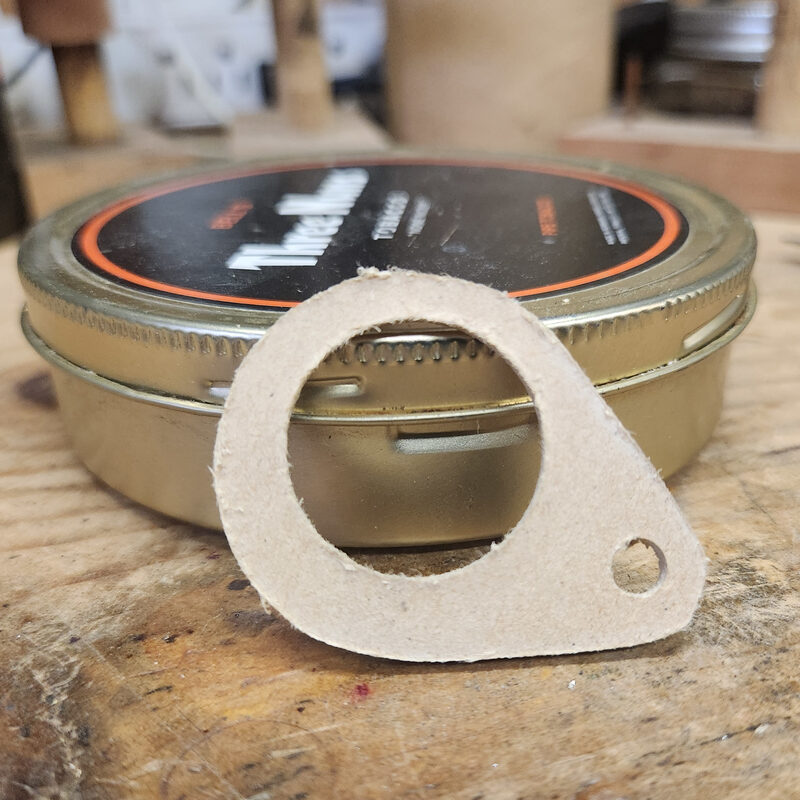
And yes, I know the drilling is off center. It doesn’t matter and I just didn’t bother to carefully center the fostner bit.
Production
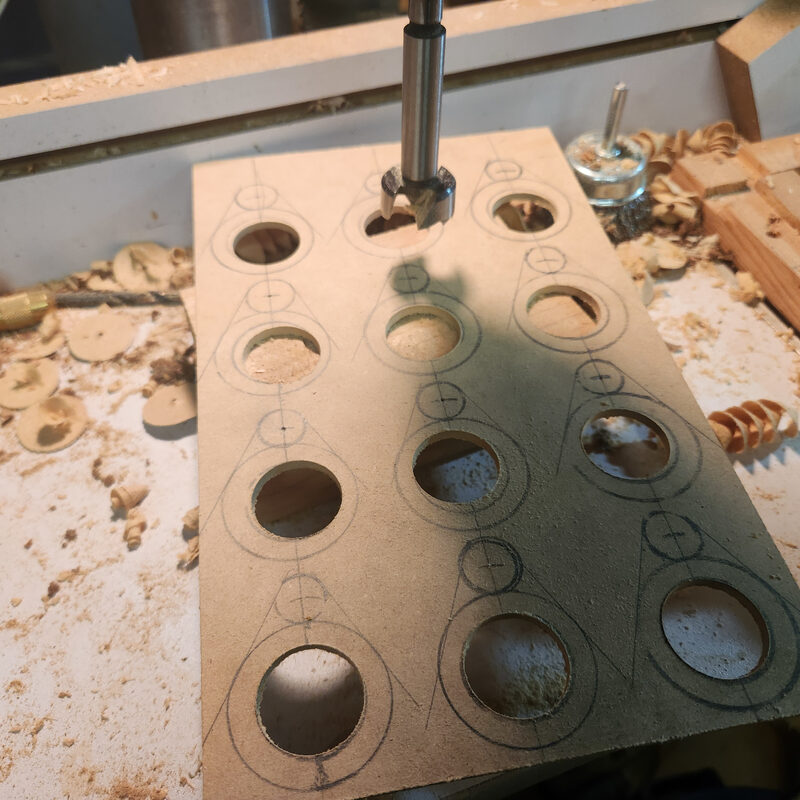
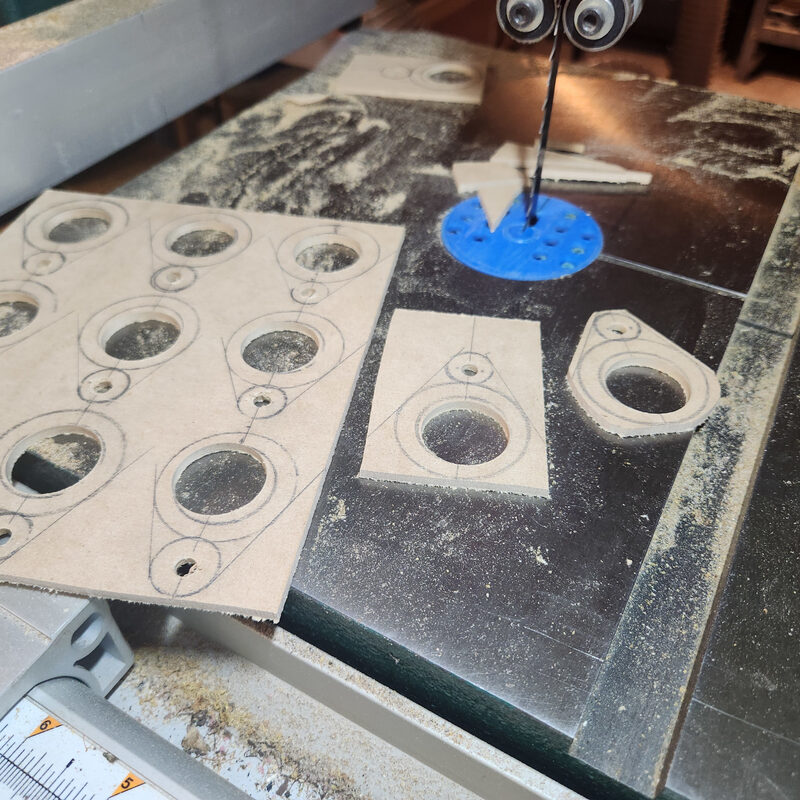
On to a production run (oh, did I mention I need a lot of these do hickeys?). First I laid out as many as I could on a piece of hardboard. Frankly the compass slipped a few times and the circles vary a bit in size. Since I was already drilling off center I figured I would just go forward and make what works rather than what is perfect (see, that prototype thing really speeds things up).
Next I just had to drill all the 1 inch holes followed by all the 7/32” holes. I had pre-punched the centers but…I swear I was sober.
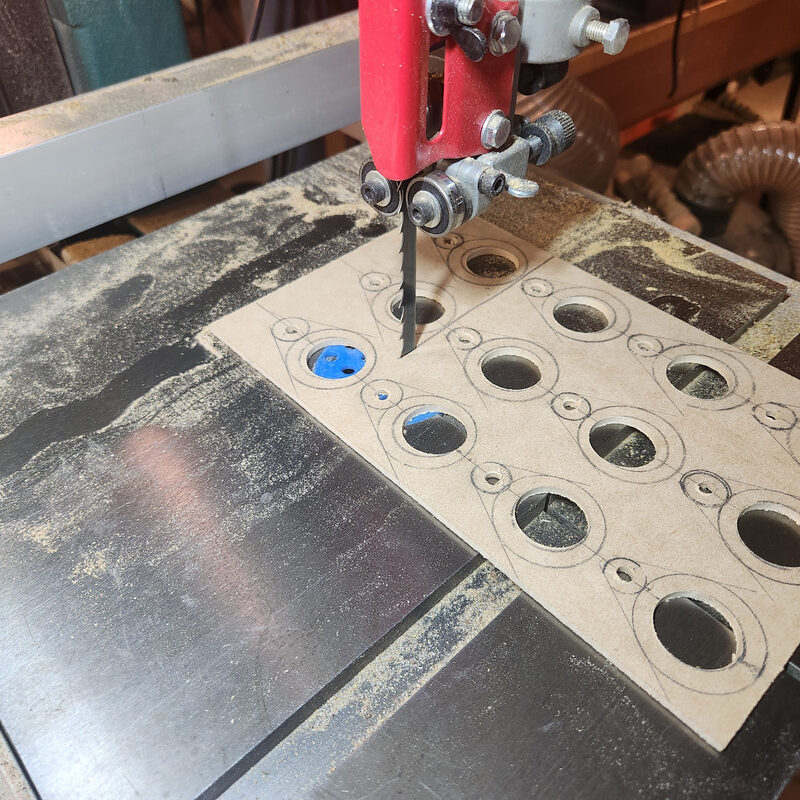
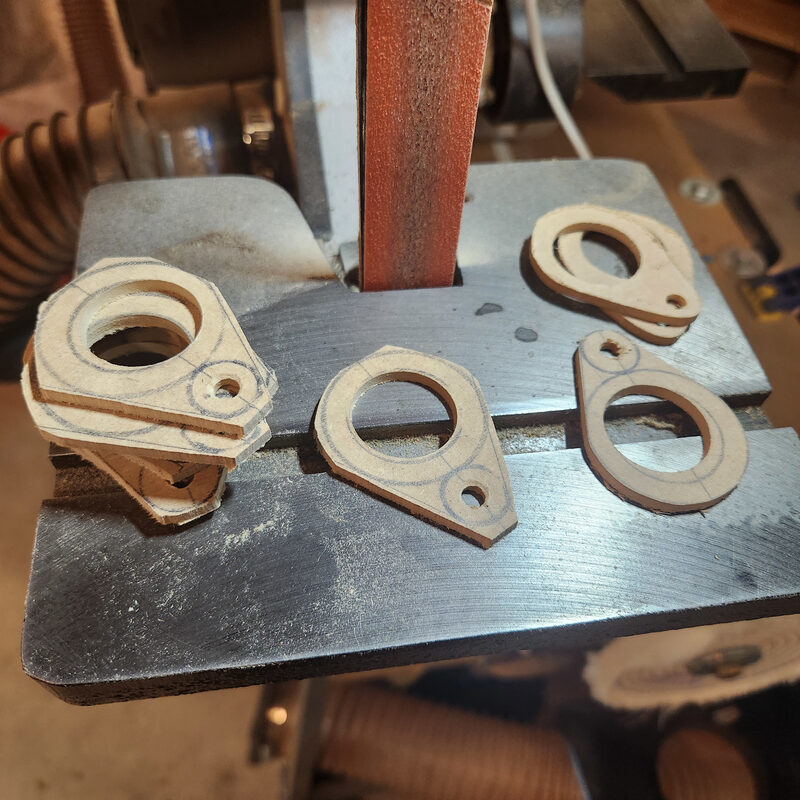
Now each group of three was separated on the bandsaw and each individual do hickey was progressivily cut to rough size. I had to violate my typical 2 inch rule regarding the bandsaw blade (i.e. keep you hand 2 inches from the blade) but I went very slowly and made sure I always knew where my non-dominant hand was. I respect power tools because I know what damage they can cause. But the bandsaw has always held the highest degree of respect in my mind. Sure table saws can cause a lot of damage, and a wood lathe can kill you. But usually that is because the operator was doing something stupid. Bandsaws are sneaky (and come to think of it, they might be colluding with the cats for world domination..but I digress).
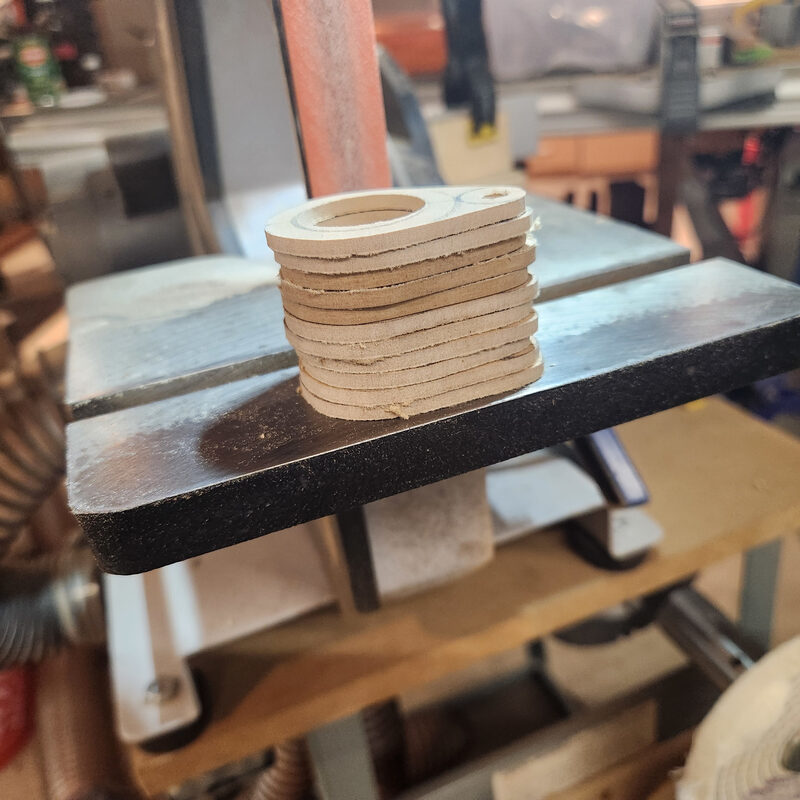
Finally, the whole stack moved to the 1 inch belt sander for final shaping. Soon I had a whole stack of do hickeys ready for service.
But Why??
Well, by now I am sure that you have figured it out. The purpose of these wonderful inventions (patent pending by the way…just kidding. Measured drawing at the end of the post of you for some odd reason want to reproduce these exactly as intended and clearly not as they turned out).
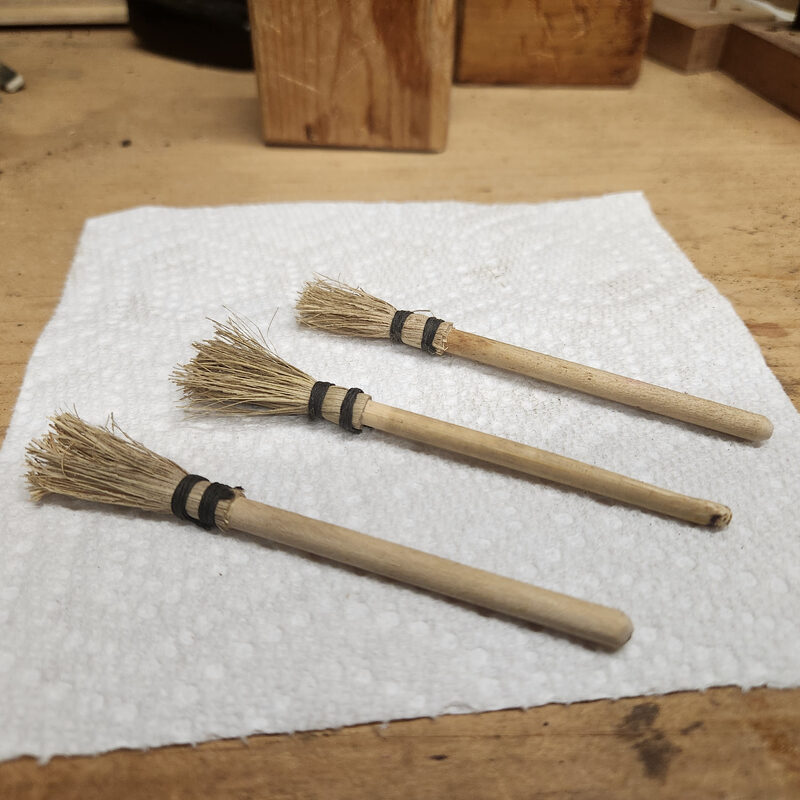
I have been mixing some custom pipe stains and re-bottling some commercial stains in Boston round bottles just to keep things neat and uniform, or at least uniform. I also came across a wonderful Japanese brush called a hakobi during a stint of fascination with Japanese wood block printmaking. You can learn more about the hakobi and how they are made in this video from David Bull’s shop, and I highly reccomend watching all of the videos from David Bull and supporting his mokuhankan print shop. He is a wise man!
I bought some bamboo culmns and set to making my own hakobi. After many failed attempts, I finally came up with a method to reliably make these brushes and they do a wonderful job of applying stain. I know a pipe cleaner does the job, but these hold more stain and allow the surface to be fully wet before the alcohol starts flashing off.
Yes, unnecessary, but it’s the kind of thing I enjoy doing. If there is interest in seeing how I make these let me know in the comments.
So I now have a reusable brush for each stain, and you can see the problem. How do I store them such that they stay associated with the right bottle. Enter the greatest thing since baked bread, the bottle mounted stain brush holder!
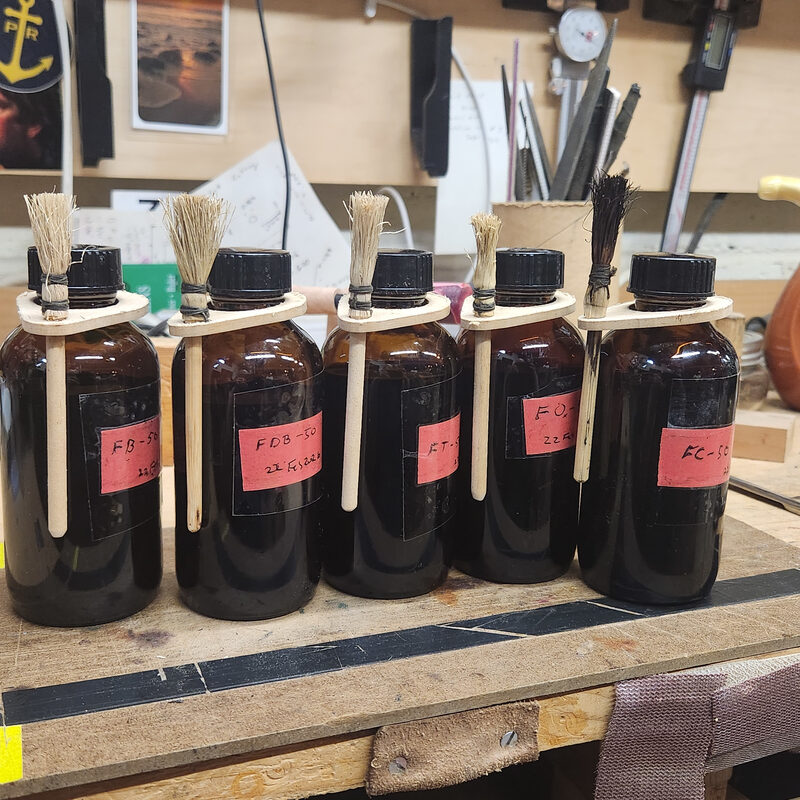
Okay, all kidding aside, these did solve a problem for me. They hold the brush with the bottle. The holder fits over the bottle threads but will not come off once the lid is in place. All in all I think it is a nice example of how an idea simmering at that back of your mind can eventually yield a result that makes life a little bit easier. I had fun with this one because it really was a problem that never needed to happen. I could have just used pipe cleaners and tossed after each use. And you might be able to make a convincing argument that it would be the better option. But I enjoy a challenge and trying new things. Perhaps it is not better, but it feels better, and that really is much more important in my humble opinion.
Thanks for reading, and if you enjoyed this and want to be alerted to whatever might be going on in the workshop. Be sure to subscribe to the blog and go to CaneRodPipes: www.canerodpipes.com to sign up for the mailing list.
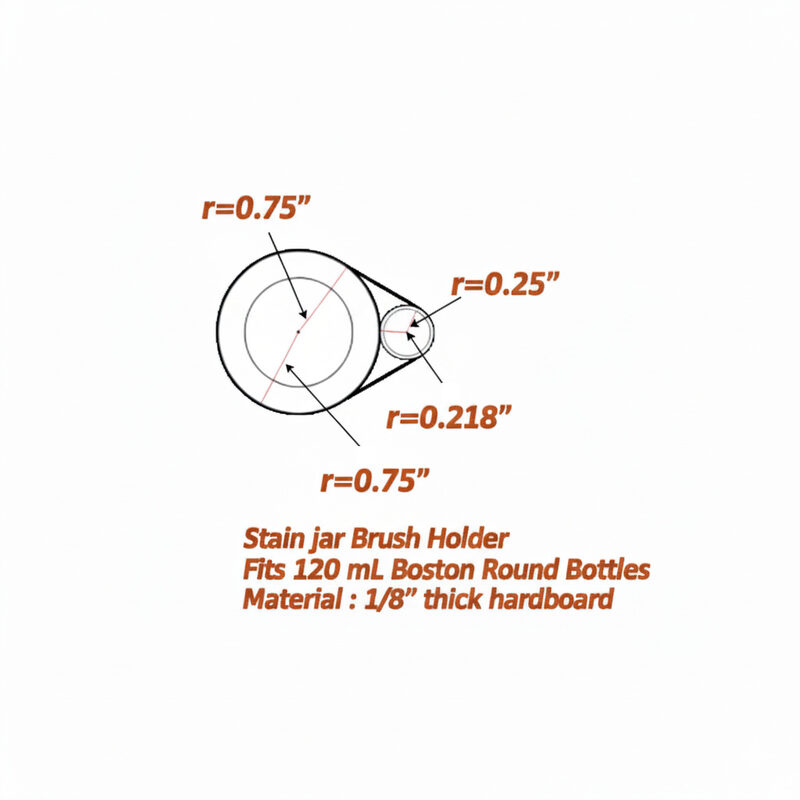
Here are the actual specs—before the bandsaw and the wandering drill bit got involved.