

In woodworking, the chisel edge is the most fundamental of sharp edges. Planes are just chisels held in a jig, and saws are just long rows of tiny chisels. So understanding chisels is fairly important. I own a lot of chisels, and have spent the better part of 20 years obsessing over what type of steel sharpens best and holds an edge, how to get them sharp, and how to maintain the edge. I can honestly say now that I wasted a lot of time and money on this obsession.
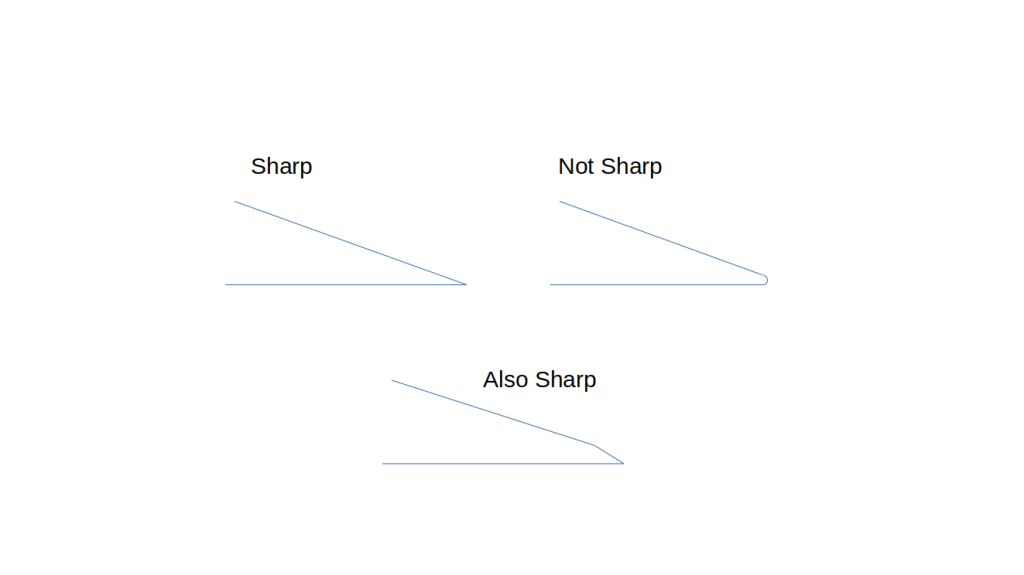
I think the best definition of sharp I have heard or read is that a sharp edge is formed by the perfect intersection of two polished surfaces. Frank Strazza describes this well and has a very good video on -chisel sharpening . His method is a bit different from mine a you will see below but the results are the same. This is not intended to be a sharpening post, but we need to have a basic understanding of what constitutes a sharp chisel in order to fairly assess a tool. Sharp the intersection of two polished surfaces (relatively polished in my opinion), but one or both of those two surfaces can be quite short as is the case when a secondary bevel is used. The also sharp example below shows a secondary bevel added to the primary ground bevel.
As I see it, there are really only three key points that need to be considered when assessing the quality of a chisel, and a fourth point that is a bit more subjective: 1) can the steel be sharpened, 2) does the edge last, 3) can the edge be easily maintained, and 4) does the fit and finish of the tool lend itself to comfortable work? As mentioned above, this is not intended to be a post about sharpening methods which is a time wasting rabbit hole. Perhaps a future post will explore this a bit more, but if you are looking for a primer on sharpening I highly recommend Christopher Schwarz’s “Sharpen This.” Again his methods are different from mine in ways that don’t really matter, but his ability to cut through the nonsense that has created an industry around sharpening as a hobby unto itself makes this one of the most valuable woodworking books I have ever read.
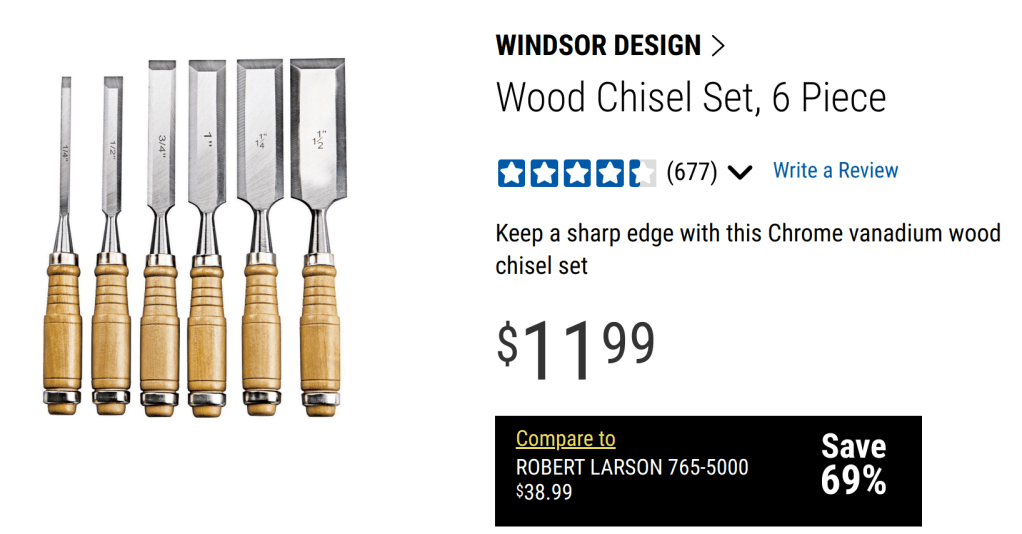
What triggered this post was a trip to my doctors office which happens to take me right past a Harbor Freight store. Now I am not a huge fan of Harbor Freight. They sell a lot of what I can only call junk. But sometimes junk is what I need. For example, I buy a lot of needle files from Harbor freight. I grind them to different profiles and treat them as disposable tools. They get the job done and at $3 for a 12 piece set it does not hurt so much when I throw them away. So I rarely pass up a chance to wander the aisles and see what they might have to offer. On this day a ridiculously prices set of chisels caught my eye. With the ever-present 20% off coupon, these were less than $2 per chisel. The handles were a bit bulky, and chrome vanadium is not generally considered to be a top rate steel for chisels. But at that price I decided to have a bit of fun.
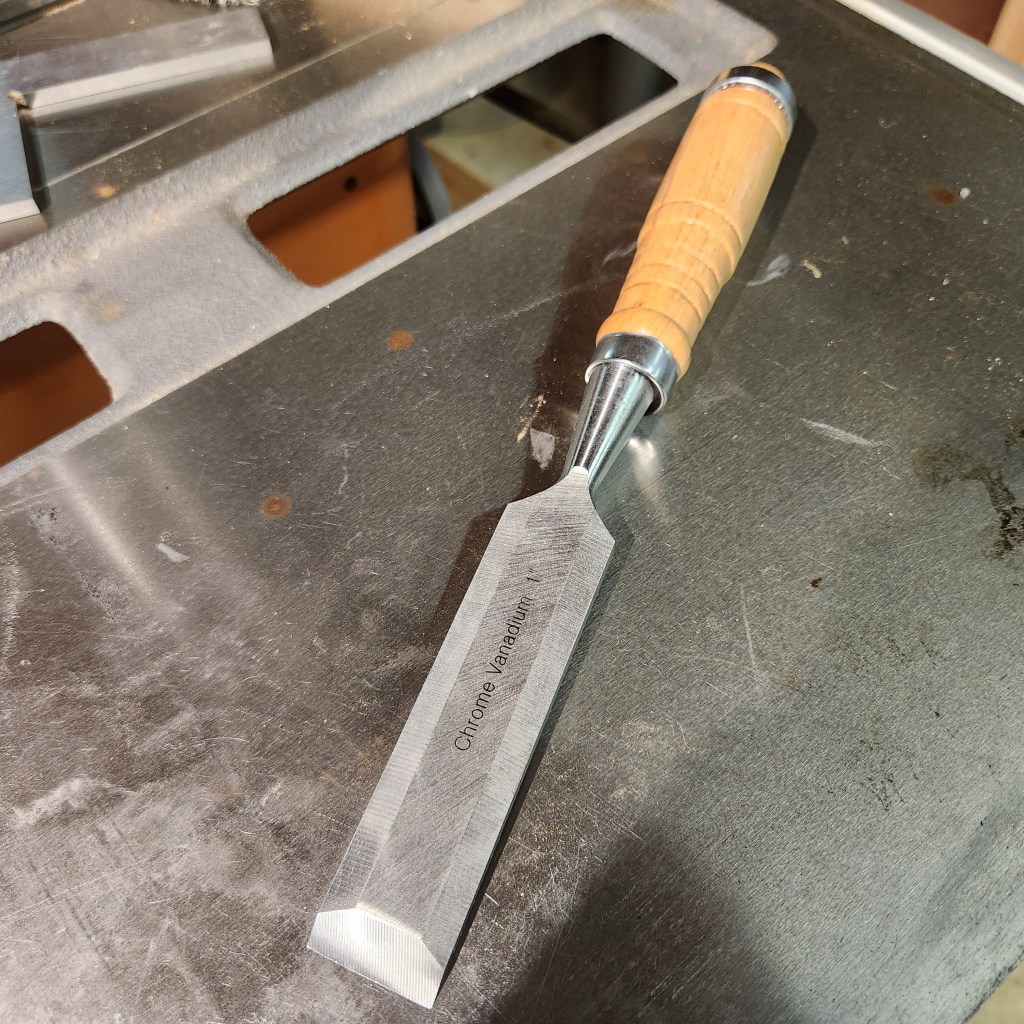
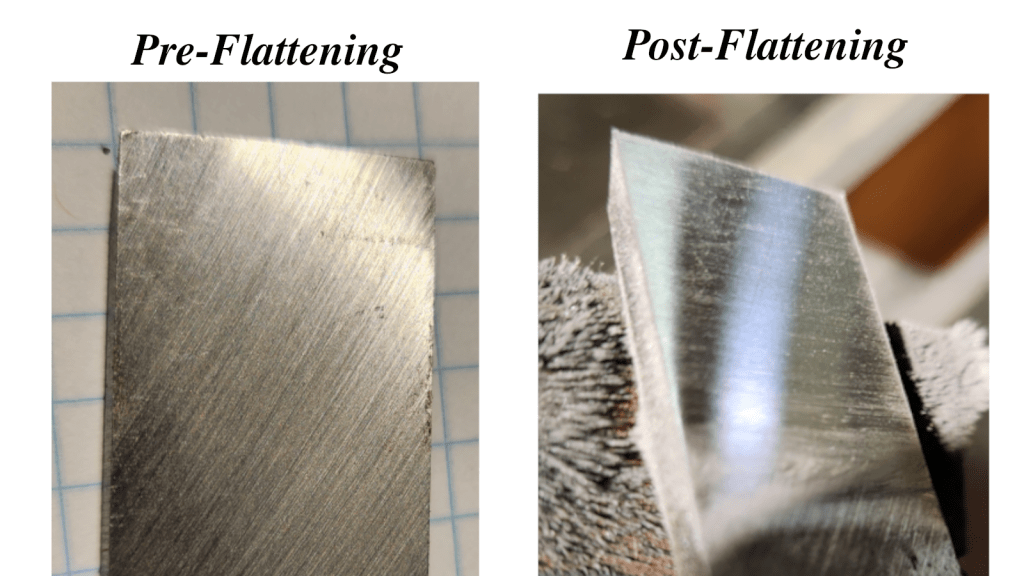
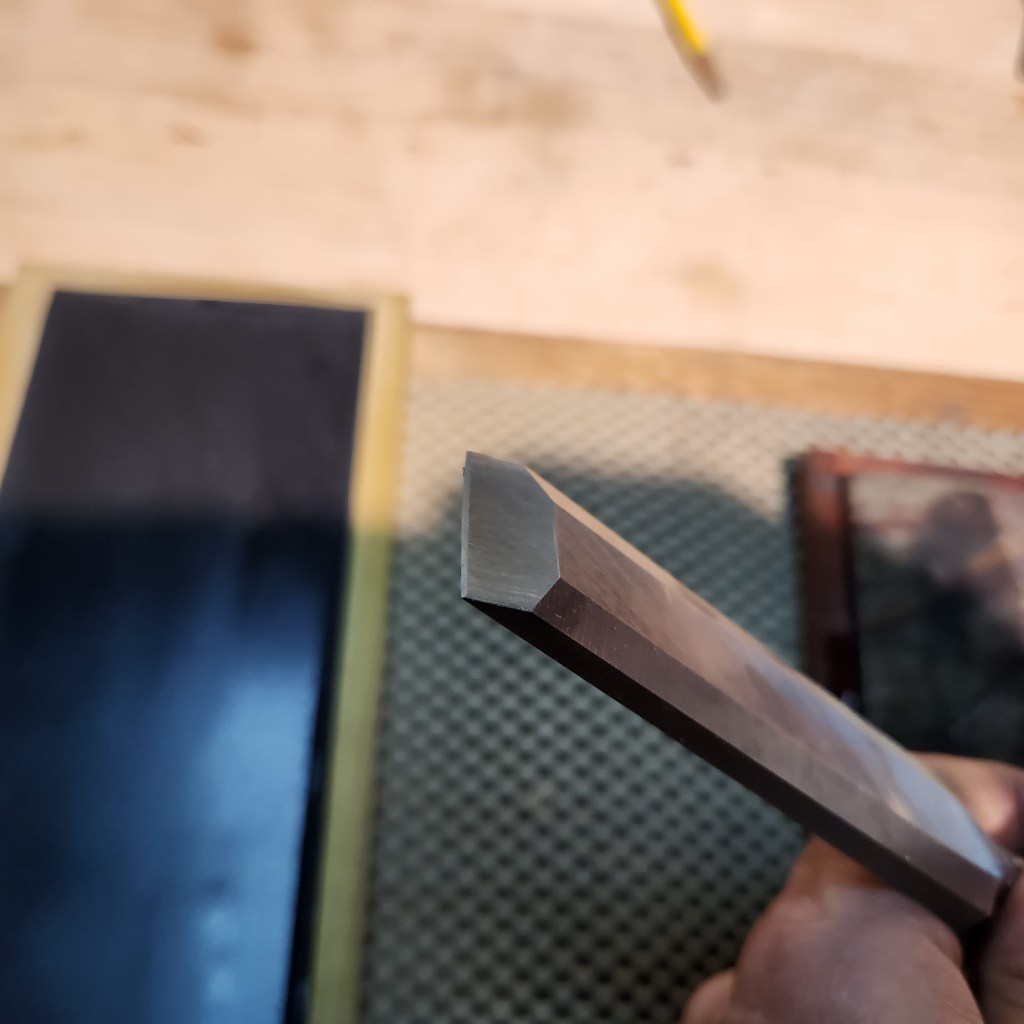
Right off the bat, the fit and finish on these chisels is frankly terrible. You can see in the image below that the chisel is covered in mill marks and the front edge is out of square with the sides.
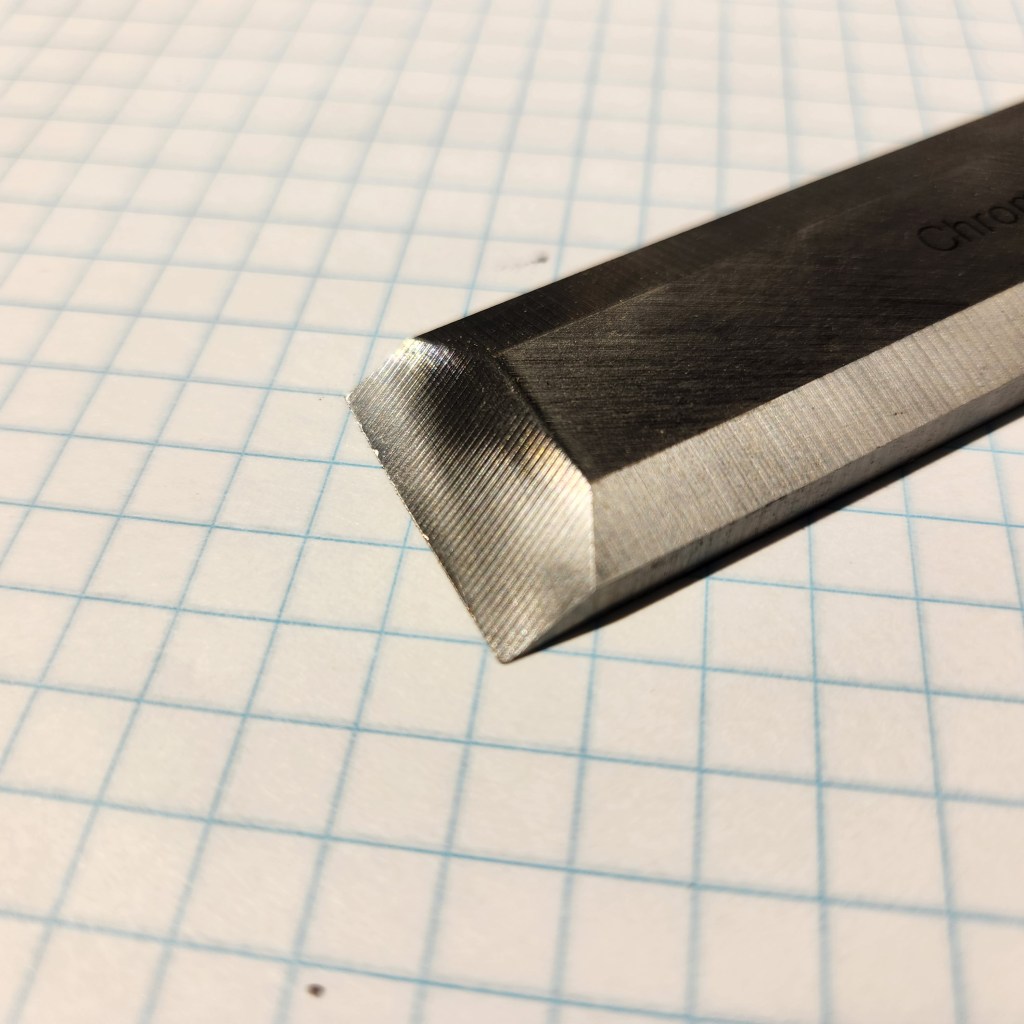
The edge is very roughly ground, has some chips in it, and is indeed out of square.
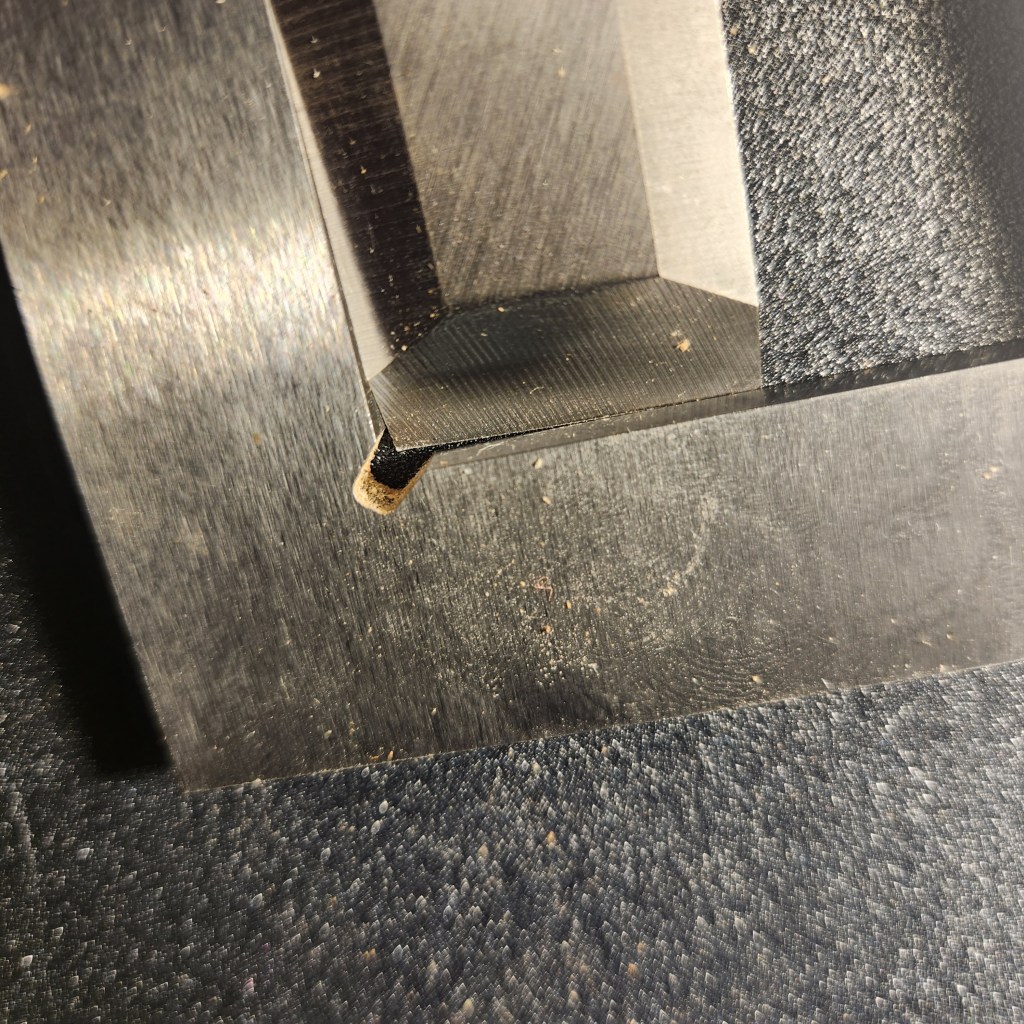
And the back is far from polished with mill marks evident. However it is notable that these are finer marks than are apparent on the top side of the chisel.
Finally, the lands (the side edges) are huge. This last point is somewhat important if you are planning to do some fine detail work like paring the inside of a narrow dovetail. On the other hand if you are chopping out the waste on a dovetail or mortise a larger land can provide a more robust edge. Technically I could grind these down, but that is more work than I am willing to do on a $2 chisel.
The first step in getting a chisel sharp is to flatten the back. This is important for a couple of reasons. First, and perhaps most obvious, any large ridges in the back will lead to serrations in the edge. We want to shoot for a keen edge like a razor, not a bread knife. The second reason is that the back serves as a reference surface. If you are paring down a mortise wall, for example, you want to register the chisel back against the wall to keep everything straight and square. These are important considerations, but can be taken to extreme. I have never found a need for a mirror like surface or a machinist reference level of flatness. We are cutting wood, not building a space craft.
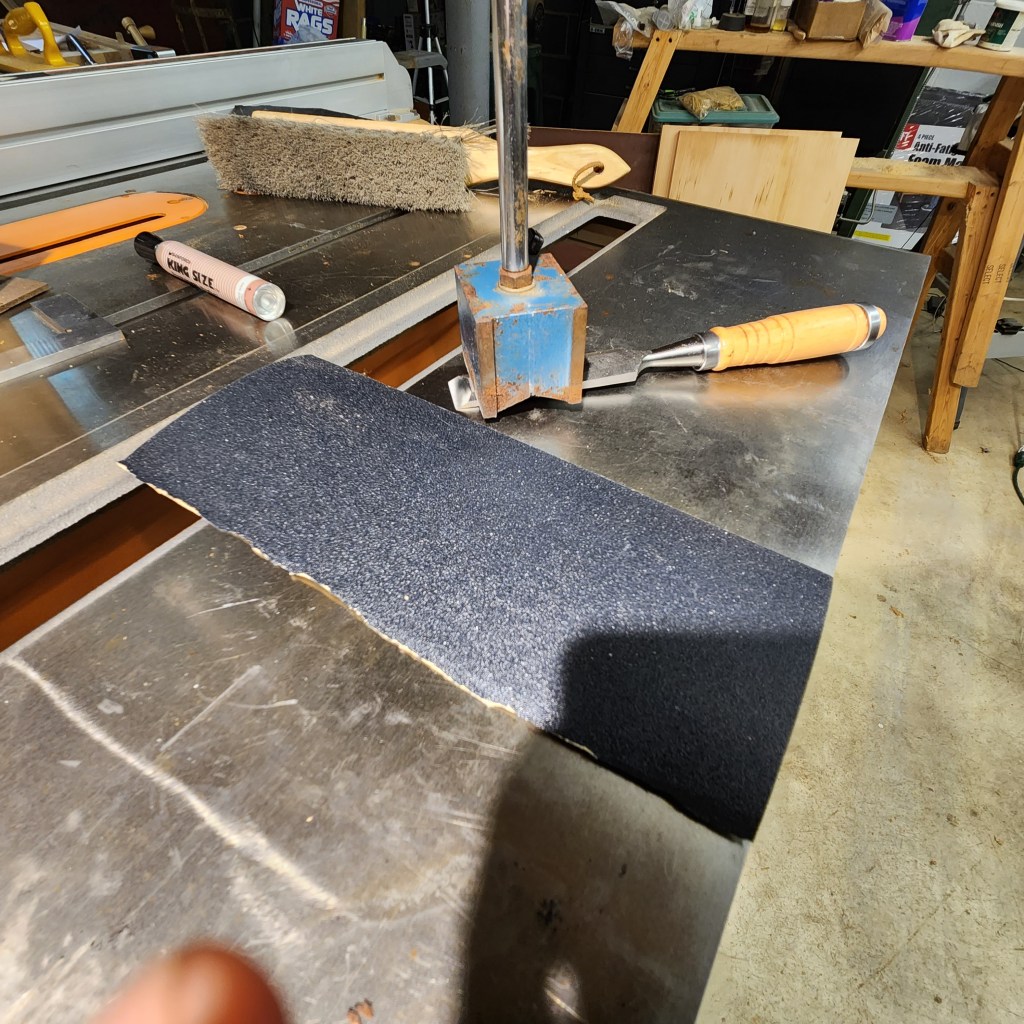
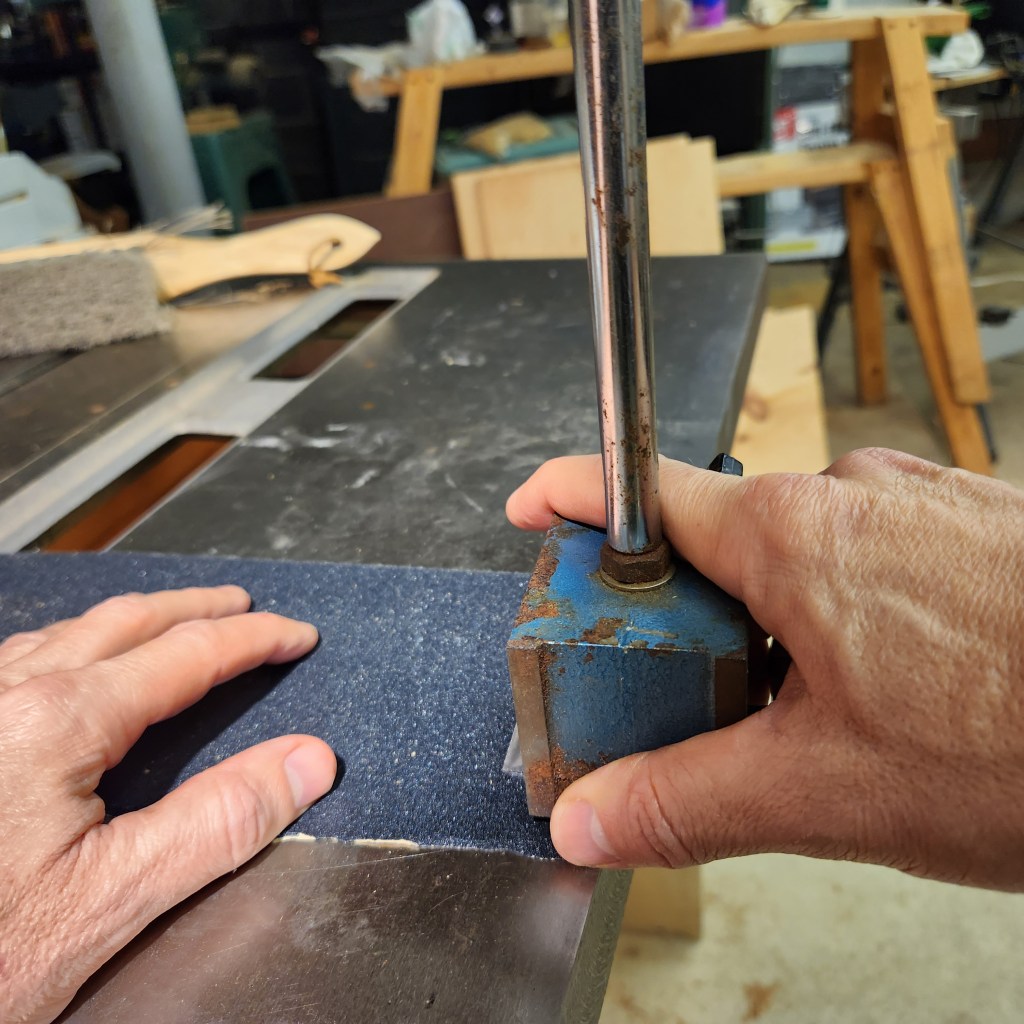
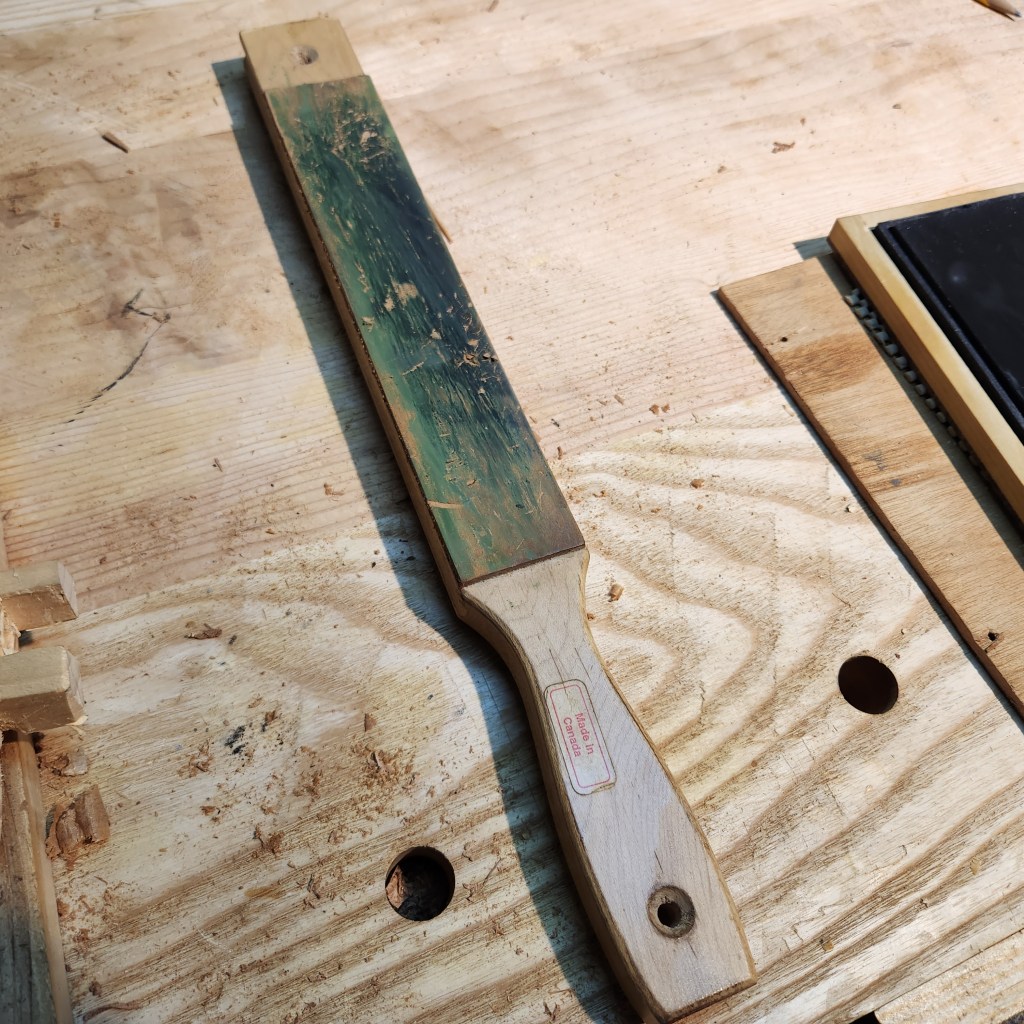
Flattening is done with a piece of 220 grit sandpaper held on my table saw which is a nice flat reference surface. In the past I have used a tile that I got at the home center for a few dollars. Anything flat will work, even a piece of MDF or a planed piece of wood. Again, this is not machinist precision we are shooting for. One thing I recommend is that, if you can, get one of these magnetic indicator stands with the magnet that switches off and on. This is one that I bought a while back that went through a flood and has the scars to show it. But it works fine as a handle that allows me to apply even pressure. The sandpaper is placed at the edge of the table, my left hand holds it in place, and the right hand holds the magnet base/chisel so that approximately 1 inch contacts the sandpaper. You only need to flatten the first inch or so, not the entire chisel.
I took 100 strokes (yes I counted for you) with a stroke being a full up and down transit across the paper. After 100 strokes I brushed off the paper with the brush you see in background above, and then took another 100 strokes. After the second set of 100, I advanced the paper over the edge of the table saw and bent the used paper down out of the way.
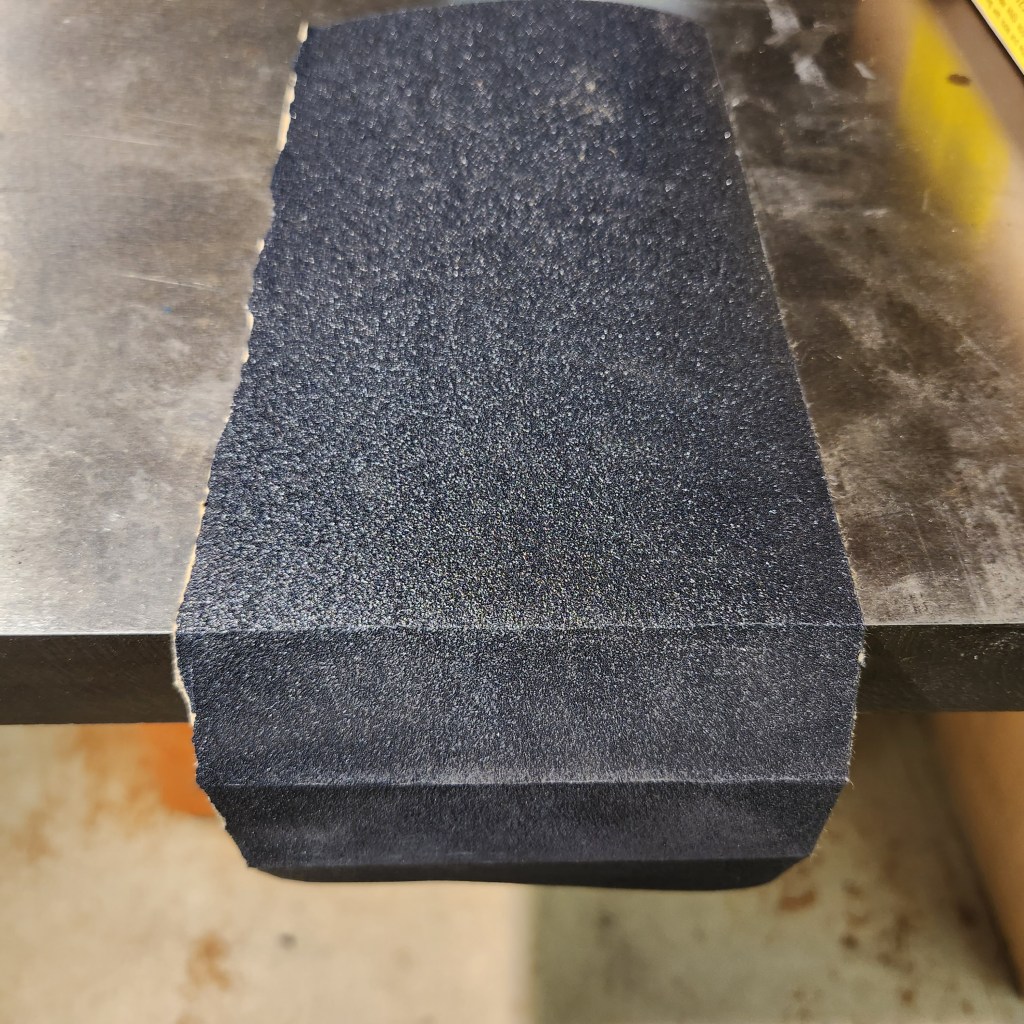
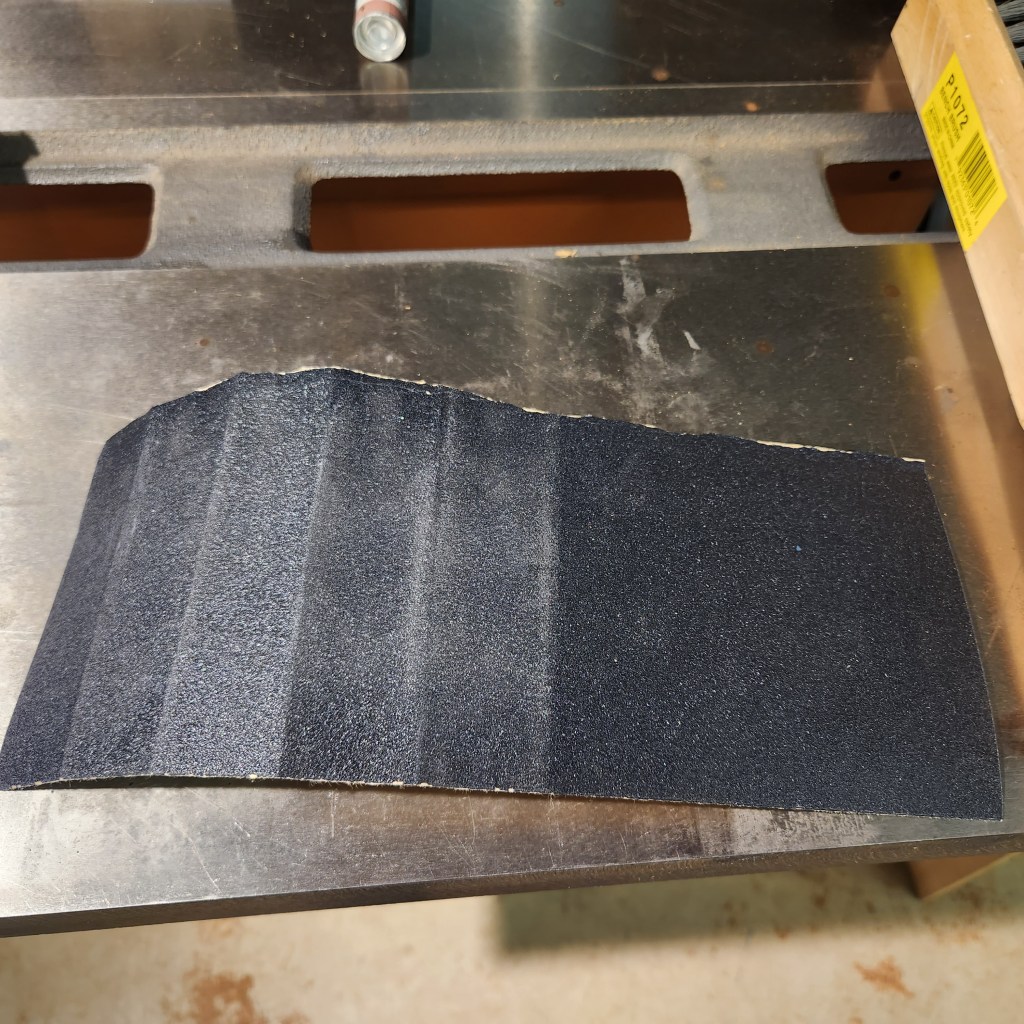
The process is repeated until the middle of the sheet is reached. I then flip the sheet around and start from the other edge placing my left hand on the used portion of the paper which allows me to use the whole sheet.
I’ve never found a need to glue the paper down or to use a lubricant on the paper, but you should do whatever makes you happy.
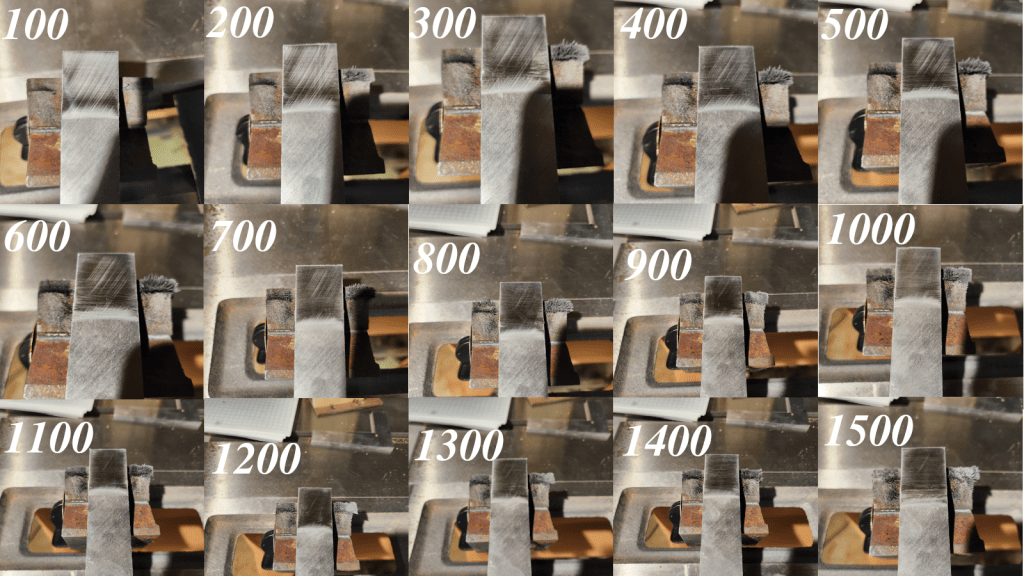
The goal of the back flattening is two-fold, get rid of any convex or concave regions (i.e. flatten it) and to replace all of the manufacturing scratches with sand paper scratches. The latter will naturally occur along with the former and it provides a means of gauging progress without resorting to indicators and reference surface plates. The montage below shows a couple of interesting things that occurred as I proceeded through the process. First, you can see after the first 100 strokes that the chisel is relatively flat with just a slight depression roughly in the middle of the region being sanded. This is much more evident after 400 strokes. Second, there is a single scratch that is very obvious at around 800 strokes that is deeper than the others. This scratch diminished but I never managed to completely remove it. Maybe it would be gone after 1600 or 1700 strokes, or it might require another 5000 strokes. I’m not that concerned as it does not reach the edge and it will take a very long time to use up the ¼ inch or so of chisel in front of the scratch. With that in mind, the last thing to notice is that 800 of so strokes was probably good enough.
Good enough? How can I say it’s good enough when you can’t yet blind yourself with the light bouncing off the mirrored surface. Well, I can say that because it works. It is simply good enough for 99.99% of the work I do. If you want to carry on and use grits in the thousands, go for it. It will look pretty, and you will impress the sort of folks that like to spend time making tools pretty. I prefer actually getting to work and using well tuned tools. But if you go the pretty route, just don’t fool yourself into thinking that you have to do that in order to do good work. Remember that for most of the history of woodworking, we have been sharpening our tools on rocks, and not 90,000 grit water stones, but river rocks.
Here is a before and after picture of the back to better show the detail. Of course, the gleam line from the lights managed to perfectly cover the scratch, but really, it’s there.
Once we have the back flattened, we need to grind a proper bevel angle. I use about 25 degrees which I measured once upon a time. Now I just take a chisel I like, and hold it up to the grinder to check the platform angle. This is an old Central Machinery (Harbor Freight) grinder that I got for free when I bought a second hand lathe. It is 3450 RPM and has a 6 inch diameter ¾ inch wide 80 grit wheel. I have a fancy 8 inch grinder for my lathe tools, but for plane irons and chisels I prefer the 6 inch because it seems easier to register the bevel on sharpening stones. But this is not a sharpening post, so I digress.
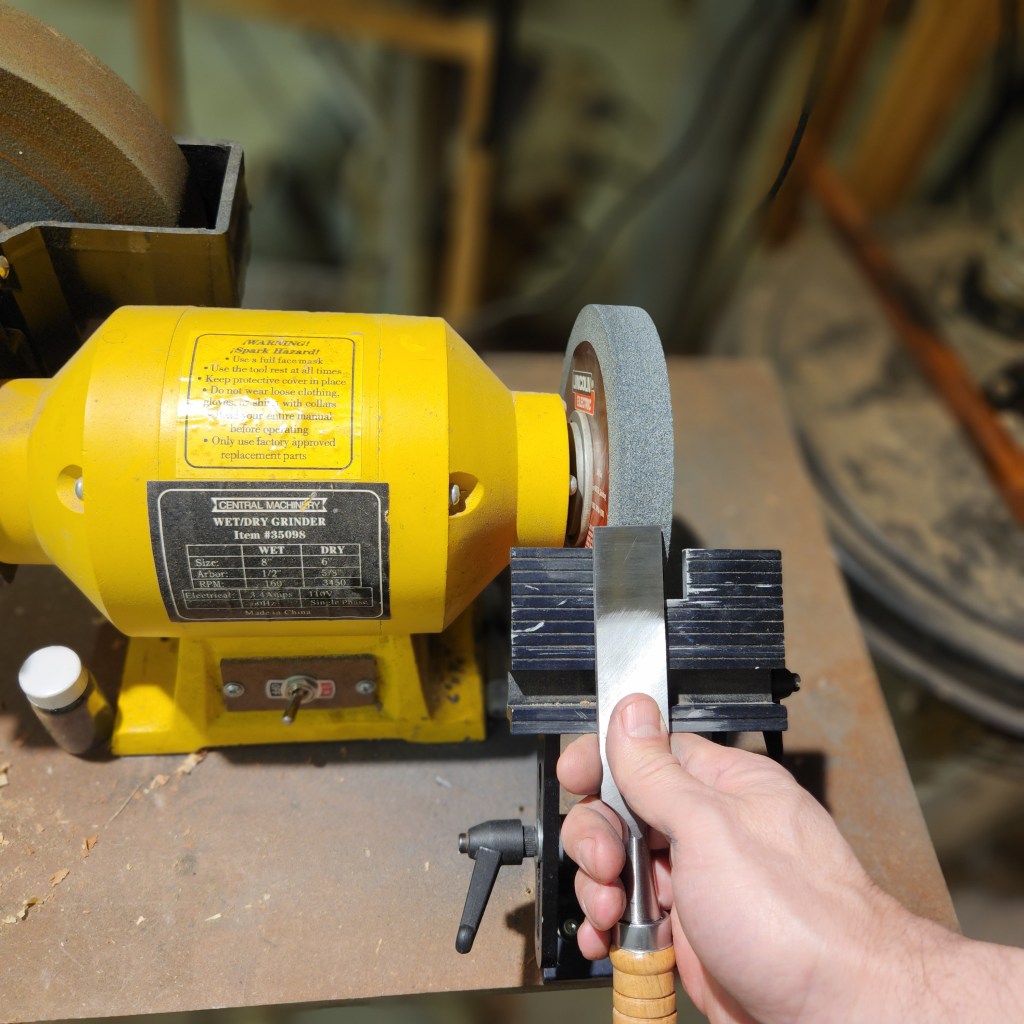
I hold the chisel against the stone using my right index finger as a fence to guide the side to side movement. My left hand comes up on top and presses down on the chisel. I grind until the chisel becomes uncomfortably hot and then dunk it in water repeating the process until I can see sparks coming over the top indicating I’ve established a new bevel. I also check the back to see if I can feel a burr across the entire width of the chisel. I don’t worry about squaring up the chisel as it usually happens automatically using this grinding method. I tried to get a picture showing both the new bevel and the square edge, but managed to fail on both counts. Hopefully you get the idea.
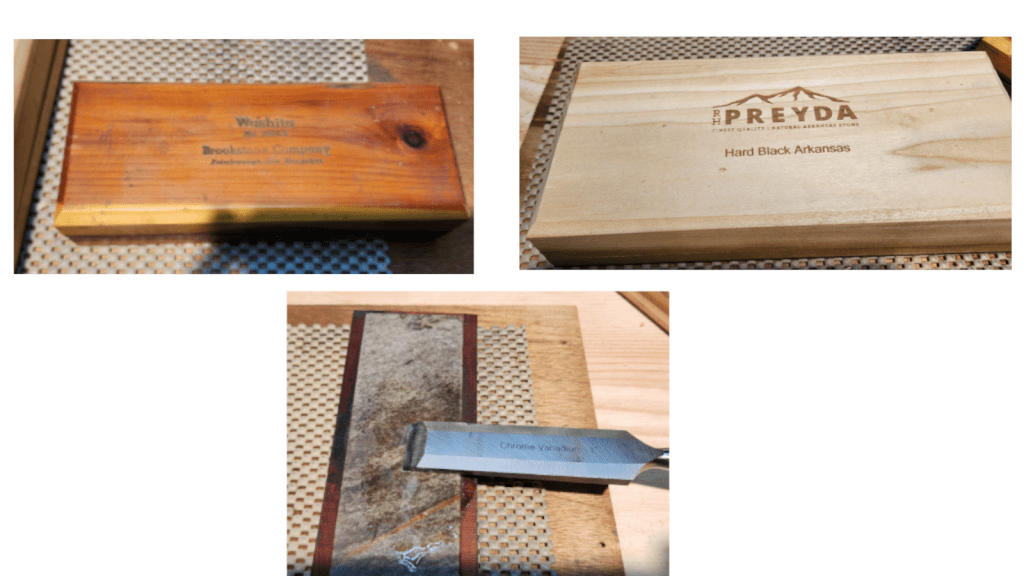
Now that the back is flat (enough) and a new bevel has been established, all that remains is to sharpen and hone the edge. I used the same method I would use with any other new or used chisel that had been freshly ground. I use oil stones, because I find them to be the quickest and most mess free method of maintaining any edge tool. But this is not a sharpening post, so I digress. I use two stones, one a vintage Washita stone which is fast cutting but able to produce a relatively fine edge, and a hard black Arkansas stone that further refines the edge. In the picture below you can see the start of the process which is polishing the back of the chisel. A small amount of honing oil is placed on the stone, the back is held flat against the stone being careful to only include the portion that had been flattened above, and 100 strokes are made using the same method that was used on the 220 grit sandpaper.
This first step is only done after a new (to me) chisel has been flattened. It will never be necessary again until I use up that inch that has been flattened, not a likely event in my lifetime. The following steps are standard and will be done to resharpen a chisel as needed:
1) Register the bevel against the Washita stone and take approximately 30 strokes parallel to the edge. In other words, perpendicular to the grinder marks. Check to make sure that a burr has been raised on the back across the entire edge and do a few refining strokes if needed.
2) Take approximately 10 strokes on the Arkansas stone to remove the burr raised by the Washita and to further polish the back.
3) Flip the chisel over and take approximately 30 strokes with the bevel registered on the Arkansas stone to sharpen the edge. Again check for a burr and refine as needed.
4) flip the chisel again and polish away the burr with 4 or 5 strokes.
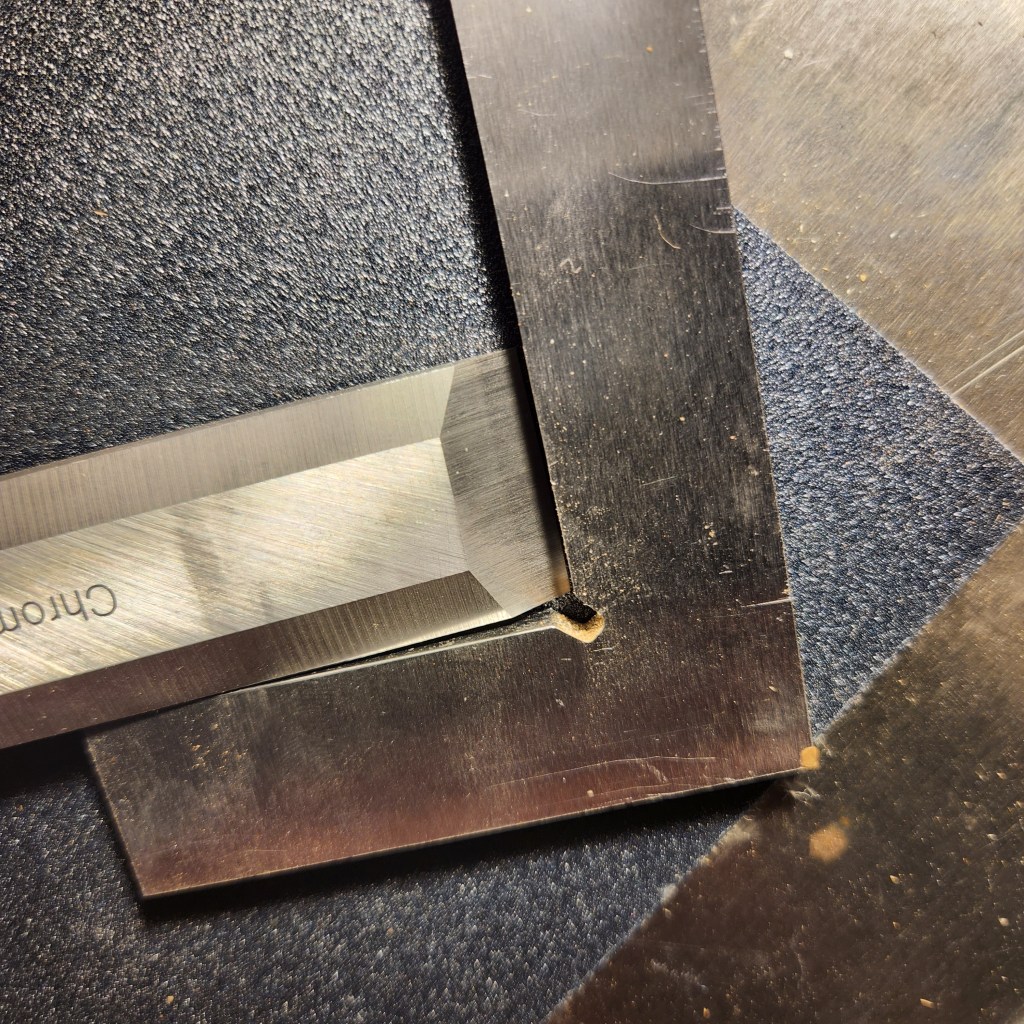
In the picture below you can see the resulting edge off the Arkansas stone. If you look closely you can also see that the top edge of the bevel has been polished as it registered against the stones.
The final step is honing which I do on a leather strop charged with green 0.5 micron honing compound. I take about 20 strokes on the edge pulling the tool back away from the edge to avoid cutting the strop (something I sometimes forget as you can tell from the picture below). I then flip the tool and do the same on the back.
To return to assessing the quality of a these chisels, I proposed 4 questions above: 1) can the steel be sharpened, 2) does the edge last, 3) can the edge be easily maintained, and 4) does the fit and finish of the tool lend itself to comfortable work. Lets focus on the first question first.
The steel on this chisel is claimed to be chrome vanadium (CV). This is a steel that should be a reasonable compromise in that it is soft enough to sharpen easily and hard enough to retain an edge. There are folks that hate CV and would not touch a chisel made from it. I found that these chisels tuned up as easily as a vintage Stanley, and using the same method and effort I use for any other chisel they took an edge that was sharp enough to bite into my thumbnail. I’m not interested in shaving hair or cutting paper as those super sharp edges don’t last very long when you are chopping a dovetail. But this is not a sharpening post, so I digress.
To do a fair assessment of sharpness and edge durability, I decide to do a head to head chisel comparison between the Harbor Freight, my 20+ year old Marples (Irwin), and my pre-war Stanley 750
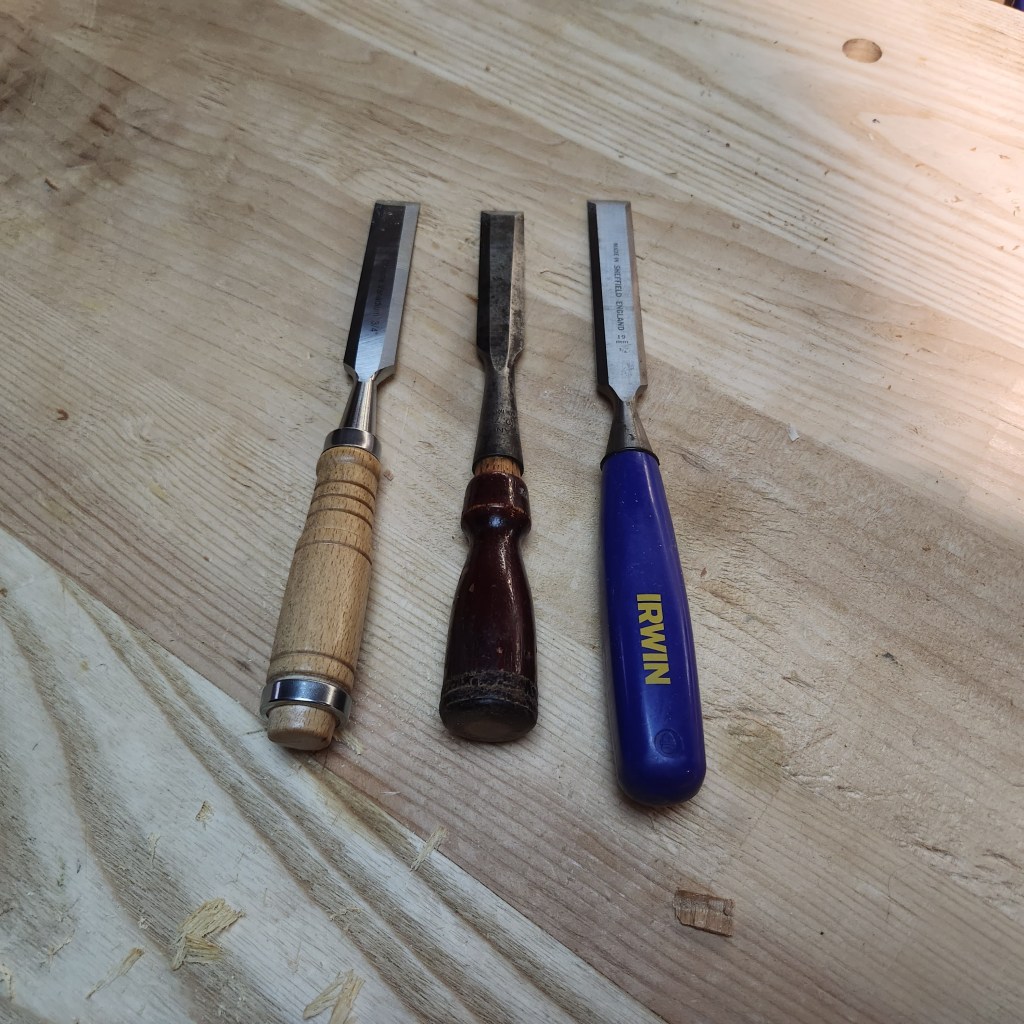
Both the Marples and the Stanley are made from high carbon steel. The shiny look of the Marples suggests that there might be a higher vanadium or chromium content to prevent oxidation. I’m not diving deep into tool steel because the proof is in the pudding, and both of these chisels have served me well for some time. I have no complaints.
I took all 3 chisels and ran them through the steps described above (except I did not need to flatten the backs on the Marples or Stanley since I already did that years ago). This provided an even starting point for comparison. I can tell you that all three passed the “thumbnail test”, and all cut the way I expect my chisels to cut, but wanted to try and give you a picture of how they compared that was pseudo-scientific. So I got out one of my favorite toys, a video microscope that I purchased off Amazon a few years ago for around $30. While this is not a research quality tool, it works surprisingly well given the price.
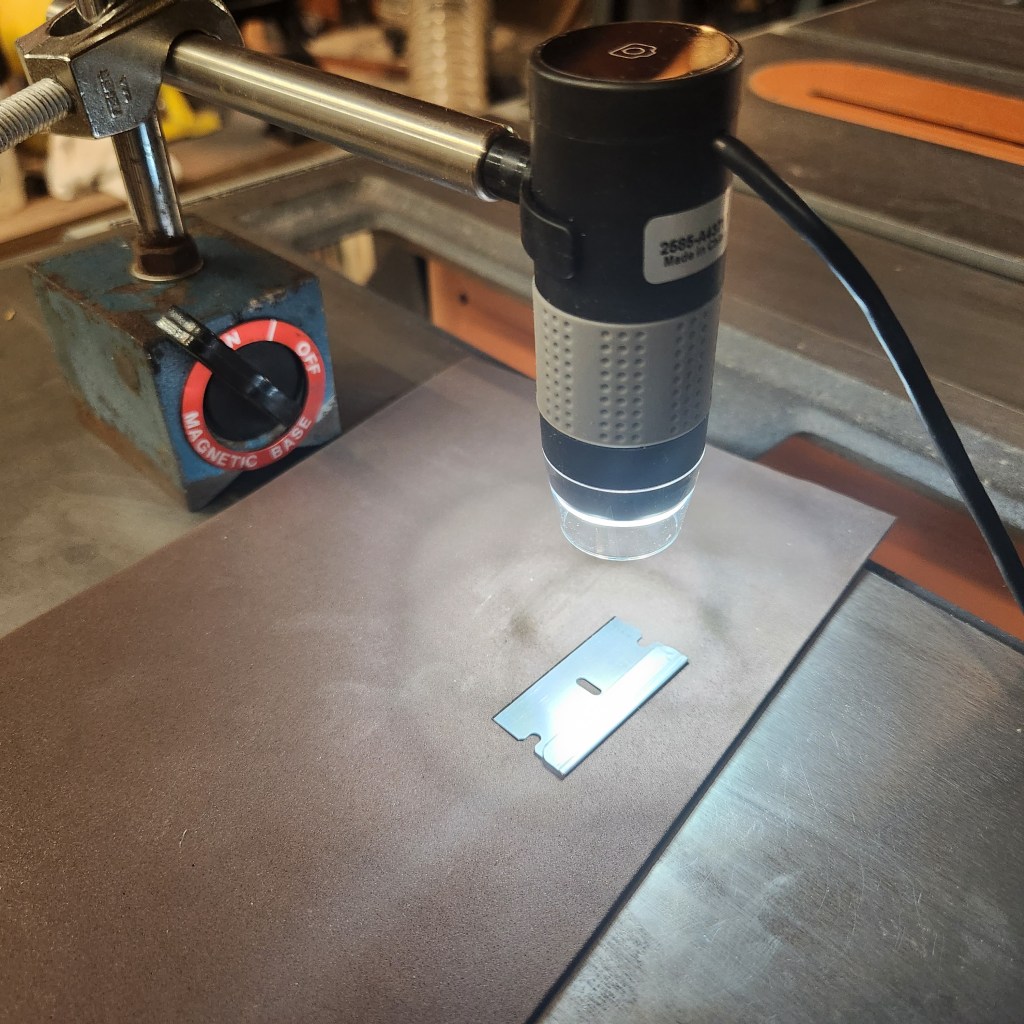
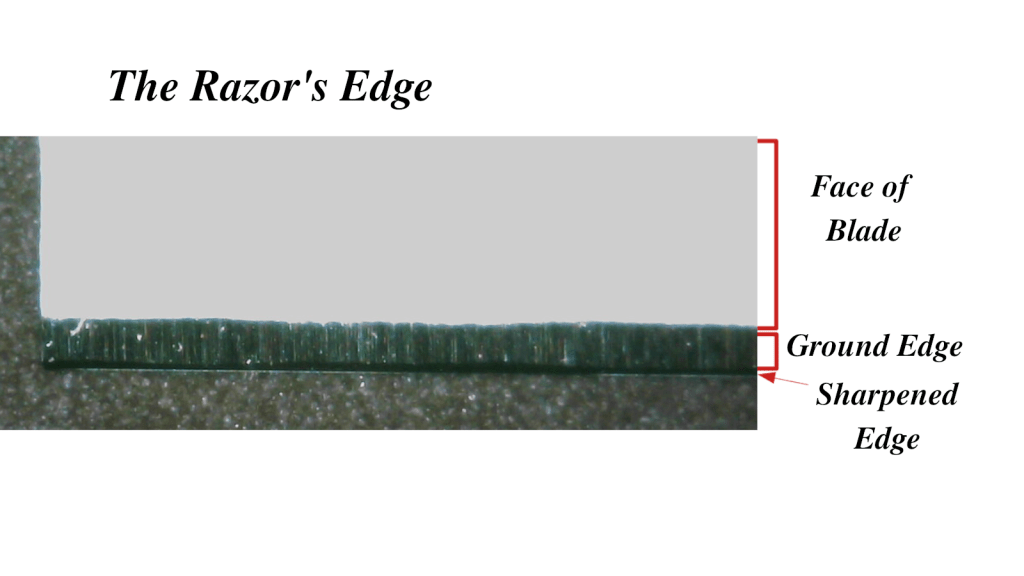
In the picture below you can see a micrograph of the edge of the razor blade shown above. The magnification on this scope is reported to be in the range of 60 – 250X, but frankly that is not likely. I’ll include a scale bar where I can, but the actual scale is not that important. What is important is that you can see 3 regions indicated on the micrograph. First, there is the face of the blade which is most of what you see when you look at a razor blade. This is perpendicular to the scope viewing axis and is relatively polished, so most of the light reflects straight back and we see a white plane. Next is the ground edge (primary bevel). Here the surface is at an angle to the viewing axis, so less light reflects and the image gets darker. You can see the striations left by the grinding process. Finally there is the sharpened edge which appears as a thin dark band. I think (and I am just hypothesizing here) that this appears dark, almost black, because it is highly polished and at an angle to the viewing axis. Therefore, most of the light is being reflected away from the scope.
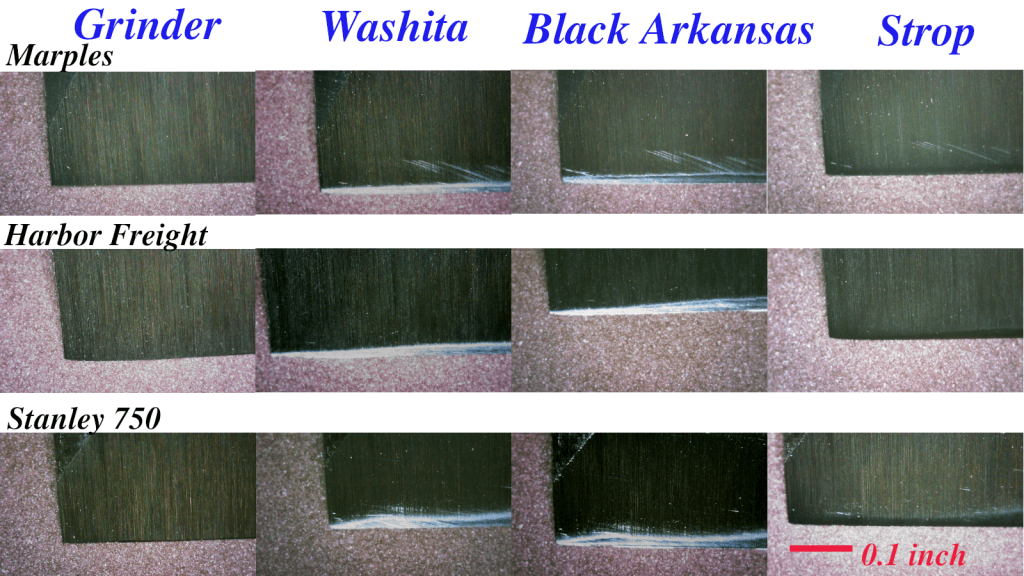
When we look at the photo micrographs of the chisel edge, the ground edge is much longer, so the face of the blade will not appear. In the pictures below you will just see the ground edge and the sharpened edge. If you study these pictures a couple of things become apparent. First off, all 3 chisels look pretty similar off the grinder. No real surprise there. I slipped off the Washita stone while sharpening the Marples and you can see the scratch from that mishap. And you should notice that the Stanley, being the softest steel, was the easiest to round over a bit where the sharpened edge meets the ground edge. The Harbor freight appears to be somewhere in the middle with the Marples being the hardest (or I just did a better job on the Marples).
In terms of the sharpening progression, The Washita quickly puts an edge on the tool and replaces the grinder scratches with smaller scratches running perpendicular to the grinder scratches. The edge appears shiny because it reflects more light but is not yet polished to the point that the light reflects away from the camera. The black Arkansas further refines this process, and the stropping polishes to the a now highly reflective black edge. There are really no differences between the three chisels worth noting here. They all sharpened to what appears to be the same degree with the same amount of effort. Now maybe the Stanley would slice through paper better than the Harbor Freight, I don’t know, for as I said above that is largely irrelevant for woodworking. But this is not a sharpening post, so I digress.
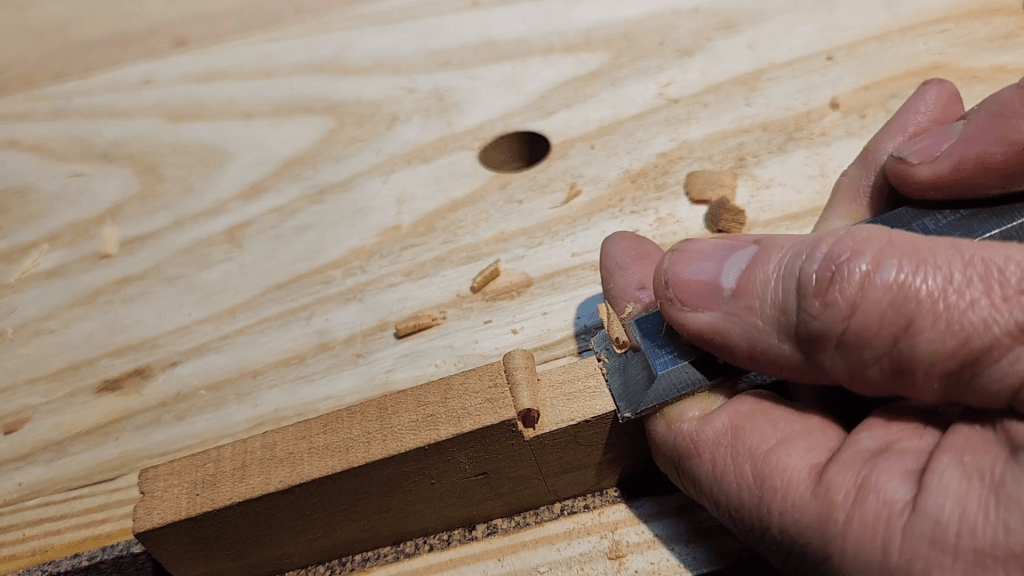
So how did they perform then, and how well does the edge hold up? To try and determine this in a somewhat objective way I set up the following experiment. I cut a 3 inch kerf 1 inch from the edge of a cherry board a bit shy of ½ inch thick.
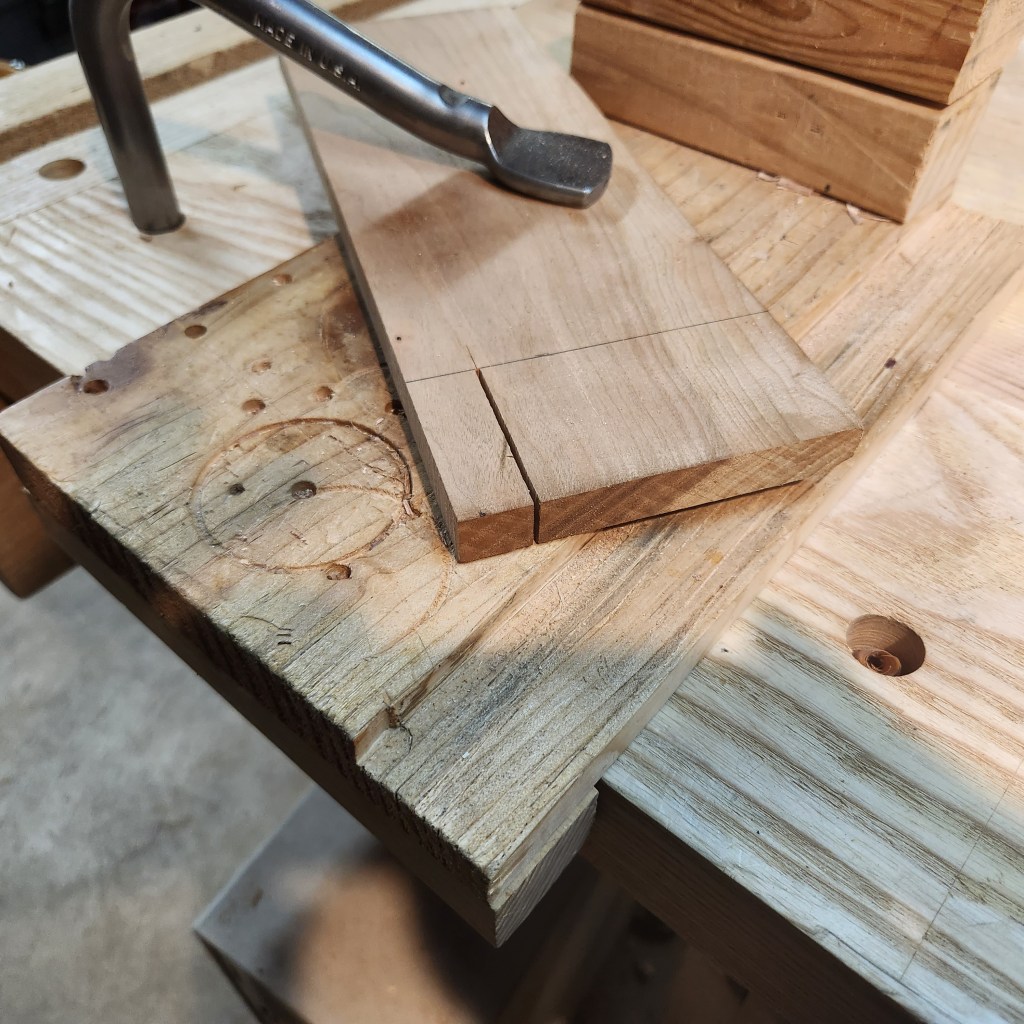
I treated this like a mortise and set to chopping out the “waste”
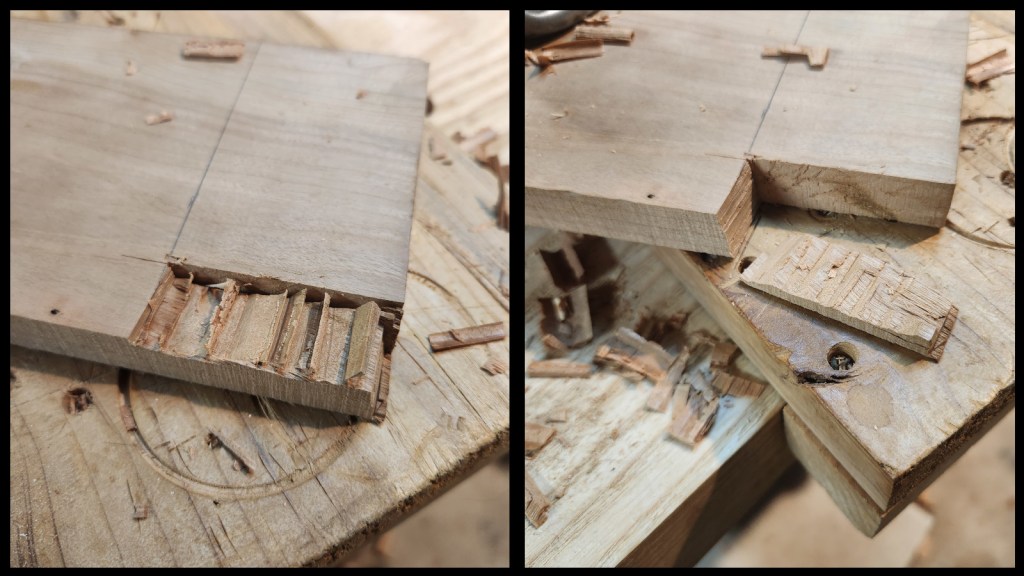
I repeated this process with all 3 chisels. The idea being that I would provide the same amount of abuse to the edge of all three freshly sharpened tools. The chisels all behaved as would be expected of any chisel used in this way, and I would be perfectly happy to use any of the three to chop a similar mortise. The only distinguishing feature was that the Stanley was the nicest one to handle, followed by the Marples, and then the Harbor Freight. This is purely due to finish and in no way impacted on the effectiveness of the chisels.
I next took another round of photomicrographs, then stropped (which is my standard practice after doing something like chopping) and took yet another round of photomicrographs. The results were interesting albeit not dramatic
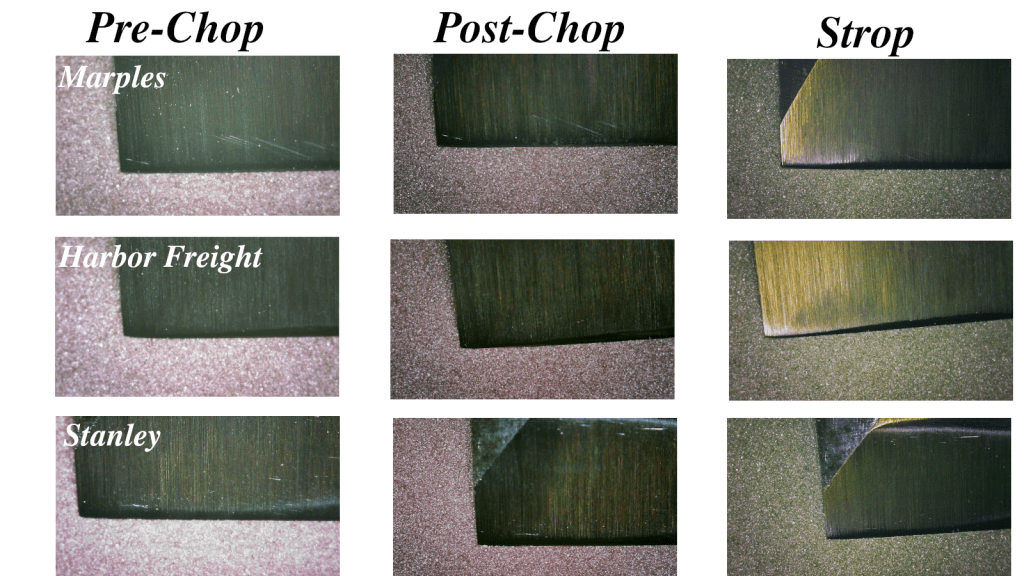
I could argue that the Stanley held an edge better than the others, but stropping seems to have restored the edge in all three. I have to admit I was a bit surprised by this. It seems that there is really not much of a difference between the three chisels. To get a slightly more subjective feel for this I decided to try an experiment that would mimic the sort of work I do most often with a chisel.
I took a similar piece of ½ inch cherry and cut a notch out of the corner using a marking gauge line cutting on the waste side of the line. I then pared the side grain to the gauge line. This mimics the sort of work I do when paring a dovetail, tenon, or mortise for final fit. I very rarely pare end grain on pine or slice paper, so I’m not going to use those popular YouTube methods of showing you how ‘scary; sharp I can get a chisel.
For each chisel, I freshly sharpened and stropped before paring to the line. I then went through the chopping exercise described above, stropped, and pared to a newly cut line. The image below should hyperlink to a YouTube video of the paring for each chisel before and after chopping. But before you click, I warn you it is bad videography and my chisel work is terrible because I am not used to working around a camera. But if watching chisels is your thing, you might enjoy it.
So what is the verdict? In all honesty, I saw no difference in performance. I favored the Stanley chisel, but that was more because of the way it feels in my hand. I could accomplish the same result with any of the three freshly sharpened, or after chopping and stropping. If I want to be really picky, I might say that the Stanley was slightly sharper post chop/strop, but I would be splitting hairs.
Now to the last point, fit and finish. I’ll make no apologies here, the Harbor Freight chisels are horrible in terms of fit and finish. But keep in mind these cost less than $2 each. The lands are huge, and all of the edges are way too sharp to handle comfortably.
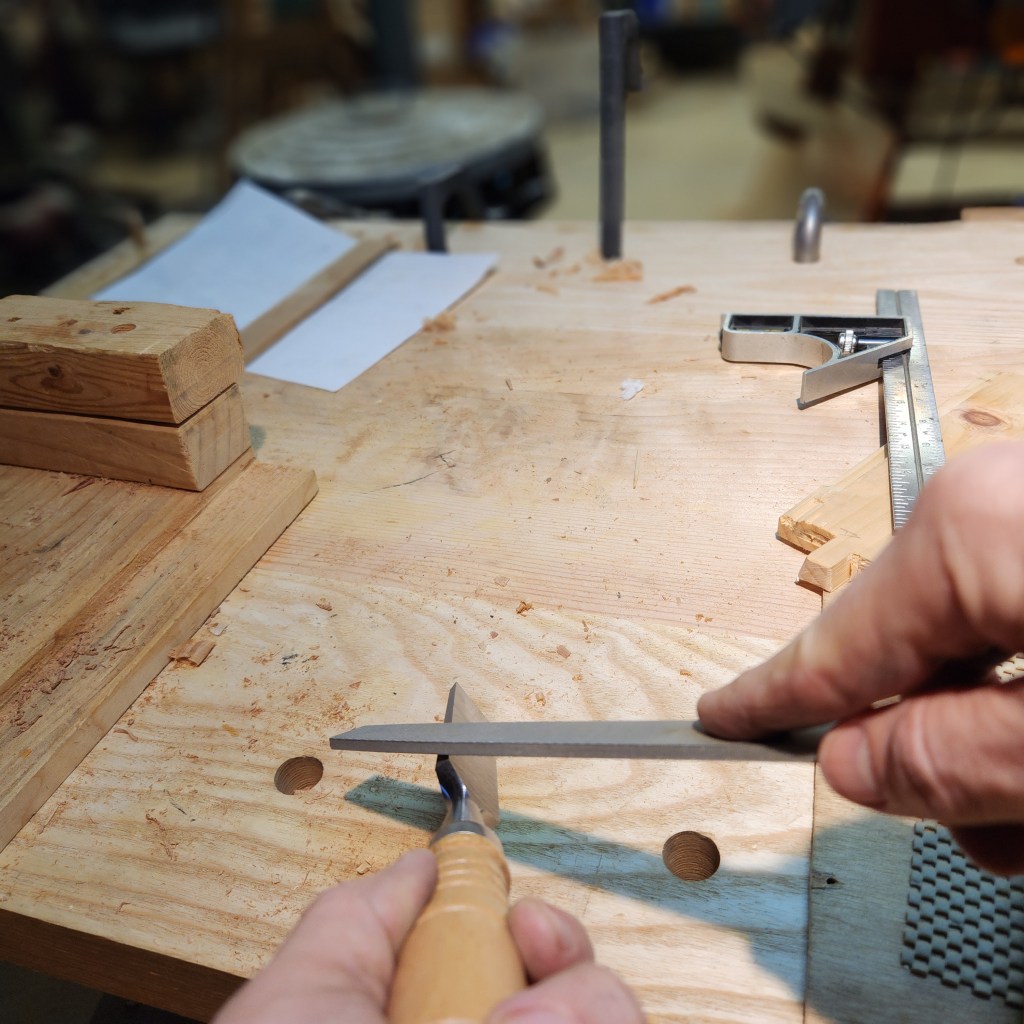
A few swipes with a file took care of the sharp edges. I suppose you could re-grind the lands, but I wont. I actually think the whole land size issue is a bit over emphasized. Yes, there are occasions where I need to get into a corner and this will be an issue, but it is rare. You are going to acquire more than 1 set of chisels and you will have chisels better suited to such fine work. But for 95% of my bench chisel work, these would be just fine.
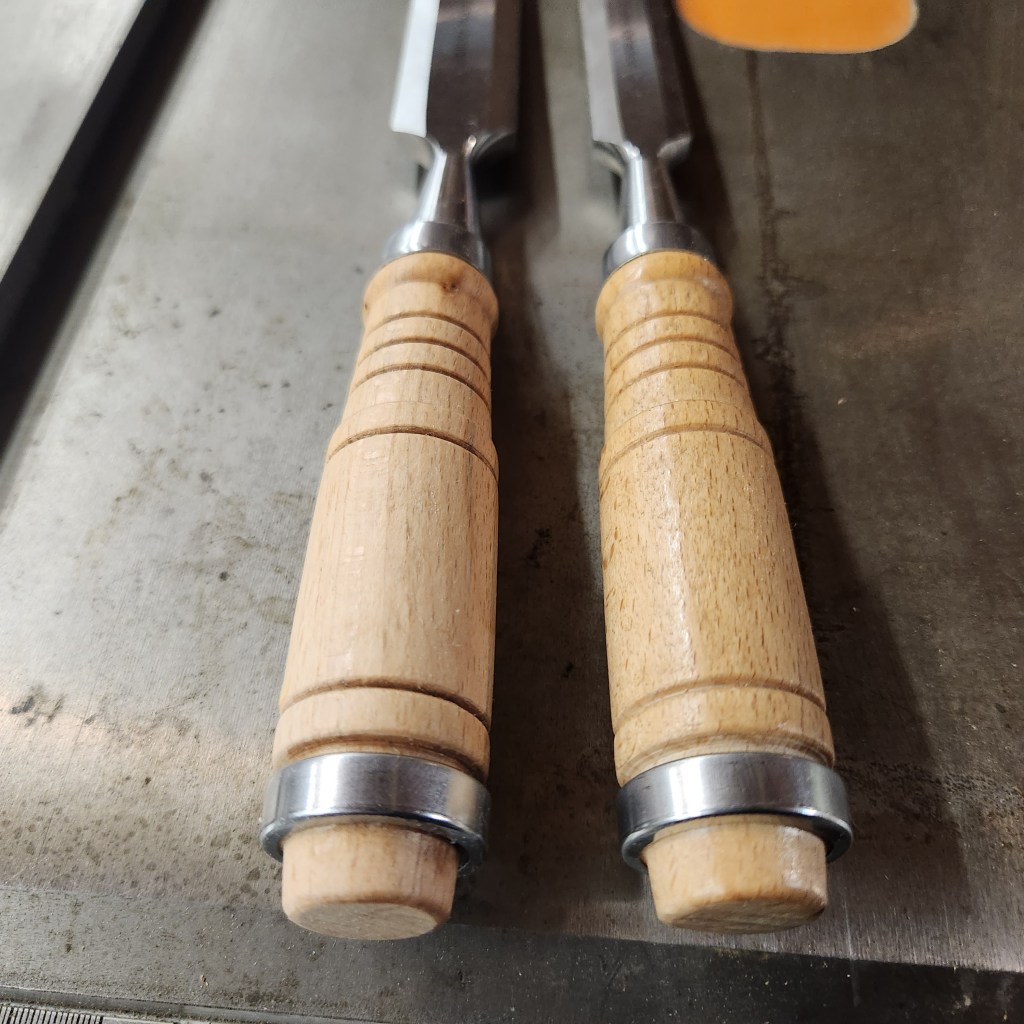
Also, the handles are poor, and I’m being kind. I find them bulky and unnecessarily decorated. Worst of all, they have some sort of glossy finish on them that makes them feel slippery in the hand. As you can see on the left in the picture below, I wound up wiping the finish off with some acetone followed by a bit of 220 grit sandpaper. This made a huge difference in how they feel during use. I might try to reshape the handles or maybe turn new handles someday, but I’ve got enough other chisels to worry about, so that’s probably not going to happen.
To conclude, let’s revisit the 4 key points I raised at the beginning and assess the quality of these chisels:
1) can the steel be sharpened?
Yes, without question, the steel can be sharpened, and the chisels perform as well as my best vintage Stanley in that regard. My simple no frills sharpening method could easily achieve a sharp edge and and the edge could be quickly touched up by stropping. You could argue that the back had to be flattened a bit more than something like a Narex or Wood River brand chisel, but those also do need some attention. Of course, you could always by a Lie Nielsen or Blue Spruce and get a very nice tool that does not require the back to be dressed at all. But when you consider the cost, 9 sets of 6 Harbor Freight chisels (that’s 54 chisels!) for the cost of 1 Lie Nielsen chisel , that extra effort may be worthwhile.
2) does the edge last?
In my tests I saw no difference in edge retention between the 3 chisels. Granted I did not slice paper or end grain, but for doing the type of work I normally do with a bench chisel I see no difference.
3) can the edge be easily maintained?
Yes, I believe that the post chop/strop test indicates that edge maintenance is not a problem. Perhaps the Harbor Freight chisels are slightly less sharp after chopping and stropping, but even if so it is a very small difference.
4) does the fit and finish of the tool lend itself to comfortable work.
No, but what do you expect to get for $2?
I think I started working on this blog post back in February (I’m a very slow writer with a lot of other stuff going on). Since then I have had a chance to use these chisels a fair amount and can honestly say that if these were the only chisels I owned it would be okay. Sure I want a set of high end Lie Nielsen chisels, but I’m not going to buy them. And yes, I adore my vintage Stanley 750s and wouldn’t part with them for a set of Lie Nielsens. However I think there are two important take home messages in all of this. First, do not let the cost of chisels prevent you from getting started in woodworking. This set of 6 Windsor chisels are currently listed at Harbor Freight for $9.99 and are certainly adequate to get you started. Second, sharpness is measured in the work you do and sharp enough is just fine. But this is not a sharpening post, so I digress.